So I think that’s everything moved off of Cloudflare now. I’m going to leave the domains in the CF dashboard for a couple of days, so I can be sure DNS is working right, then I’ll start deleting them.
It’s pre-8am, and I’m working from home, so I’ve used what would have been my commute time to progress my Cloudlflare migration. All the DNS records are in place now. I’m just waiting on name servers to switch over. While that’s ongoing I’m updating all my certbot settings, and that should be everything of mine moved off of Cloudflare, at last.
Reposting: a tweet
Reposting: a tweet
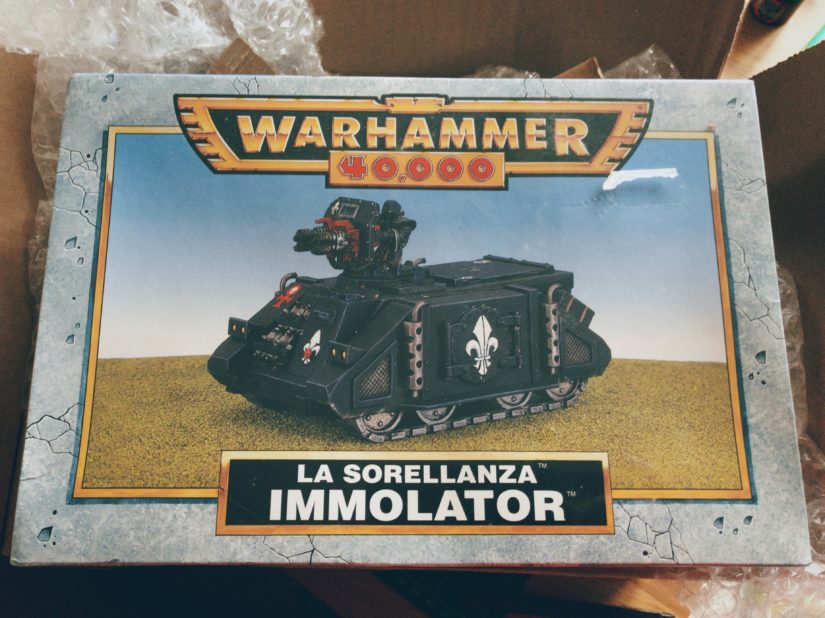
Box
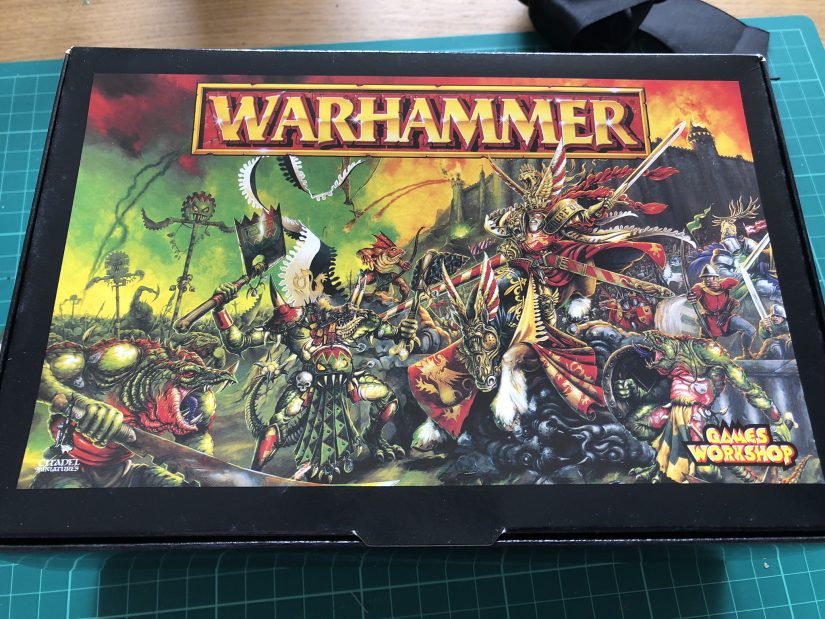
The box itself has a card sleeve with the product photo over the main box, which features the artwork from Warhammer Fantasy Battle 5th Edition (the best edition, don’t @ me)


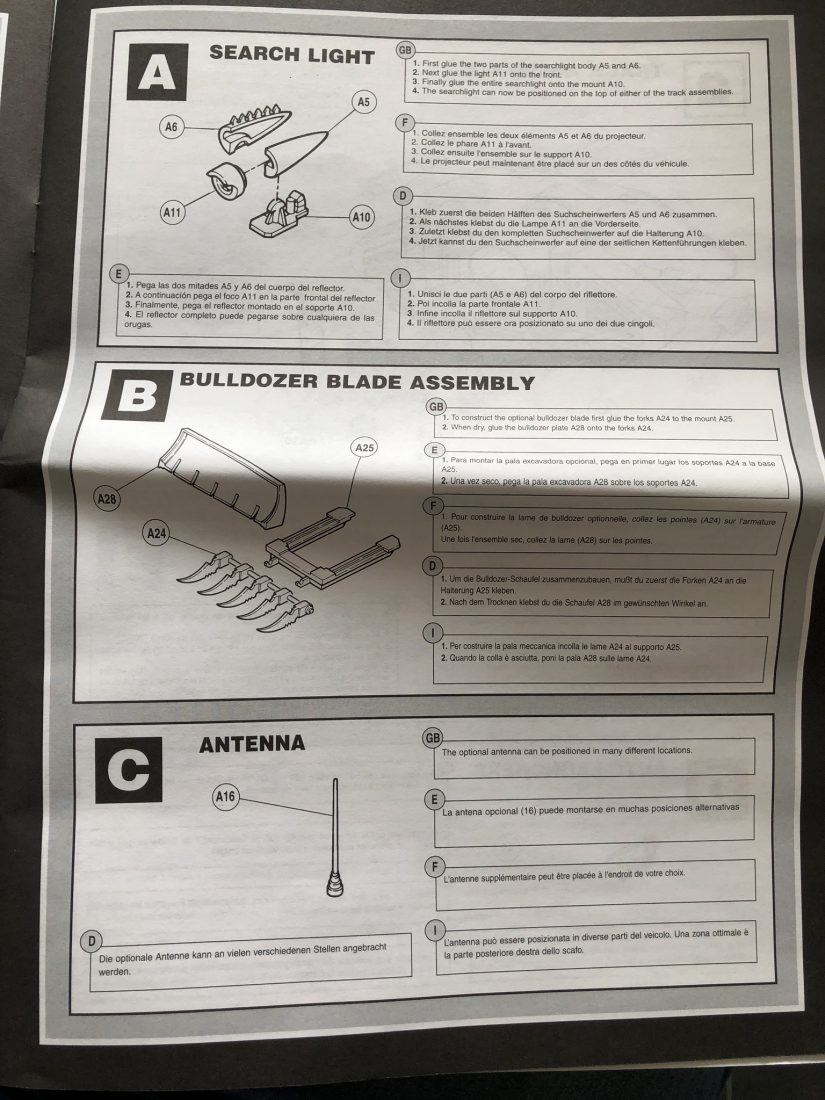
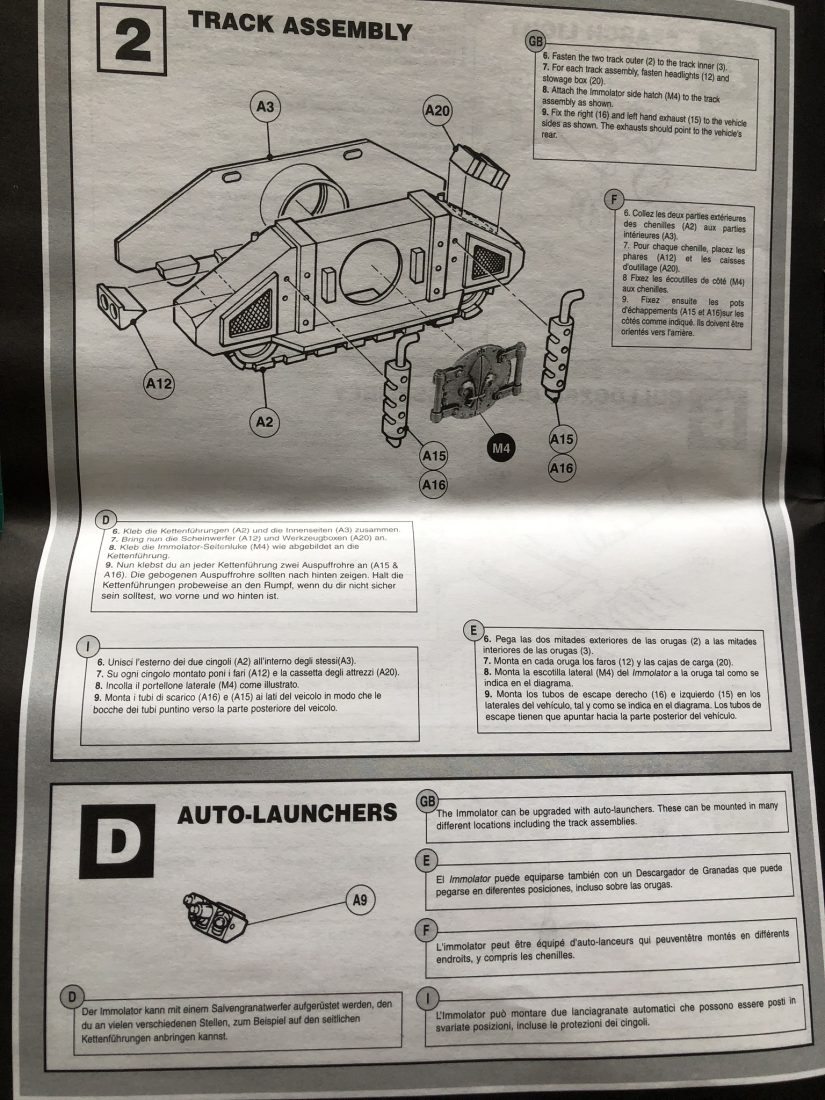
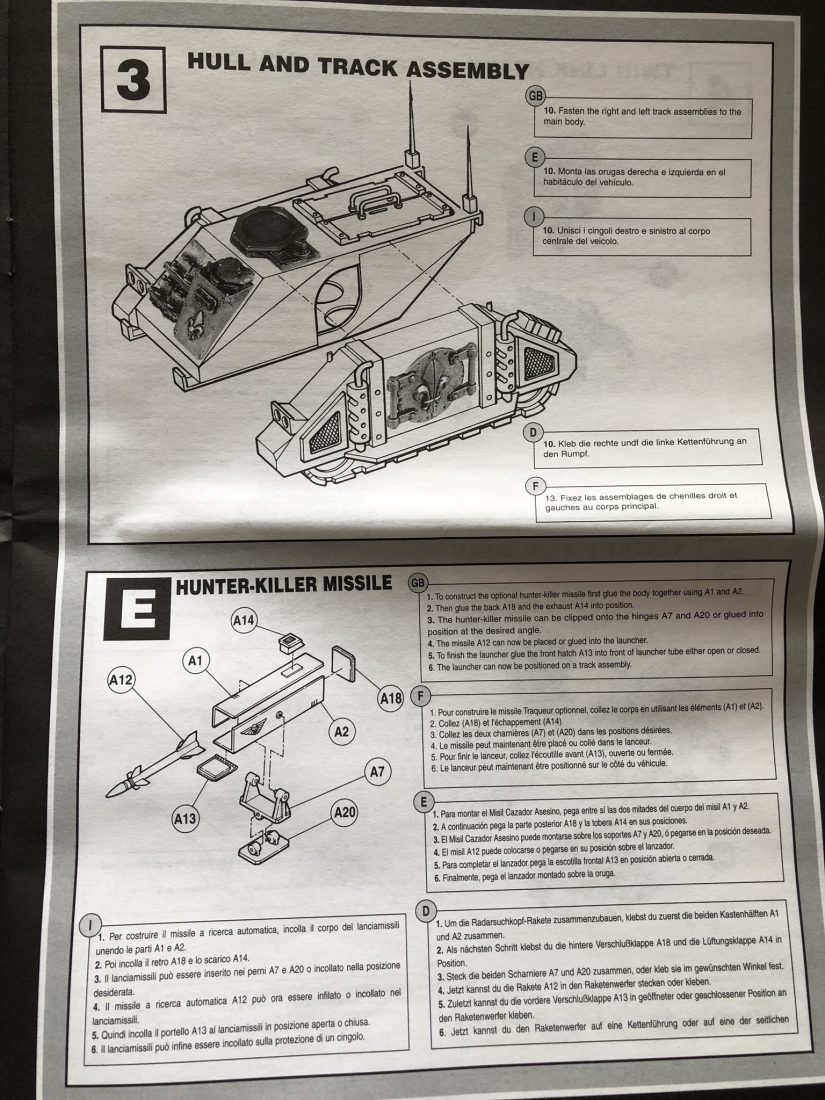
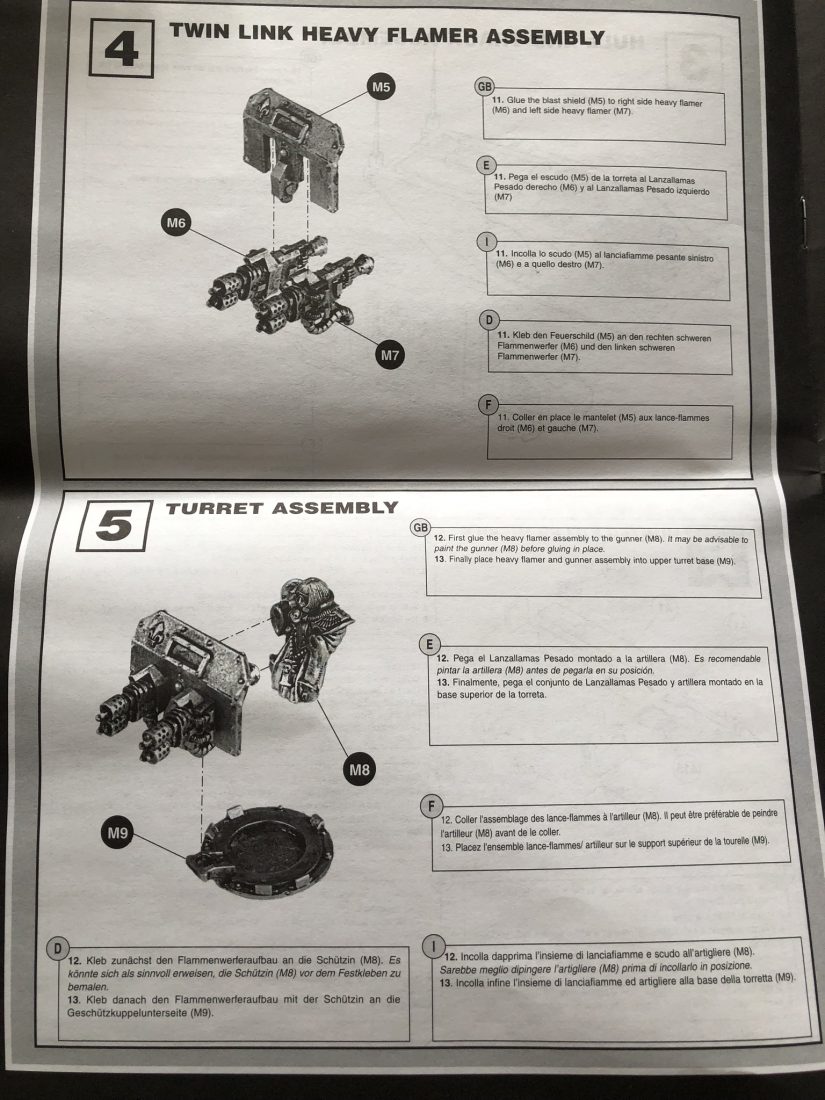
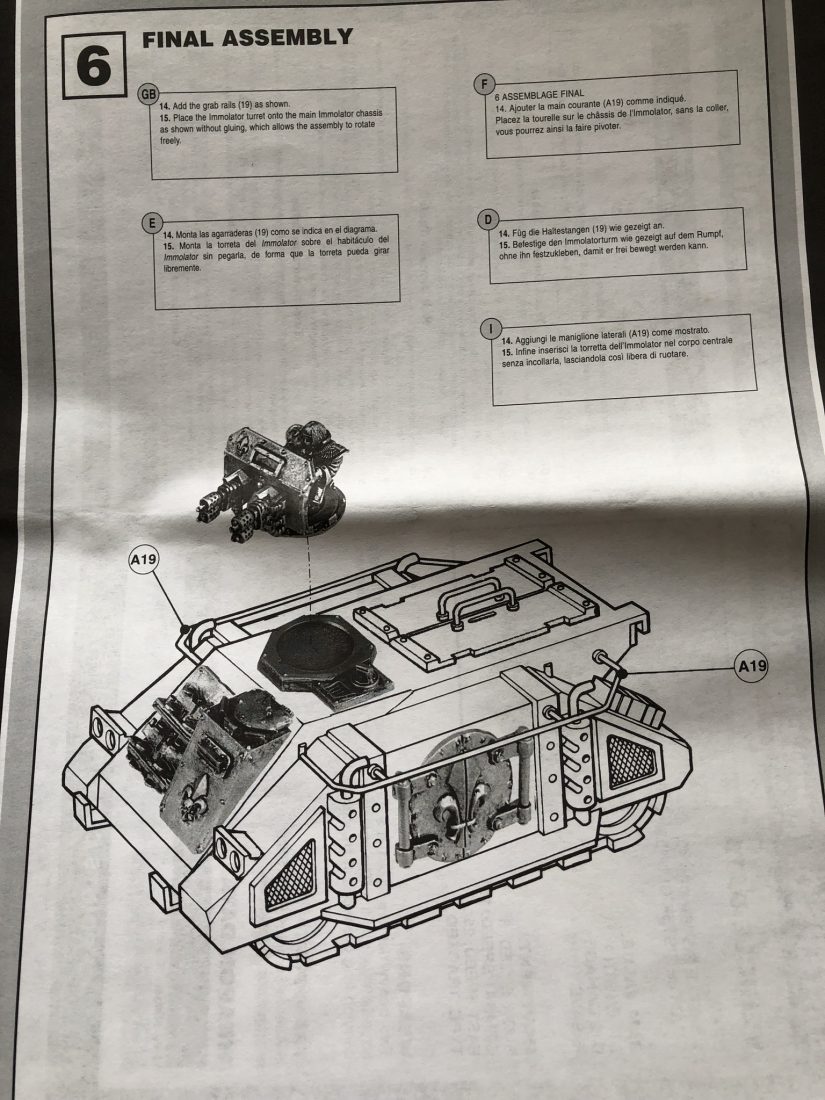
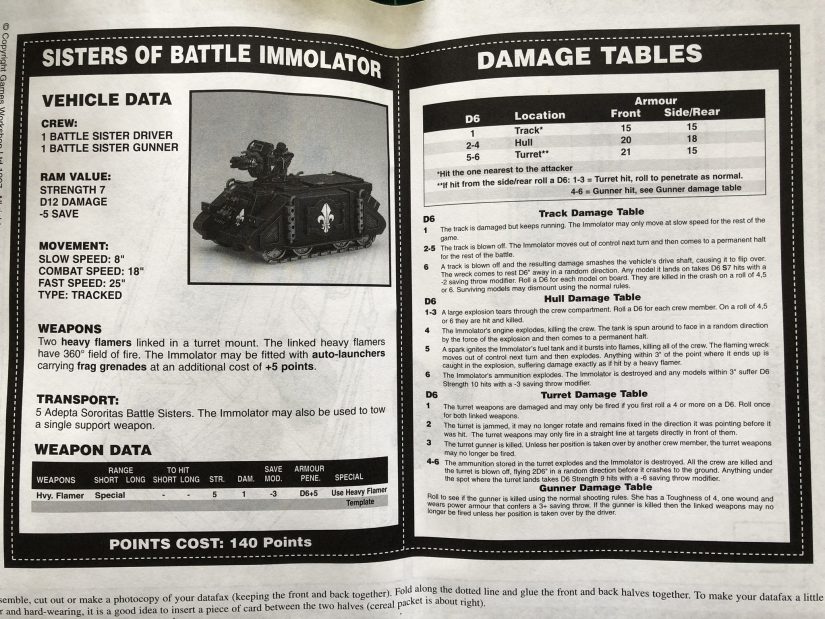
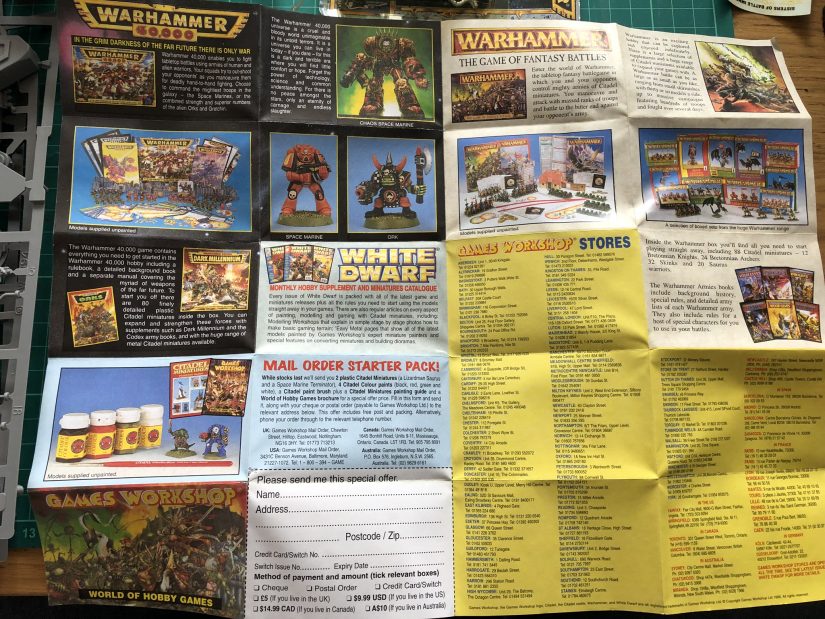
Instructions
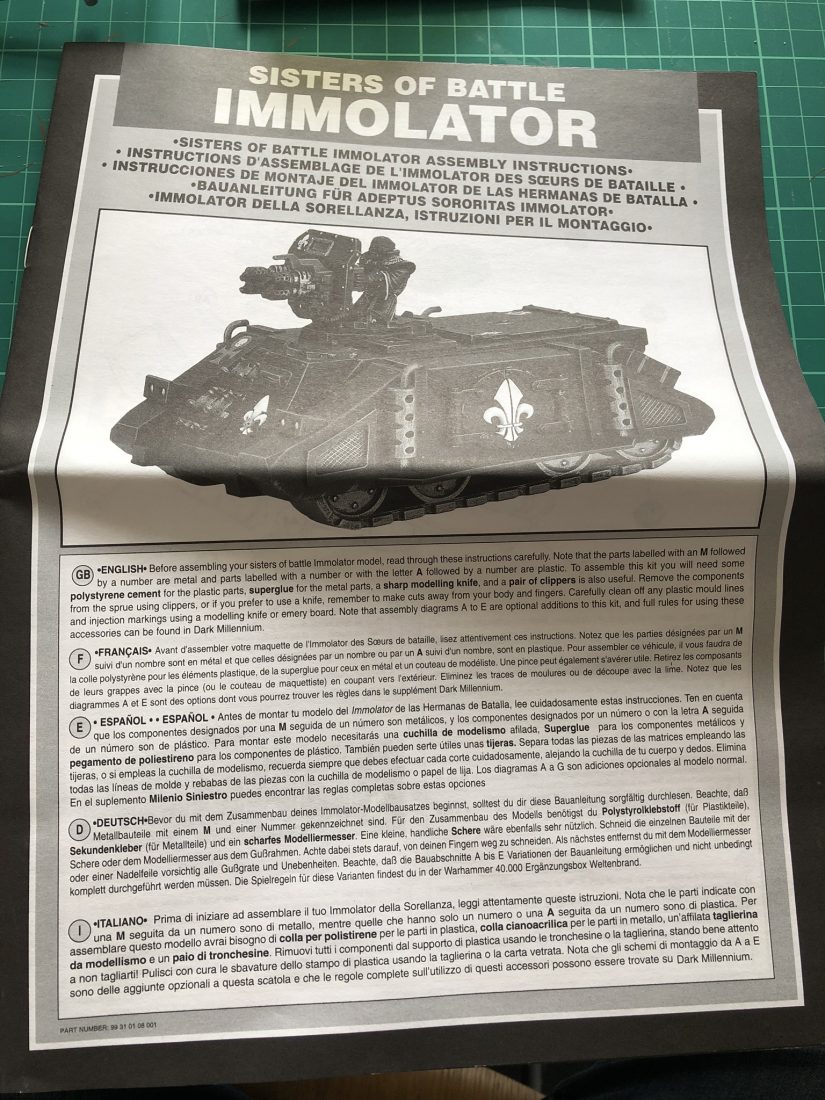
I didn’t really need these, but it was fun to flick through the instructions, for old times’ sake. For those unaware, the last picture is of a “datafax” – every vehicle in 2nd Edition had one of these, which gave the profile, armour values, and damage charts.


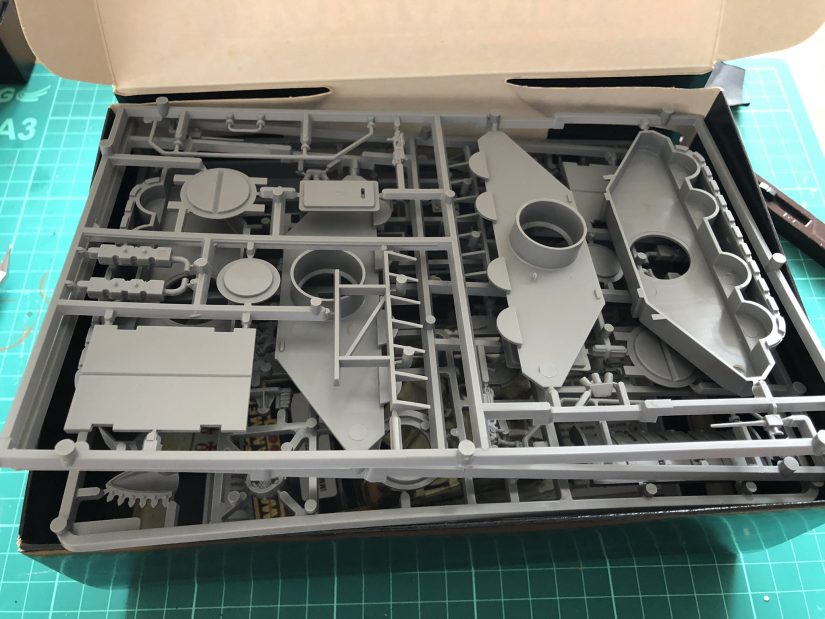
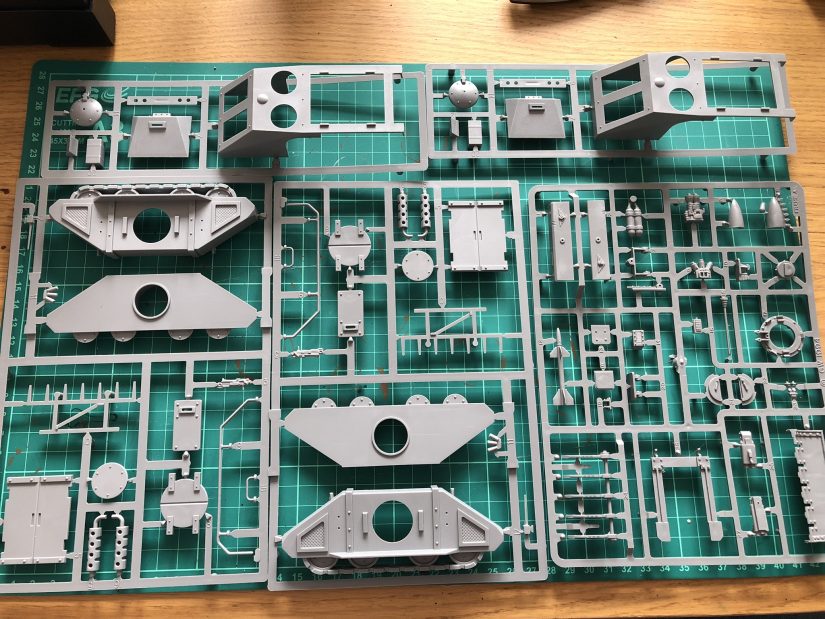
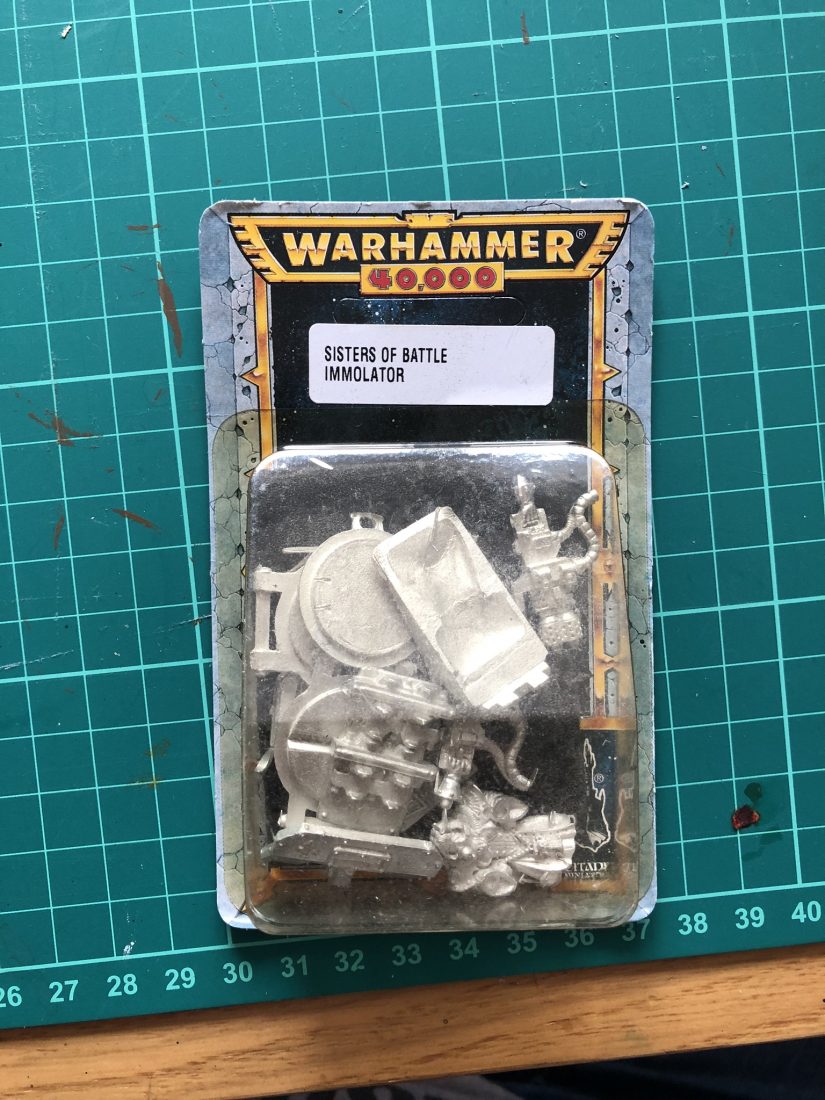
Parts and Contents
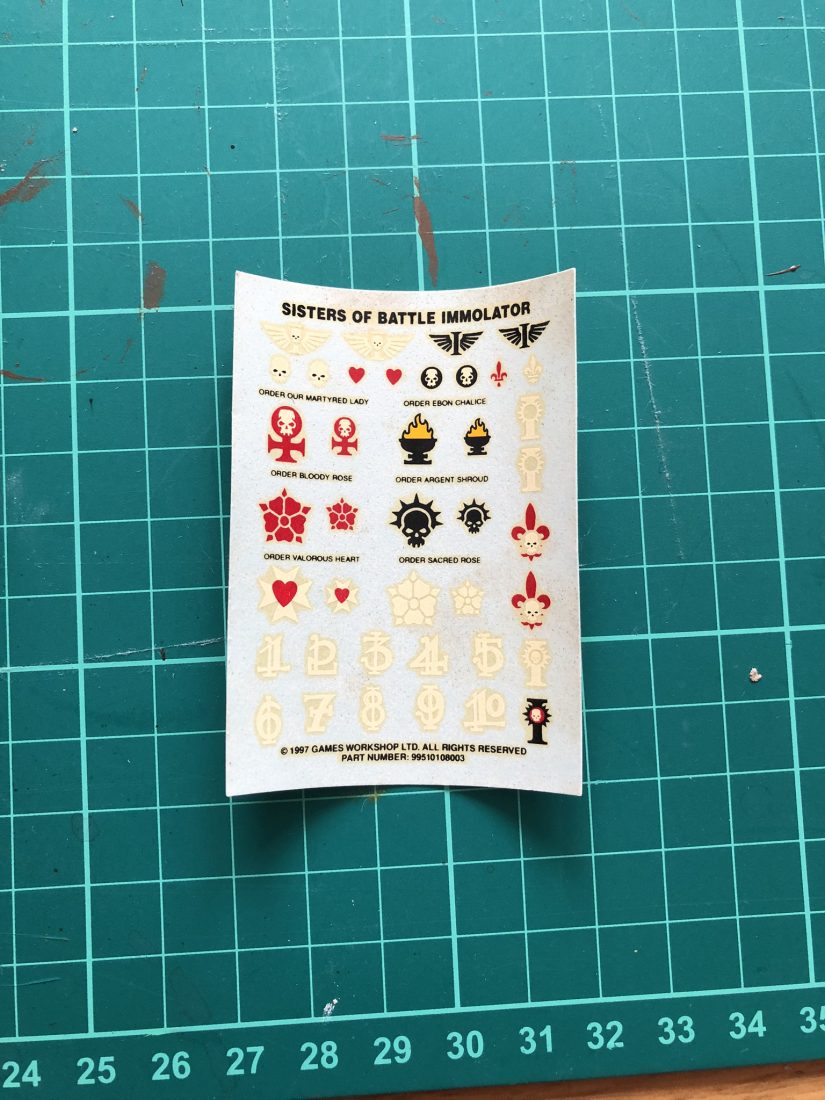
The parts I received were in good condition – which I expected, as this was a still-sealed, never-been-opened box! The blister pack and transfer sheet both showed a lot of discolouration, beyond what I’d expect for the age and unopened state, and more than shows up in the pictures; I suspect at least one previous owner smoked. As I was about to assemble everything, I wasn’t concerned by this.
Mould lines weren’t really an issue on the plastic parts. There are a couple of regular problem areas on this kit – the grab rails, and the exhausts – but most other parts were fine. The metal parts had the usual assortment of metal tags and casting imperfections, but nothing out of the ordinary or problem-causing. I’ve had more issues with 2019 GW metal castings than I had with this kit.


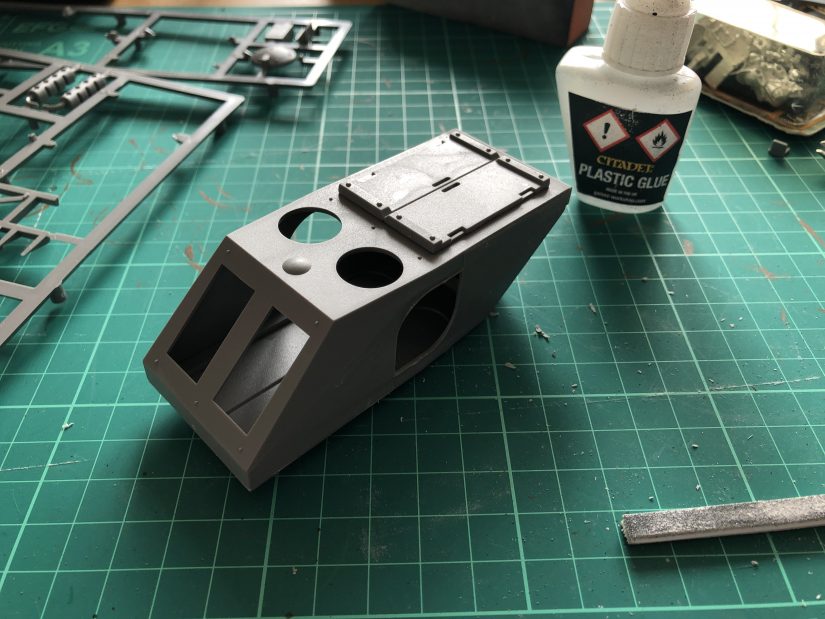
Assembly
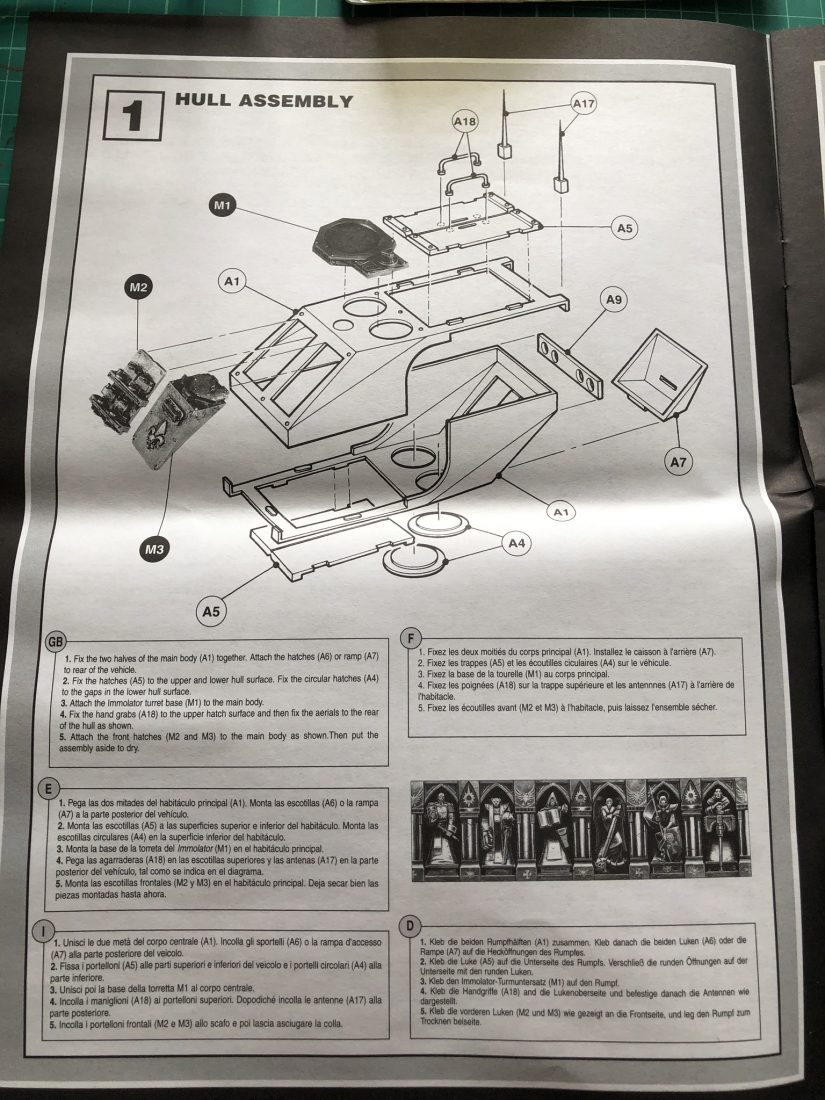
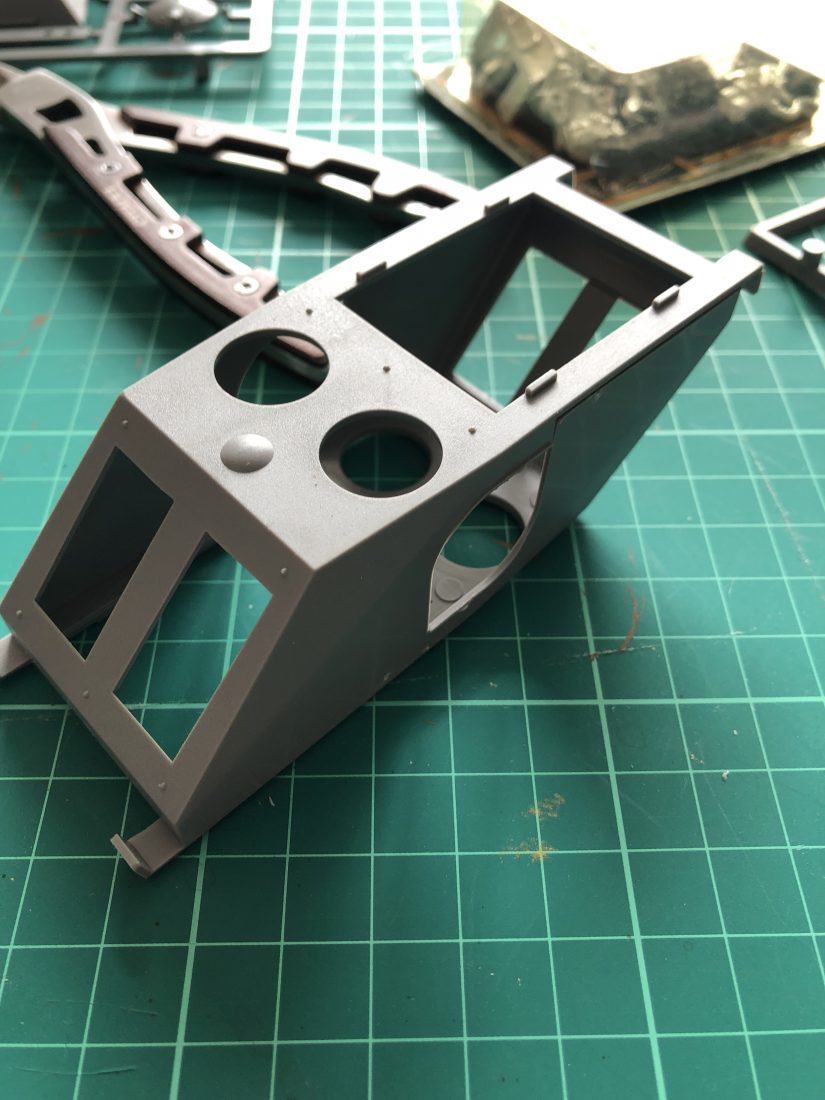
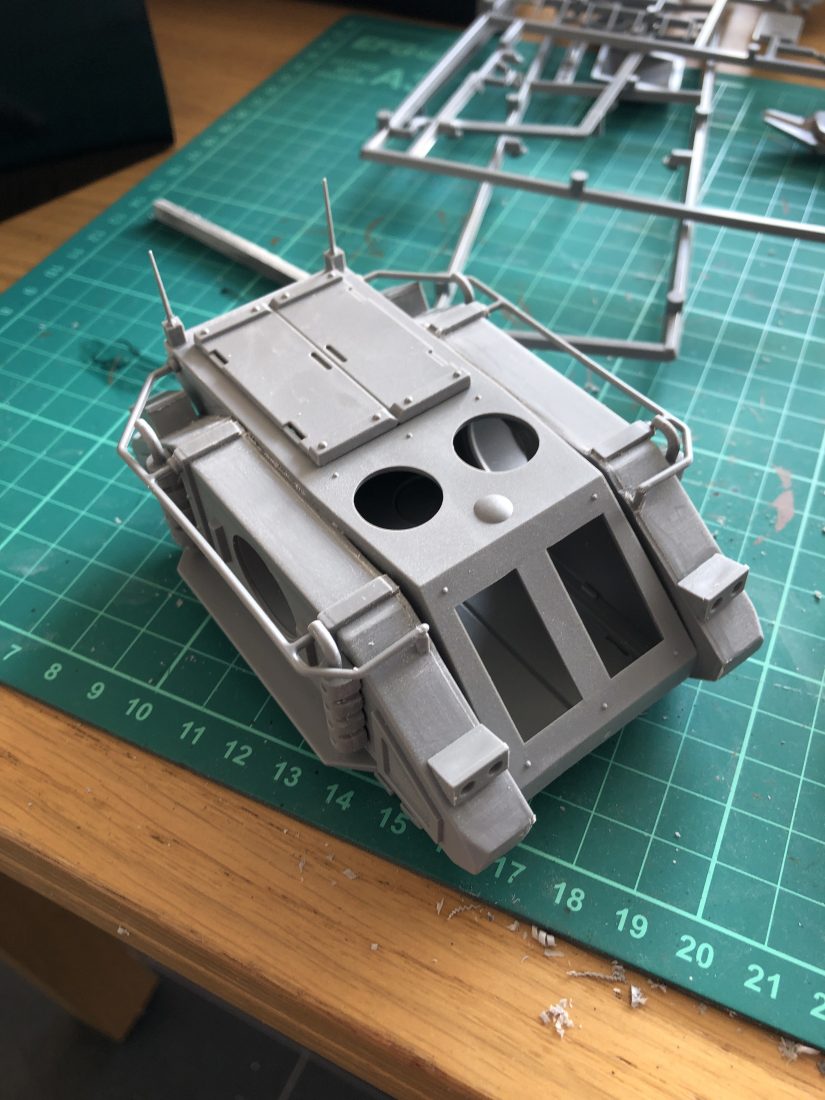
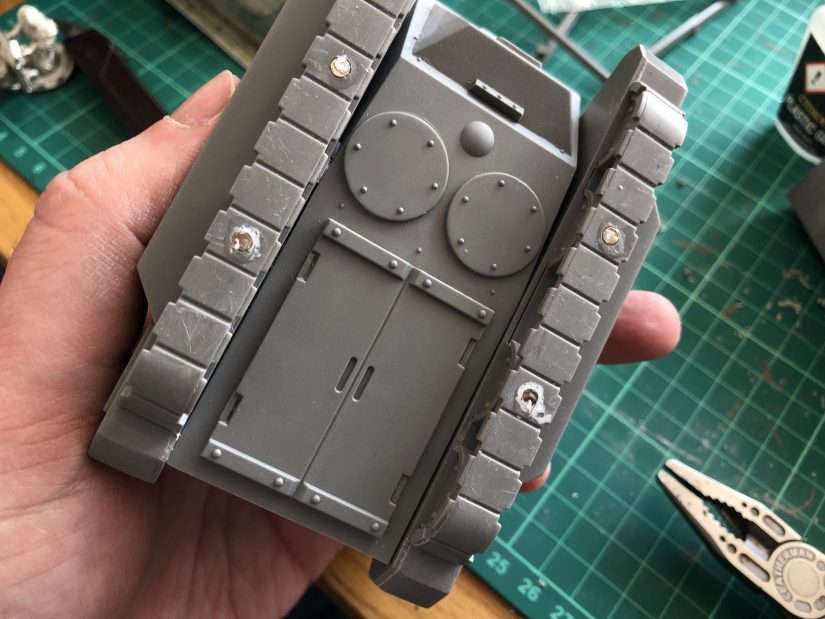
The original Rhino chassis, which forms the basis of the Immolator kit, is so simple and straightforward to put together. Glue the two halves of the hull together, add the hatches and track sections, and you’re pretty much done. The only thing you have to be mindful of, is some of the parts and connection points are small and/or fragile. I broke one of the top hatch handles just by holding it too tight between my forefinger and thumb, and had to carefully glue it back together before assembly. I did quite a bit more clean-up than 14 year-old me would have, to take care of gaps and mould lines. Modelling knives, clippers, and sanding blocks will be your friends if you ever have to build this kit yourself!
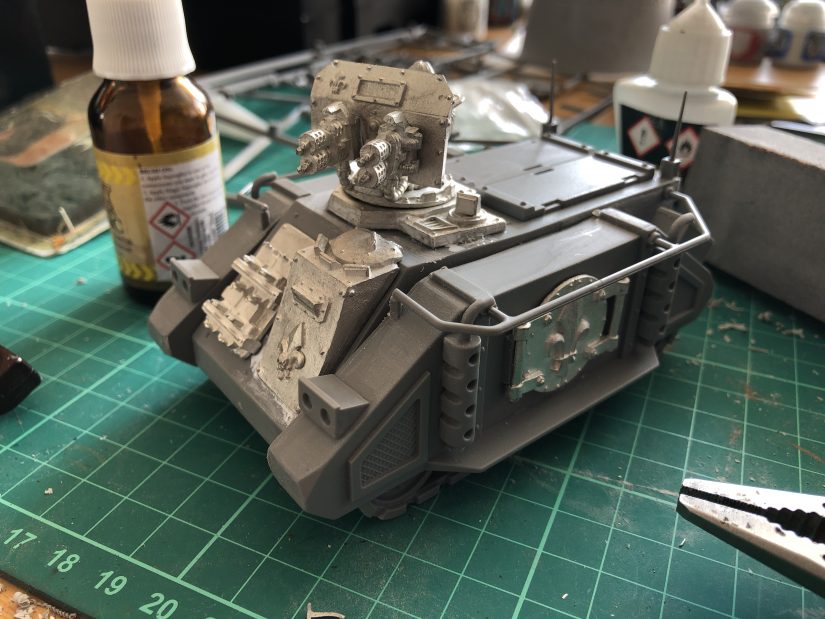
The metal parts of the kit were always a little annoying to work with. The tolerances and variance are much bigger in a spin-cast part than injection moulded plastic, so things don’t quite line-up or fit right. I did as best I could, with a bit of filing, bending, and using some superglue to gap fill where needed. I completely forgot to take pictures of the turret assembly!
I did allow myself a couple of nods to modernity – I added 3mm x 2mm magnets to the tracks and turret, to make transportation easier and stop the turret falling off all the time. To speed things along I used my power drill on the slowest setting, rather than my pin vice.


Finishing Up
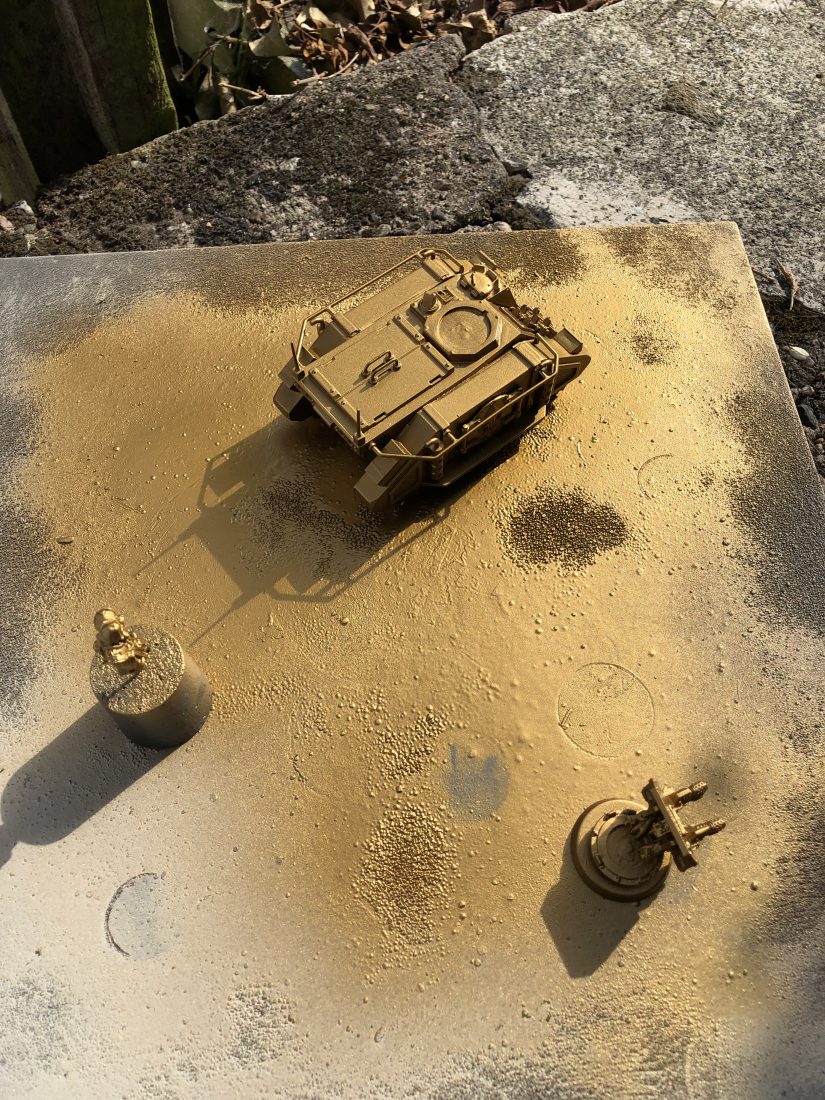
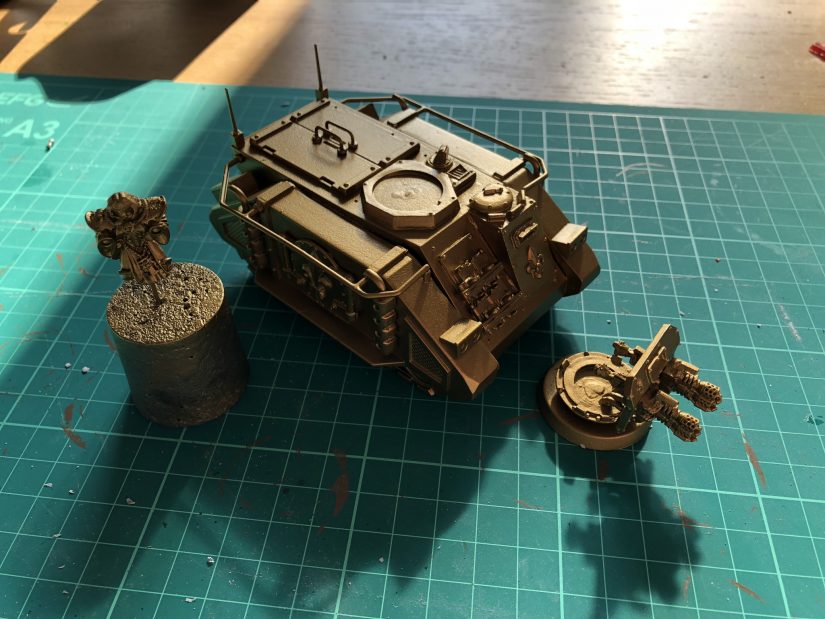
After building the Immolator I sprayed it with with Halfords Grey Car Body primer to make sure paint would stick to the metal areas as well as the plastic. Once the primer was dry, I sprayed it with a couple of thin coats of Retributor Armour to match the rest of my Sororitas.
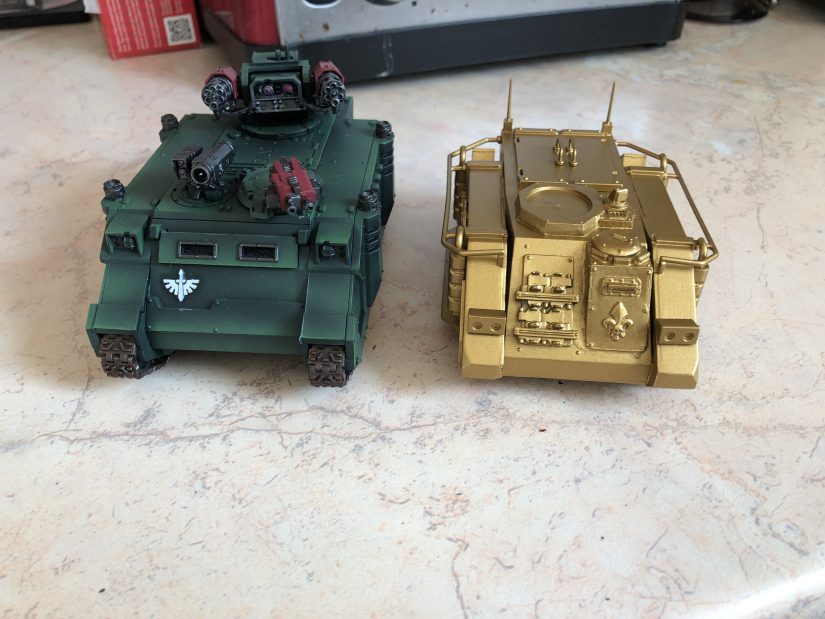
I knew the old Rhino kit was smaller than the current kit, but I hadn’t realised by how much until I put the Immolator next to a Razorback. It’s easily 25% smaller.
When I started opening the box for the Immolator, I was a little intimidated… mainly because I’d never find another in this good a condition if I messed up! By the end though I’d enjoyed myself so much I scoured eBay to find a retro Rhino kit to work on next!


Reposting: Bridie Rose ✨🌸✨ on Twitter
“Having the worst time and luck lately ✨ I never ask this kind of thing but, if you know of anyone looking for a freelance social media manager/content creator please send them my way via DM 💜 I’ve had zero work for weeks now and I can’t handle the stress anymore”
I’ve decided on a colour scheme for the custom Space Marine chapter, at last. So, #Warmonger/#PaintingWarhammer folks – what are your top tips for painting a crisp, cool, clean white on Primaris power armour? Let me know!
Batch painted the gold on my Sororitas during Paint Night. I think I need to redefine some recesses, but that should be it all mostly done. I’ll move on to the silver next, then the red and white robes. #PaintingWarhammer #ArmiesOnParade
So that’s my test domain successfully moved off of Cloudflare 👍
The rest should get done over the next few days, if nothing comes up.
Still looking for inspiration for that “design a Chapter” competition. Time to consult The Big Book of Successors!