Batch painted the gold on my Sororitas during Paint Night. I think I need to redefine some recesses, but that should be it all mostly done. I’ll move on to the silver next, then the red and white robes. #PaintingWarhammer #ArmiesOnParade
Hello gorgeous 😍
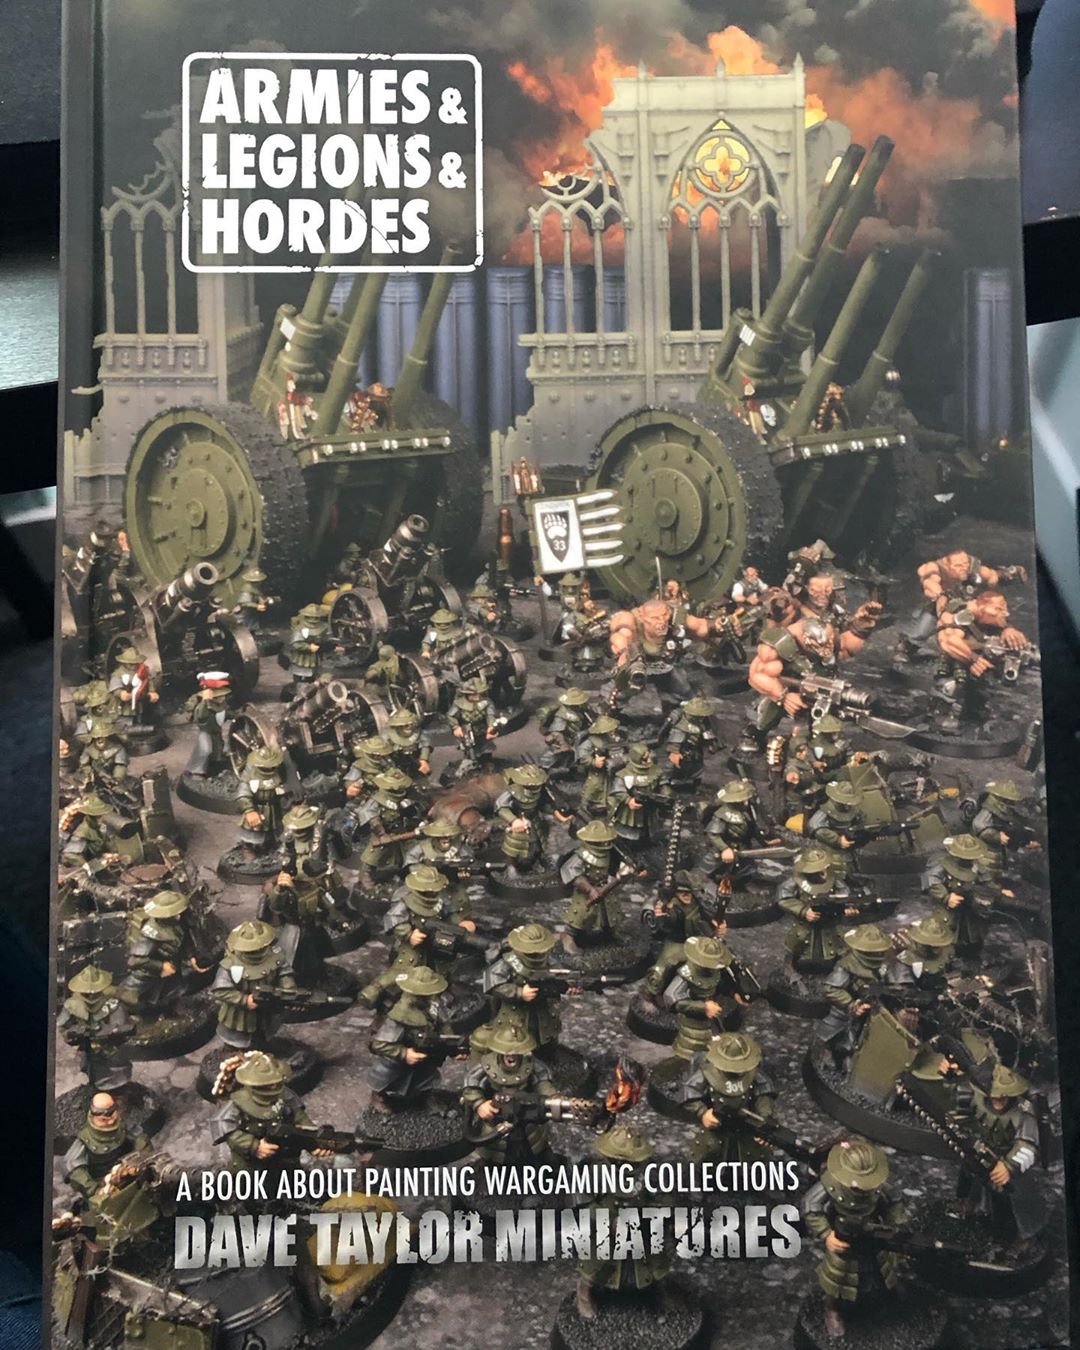
Finally got myself this book by @davetaylorminiatures – I’m looking forward to sitting down to read through it, get some ideas and inspiration ?
···
#miniaturepainting #warhammer40k #warmongers #40k #30k #horusheresy #gamesworkshop #forgeworld #paintingwarhammer #paintingforgeworld #warhammer #miniaturephotography #wargaming #fantasy #scifi #minipainting #miniatures
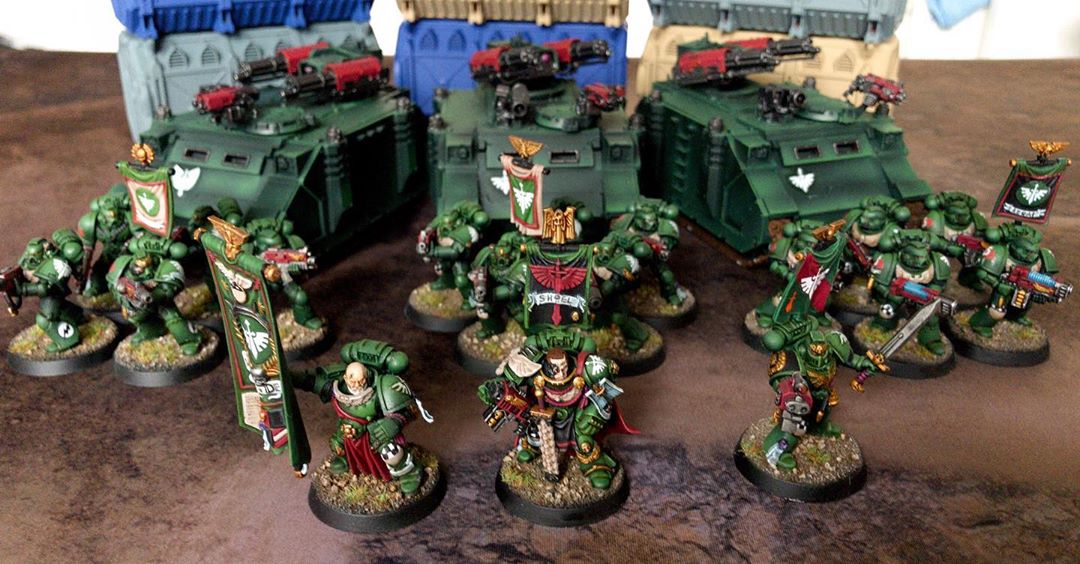
If you’ve been following me for a while, you might remember I started a Dark Angels army at the end of 2017. I never quite finished the initial plan at the time… until this month! I was challenged to finish off a project, and this was the one I chose; painting all of the banners, the last HQ, and last squad needed to round things out to a battalion. It feels good to finish off a project – but now I’m inspired to expand it even more ? thankfully I already have a load of Oldstartes kits in the cupboard that can be used!
···
#miniaturepainting #warhammer40k #warmongers #40k #30k #horusheresy #gamesworkshop #forgeworld #paintingwarhammer #paintingforgeworld #warhammer #miniaturephotography #wargaming #fantasy #scifi #minipainting #miniatures #darkangels
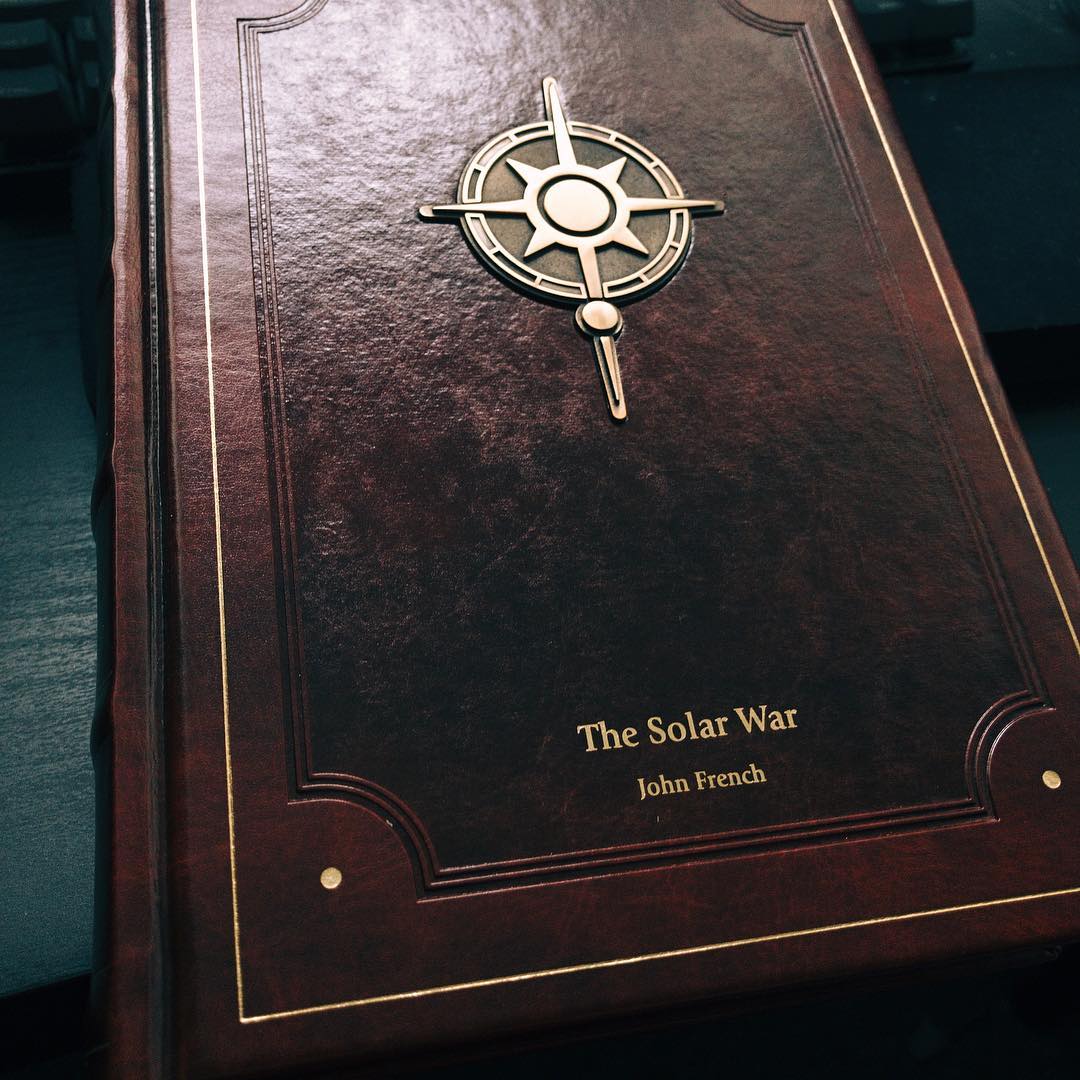
@black_library_official have hit it out of the park with this one. It’s such a weighty and tactile book! I can’t wait to get stuck in ?
···
#miniaturepainting #warhammer40k #warmongers #40k #30k #horusheresy #gamesworkshop #forgeworld #paintingwarhammer #paintingforgeworld #warhammer #miniaturephotography #wargaming #fantasy #scifi #minipainting #miniatures #imperialknight #imperialknights #custodes #sororitas

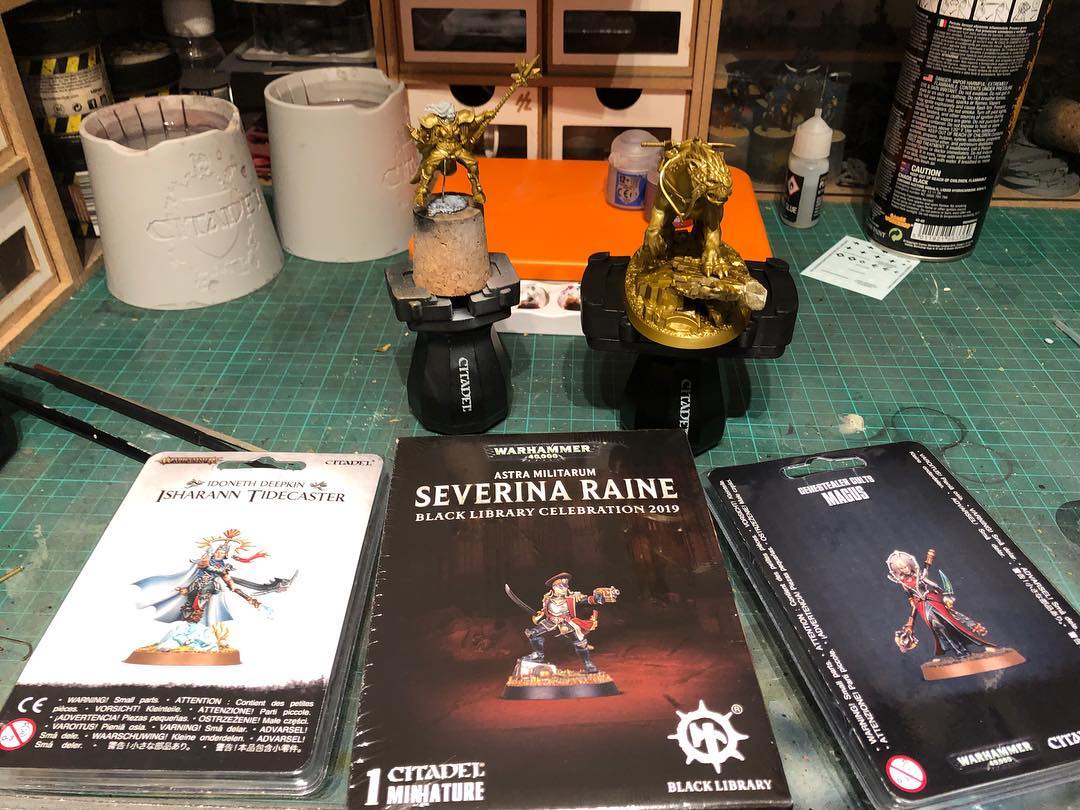
I’m not getting the finish and smoothness I want with this Magus, so I think I’m going to use it as a colour scheme sketch and start over. It doesn’t help that my eyes are really struggling to focus on details today ?
···
#miniaturepainting #warhammer40k #warmongers #40k #30k #horusheresy #gamesworkshop #forgeworld #paintingwarhammer #paintingforgeworld #warhammer #miniaturephotography #wargaming #fantasy #scifi #minipainting #miniatures #imperialknight #imperialknights #custodes #sororitas #genestealercult #genestealermagus
This is what my next 2 ½ months of hobby time looks like ?
···
#miniaturepainting #warhammer40k #warmongers #40k #30k #horusheresy #gamesworkshop #forgeworld #paintingwarhammer #paintingforgeworld #warhammer #miniaturephotography #wargaming #fantasy #scifi #minipainting #miniatures #imperialknight #imperialknights #custodes #sororitas

Can’t remember the last time I painted an Ultramarine. Possibly 20 years ago! Experimenting with some of the techniques I’ve been learning on the @alfonso_giraldes_banshee and @thechromaticcircle painting academy Patreon. I definitely need more practice, and this needs refinement, but it was nice to have a brush in my hand after weeks of nothing but work!
···
#miniaturepainting #warhammer40k #warmongers #40k #30k #horusheresy #gamesworkshop #forgeworld #paintingwarhammer #paintingforgeworld #warhammer #miniaturephotography #wargaming #fantasy #scifi #minipainting #miniatures #imperialknight #imperialknights #custodes #sororitas

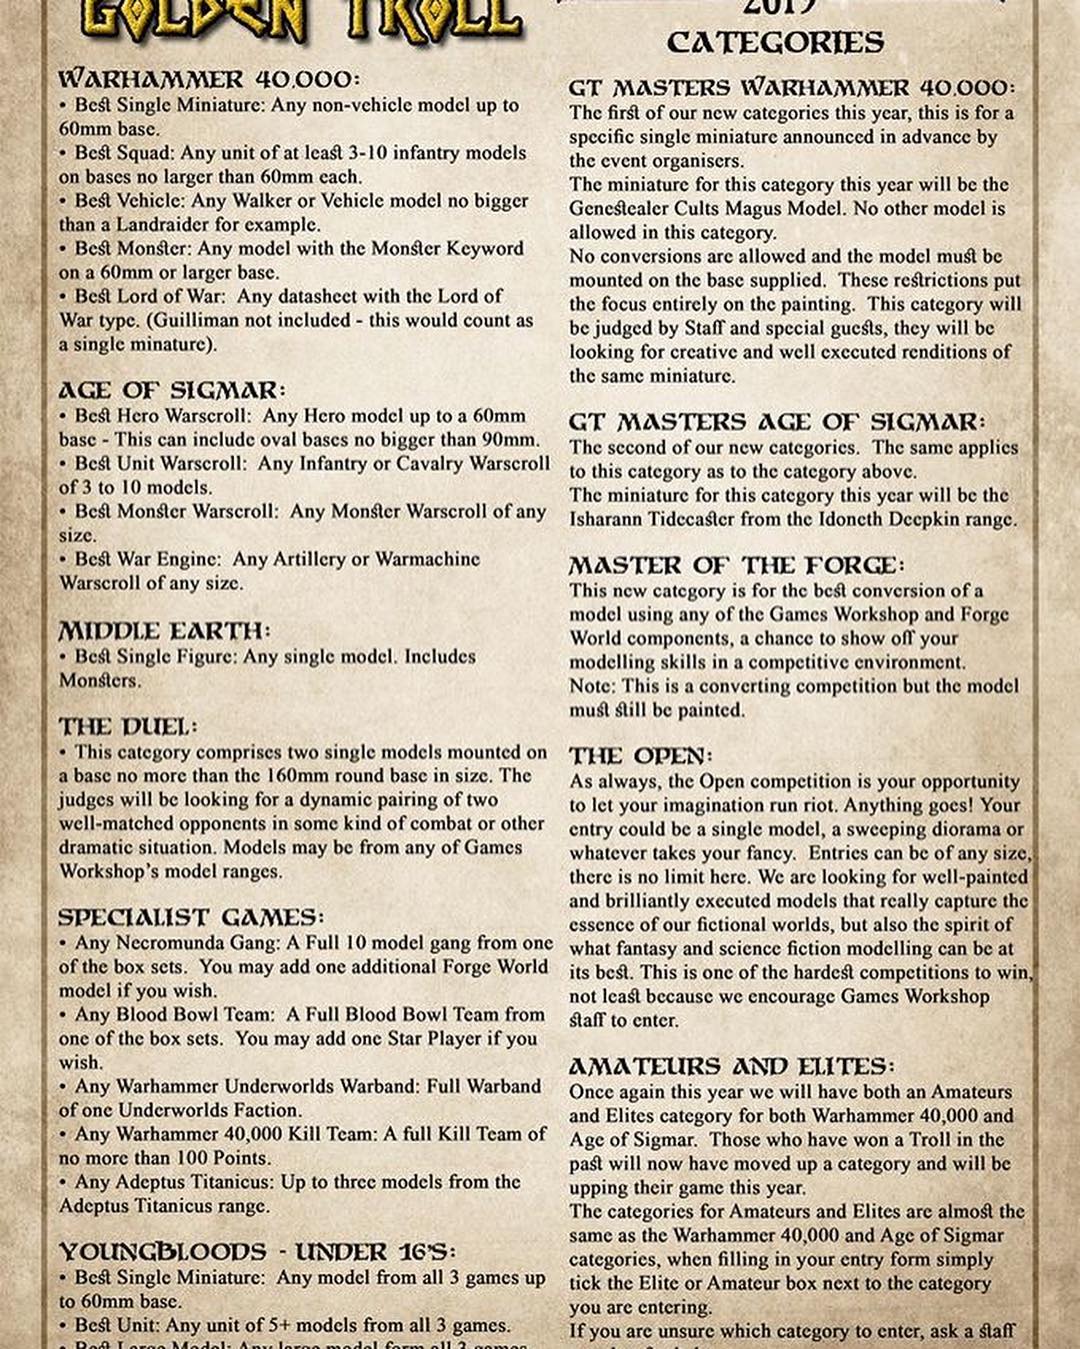
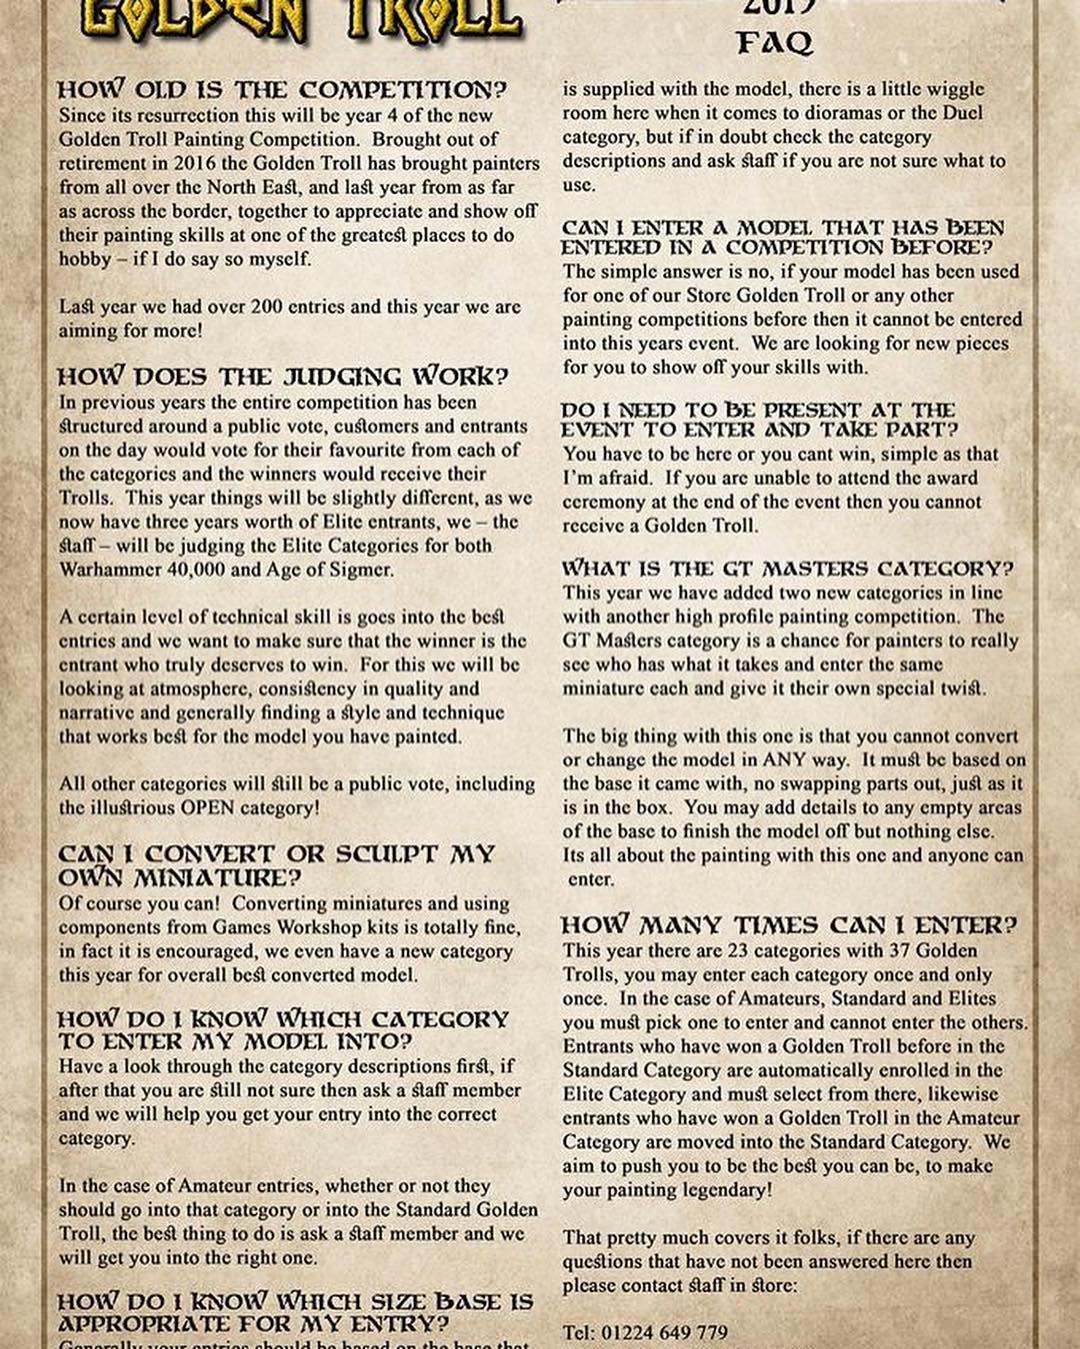
It’s that time of year again! Golden Troll 2019 @gamesworkshopaberdeenofficial ···
#miniaturepainting #warhammer40k #warmongers #40k #30k #horusheresy #gamesworkshop #forgeworld #paintingwarhammer #paintingforgeworld #warhammer #miniaturephotography #wargaming #fantasy #scifi #minipainting #miniatures
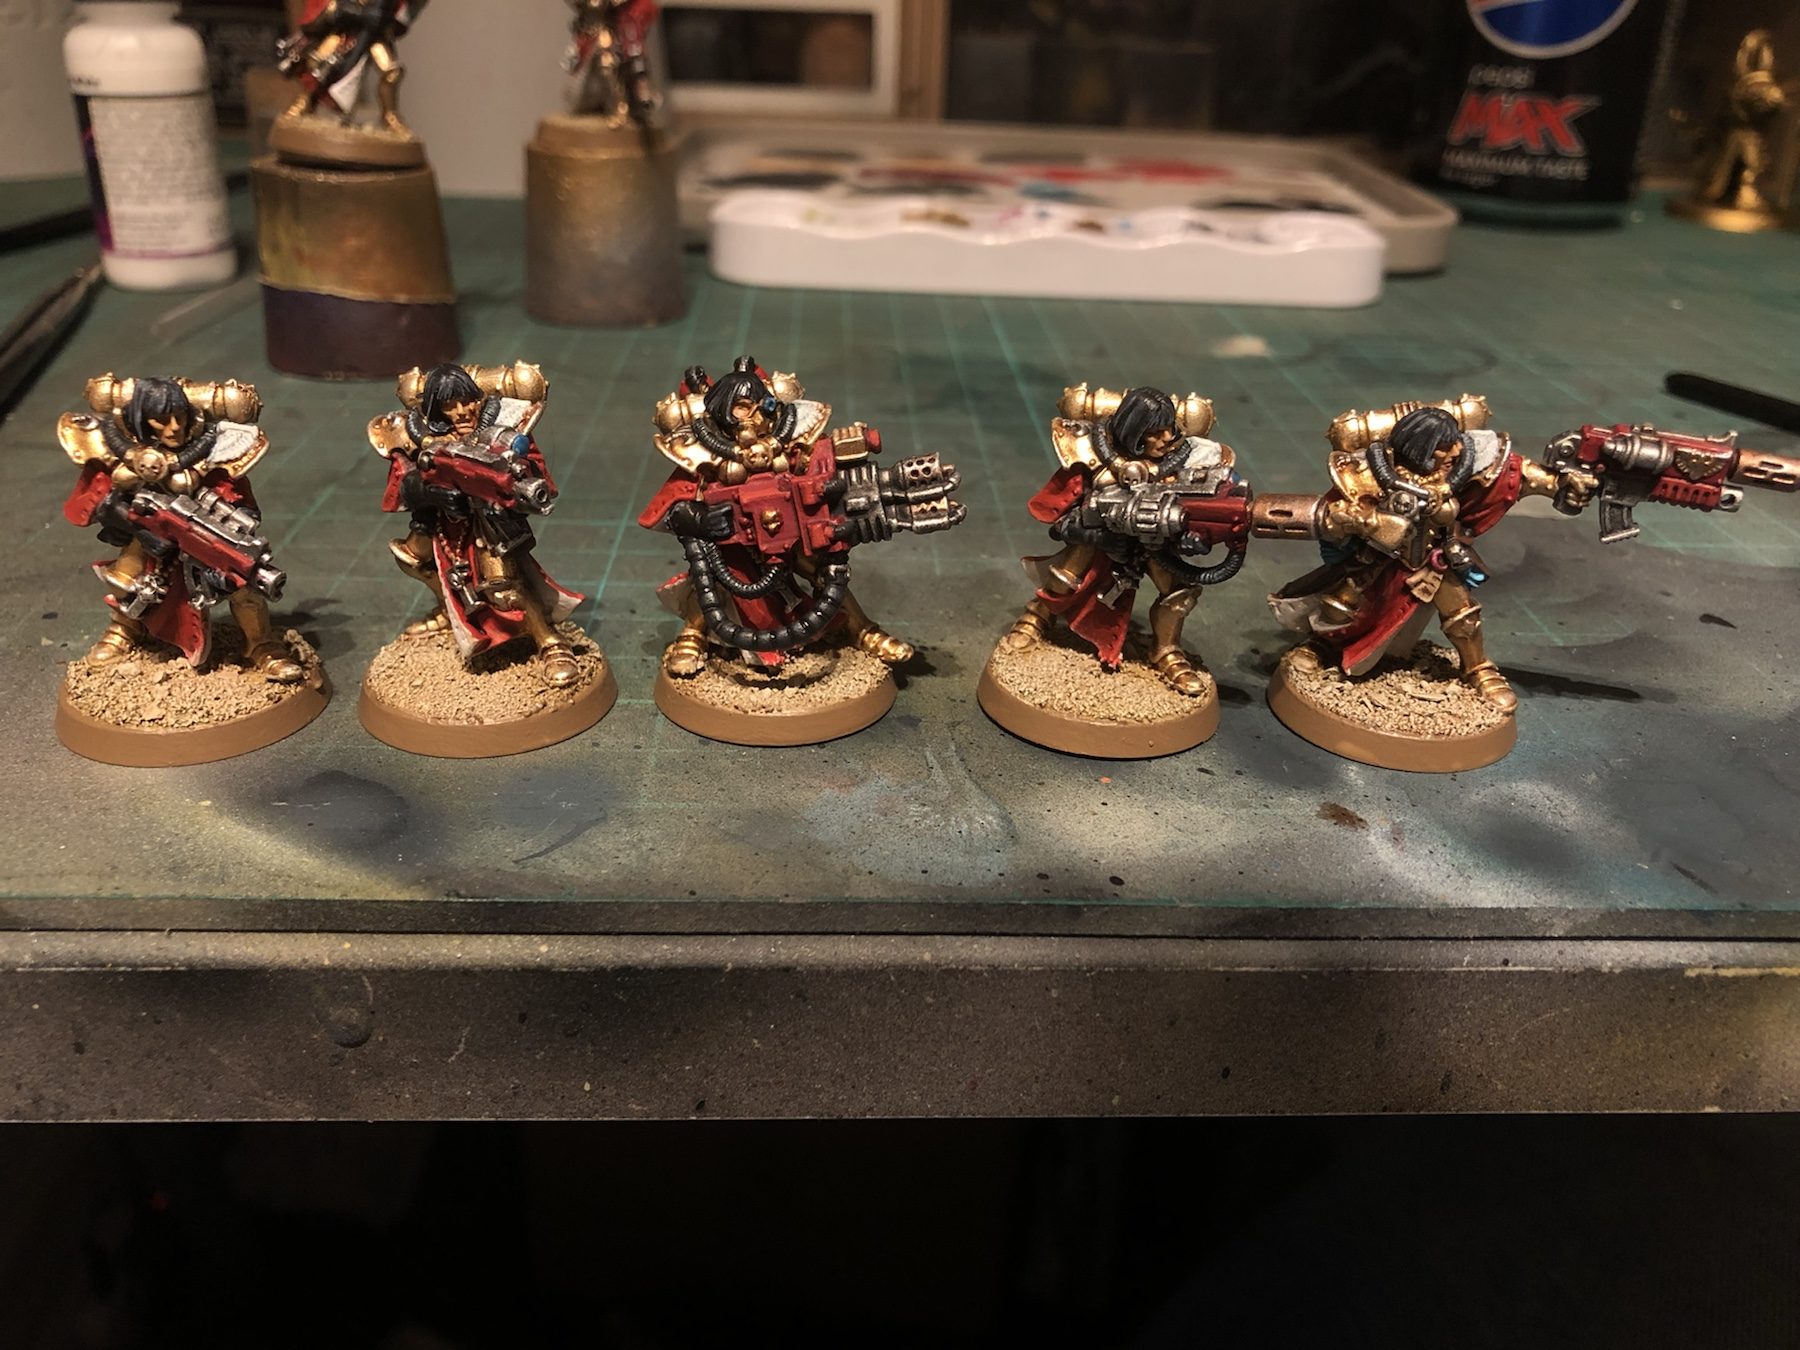


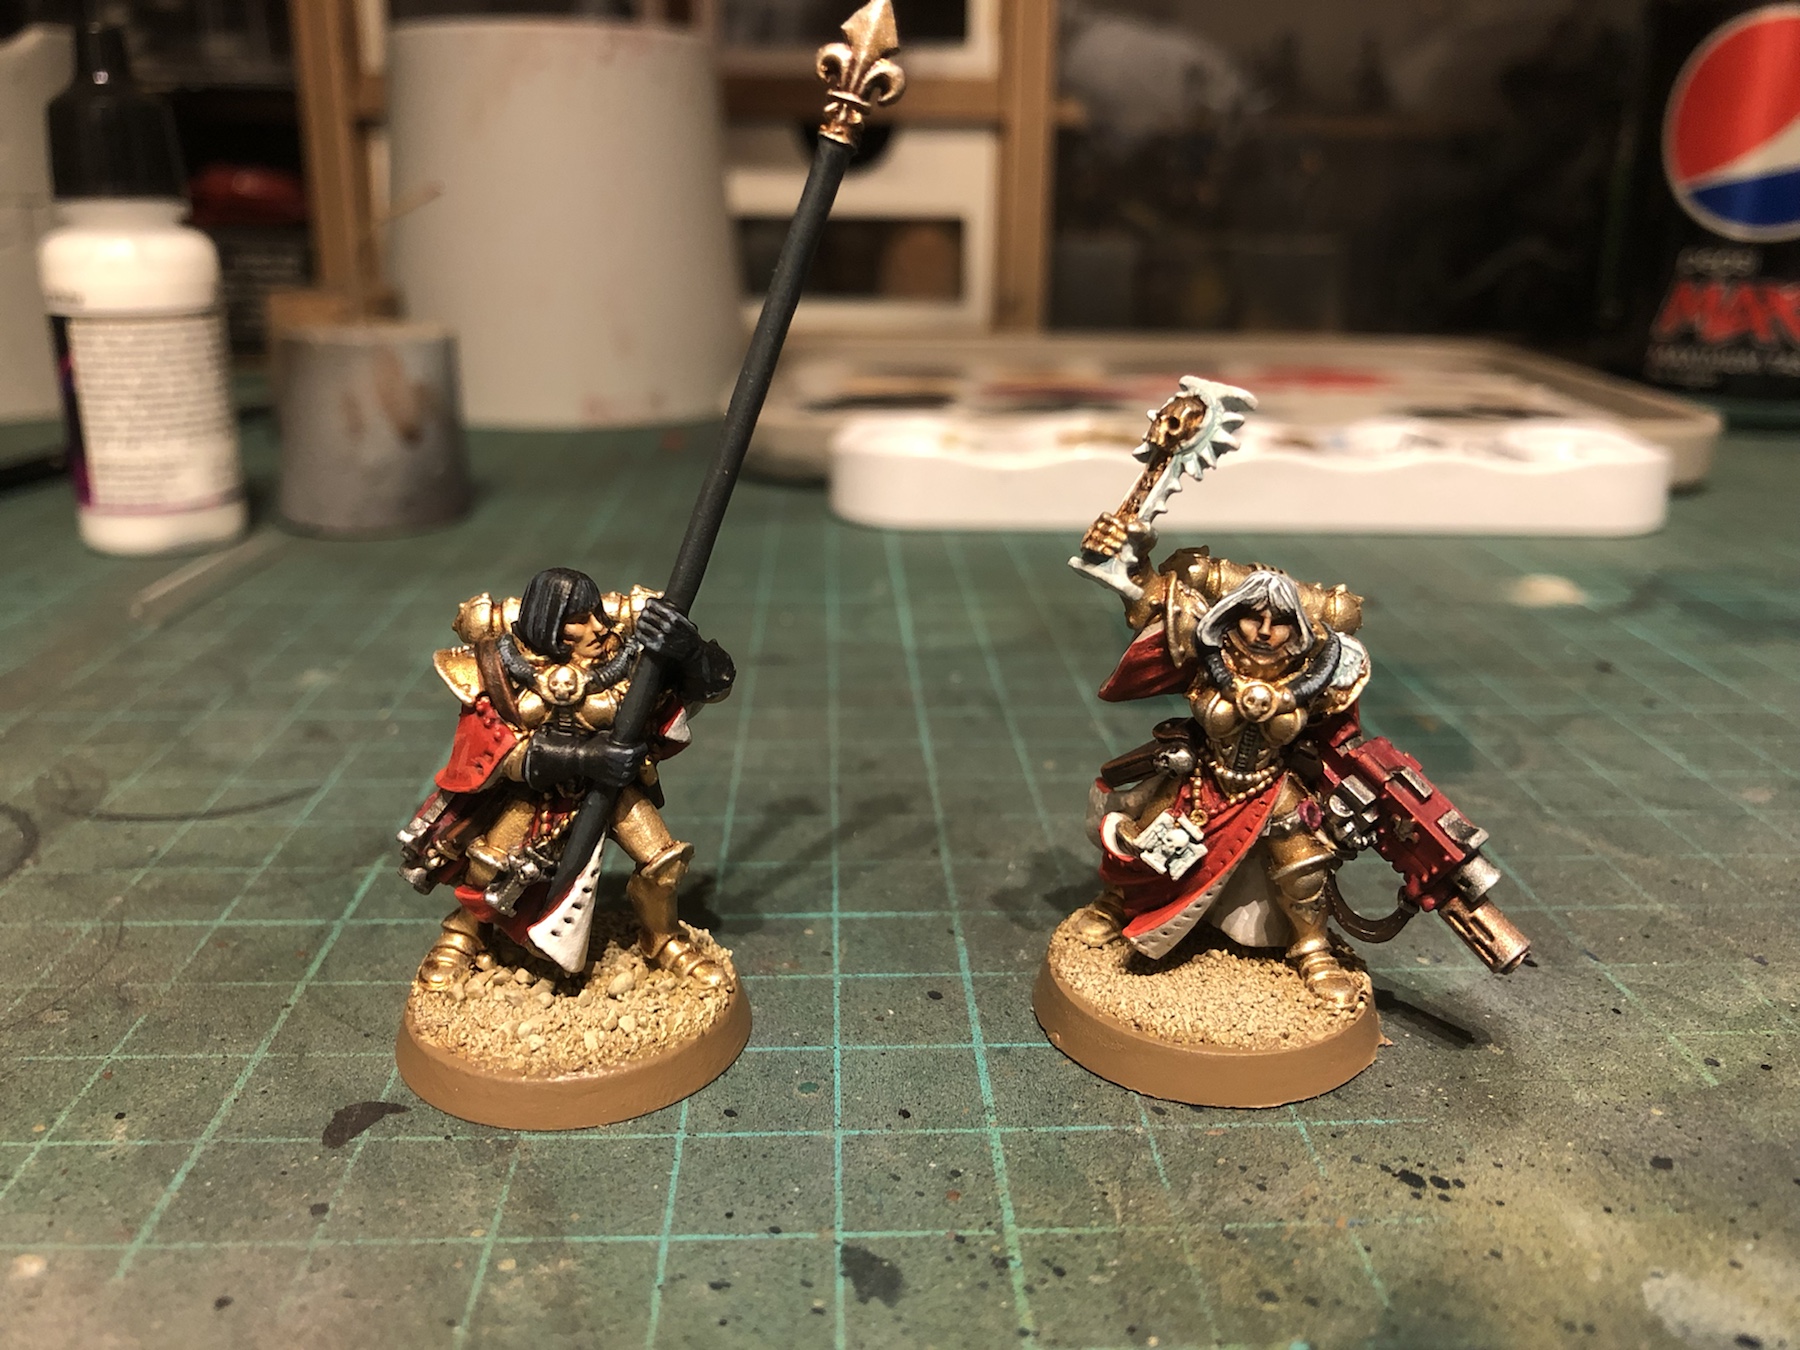
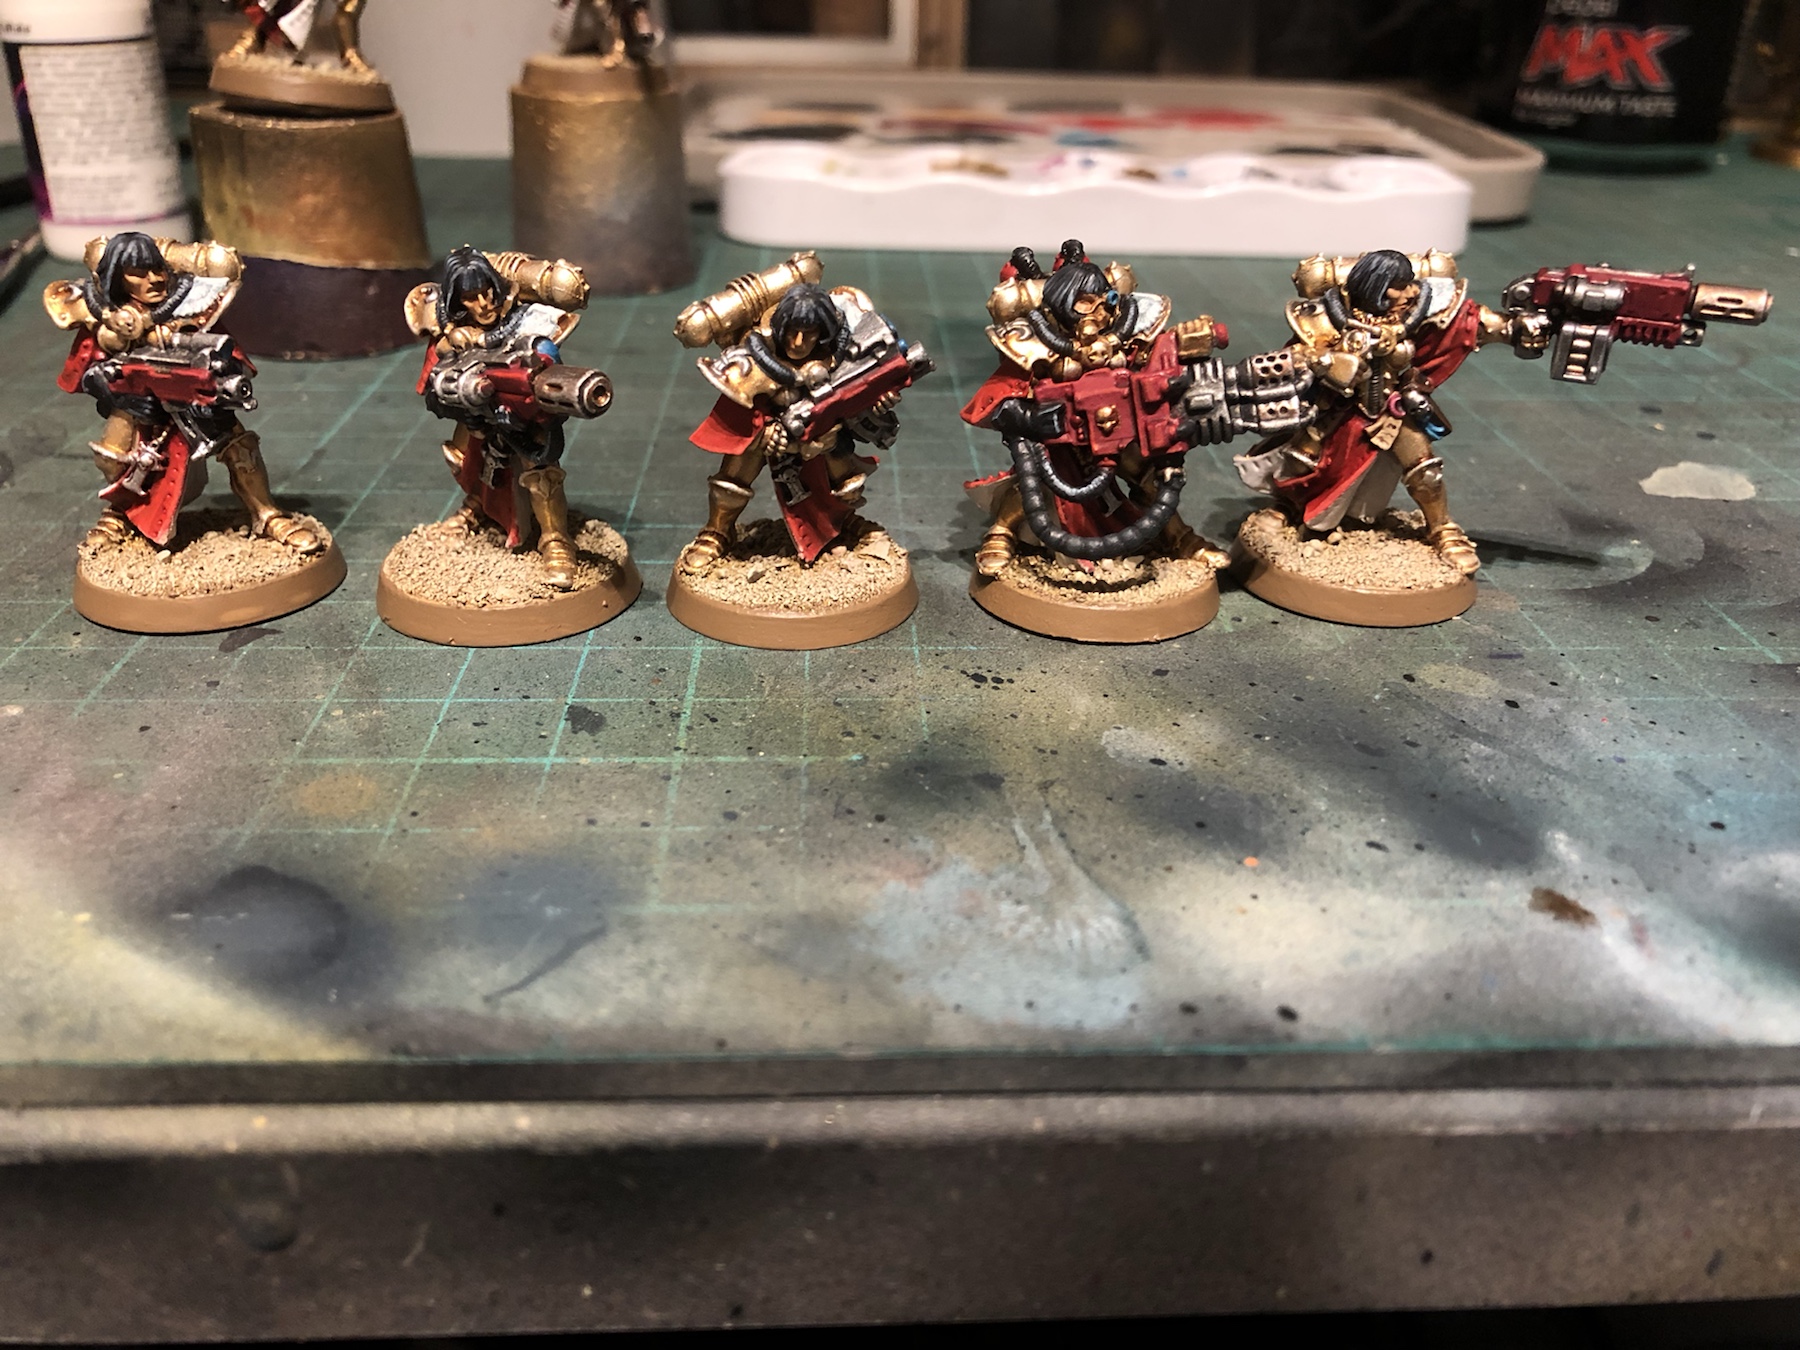
The first units of my Sororitas are complete, taking me most of the way towards that part of my 2019 hobby goals, and marking my first entries on the PaintHammer 2019 form.
As always, there’s loads I’d like to be done better on these (the white robes mainly) but finished is better than still in the WIP queue, so Im trying not to nitpick too hard!
The Imagifier will be getting her banner as soon as I find the copper foil I bought to make it.

I’m not one for New Years resolutions, but I wanted to set out a few hobby-related goals for 2019. The main driver for these is to clear some of my backlog, and also to let me play some games of Warhammer 40,000 for the first time since near the end of 7th Edition.
- Finish Knight Household
- 3x Questoris
- Castellan
- 6x Warglaives
- Finish Adeptus Custodes Battalion
- 3x Guard squads
- 2x Vertus Praetor squads
- 1x Terminator squad
- Characters
- Finish Adepta Sororitas Battalion
- 3x battle squads
- 2x Cannoness
- Imagifier
- Seraphim squad
- <stretch> Celestine + Geminae
To achieve this, I think I’m going to have to cut down on the number of one-off miniatures and competition entries I paint.
The first batch of Primaris Space Marines are just about finished, with just a few details and the decals to finish before basing.
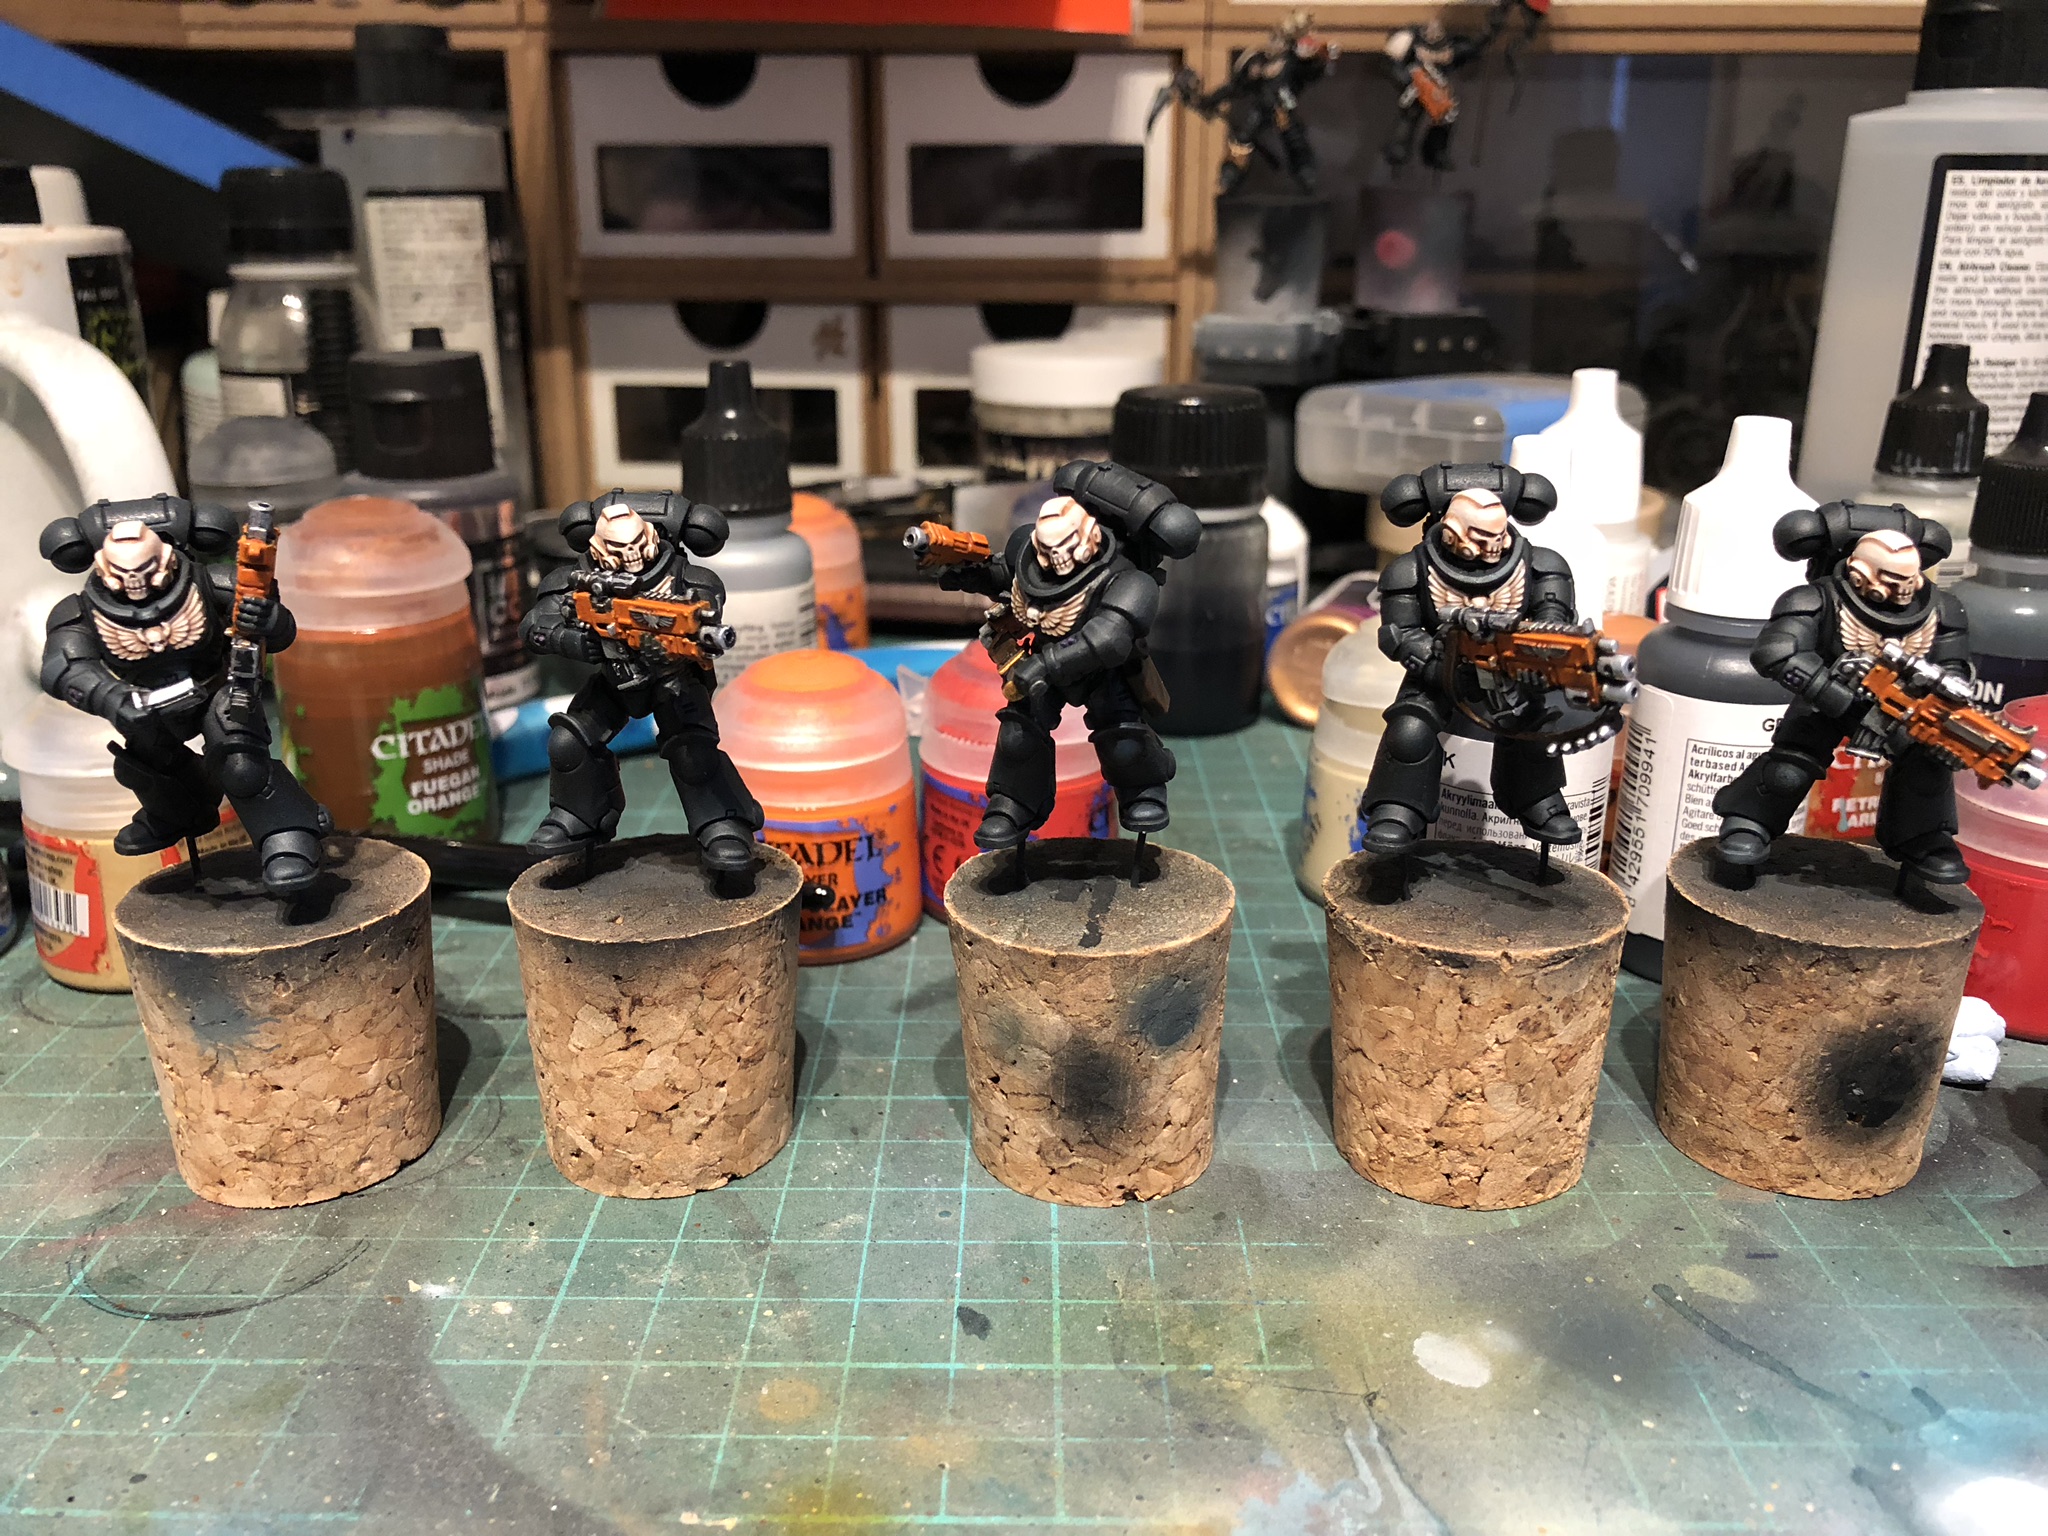
One of the choices I had to make was what secondary colours to use for contrasting and spot colours. The main armour is fairly monochromatic, being essentially black and bone-white. The main contrast would come from the gun casing, for which I chose a fairly bright orange. Orange isn’t a colour often seen on Space Marines, so this in itself helps the models stand out. To offset this, purple was added as a spot colour, used on lenses and purity seals.
I decided these marines would be from the 3rd Company, so red was also added to the palette. Each marine will get a red trim added to one knee (still to do), and the shield of the Ancient was painted red to match this.

The Lieutenant was given some basic freehand on his tilt-shield, also integrating the red of the company. I’m not happy with the blade of the scythe, so I plan to repaint it.

The Intercessors finally received their helmets. Once the shoulder pads are added, I think these will look quite intimidating on the tabletop!
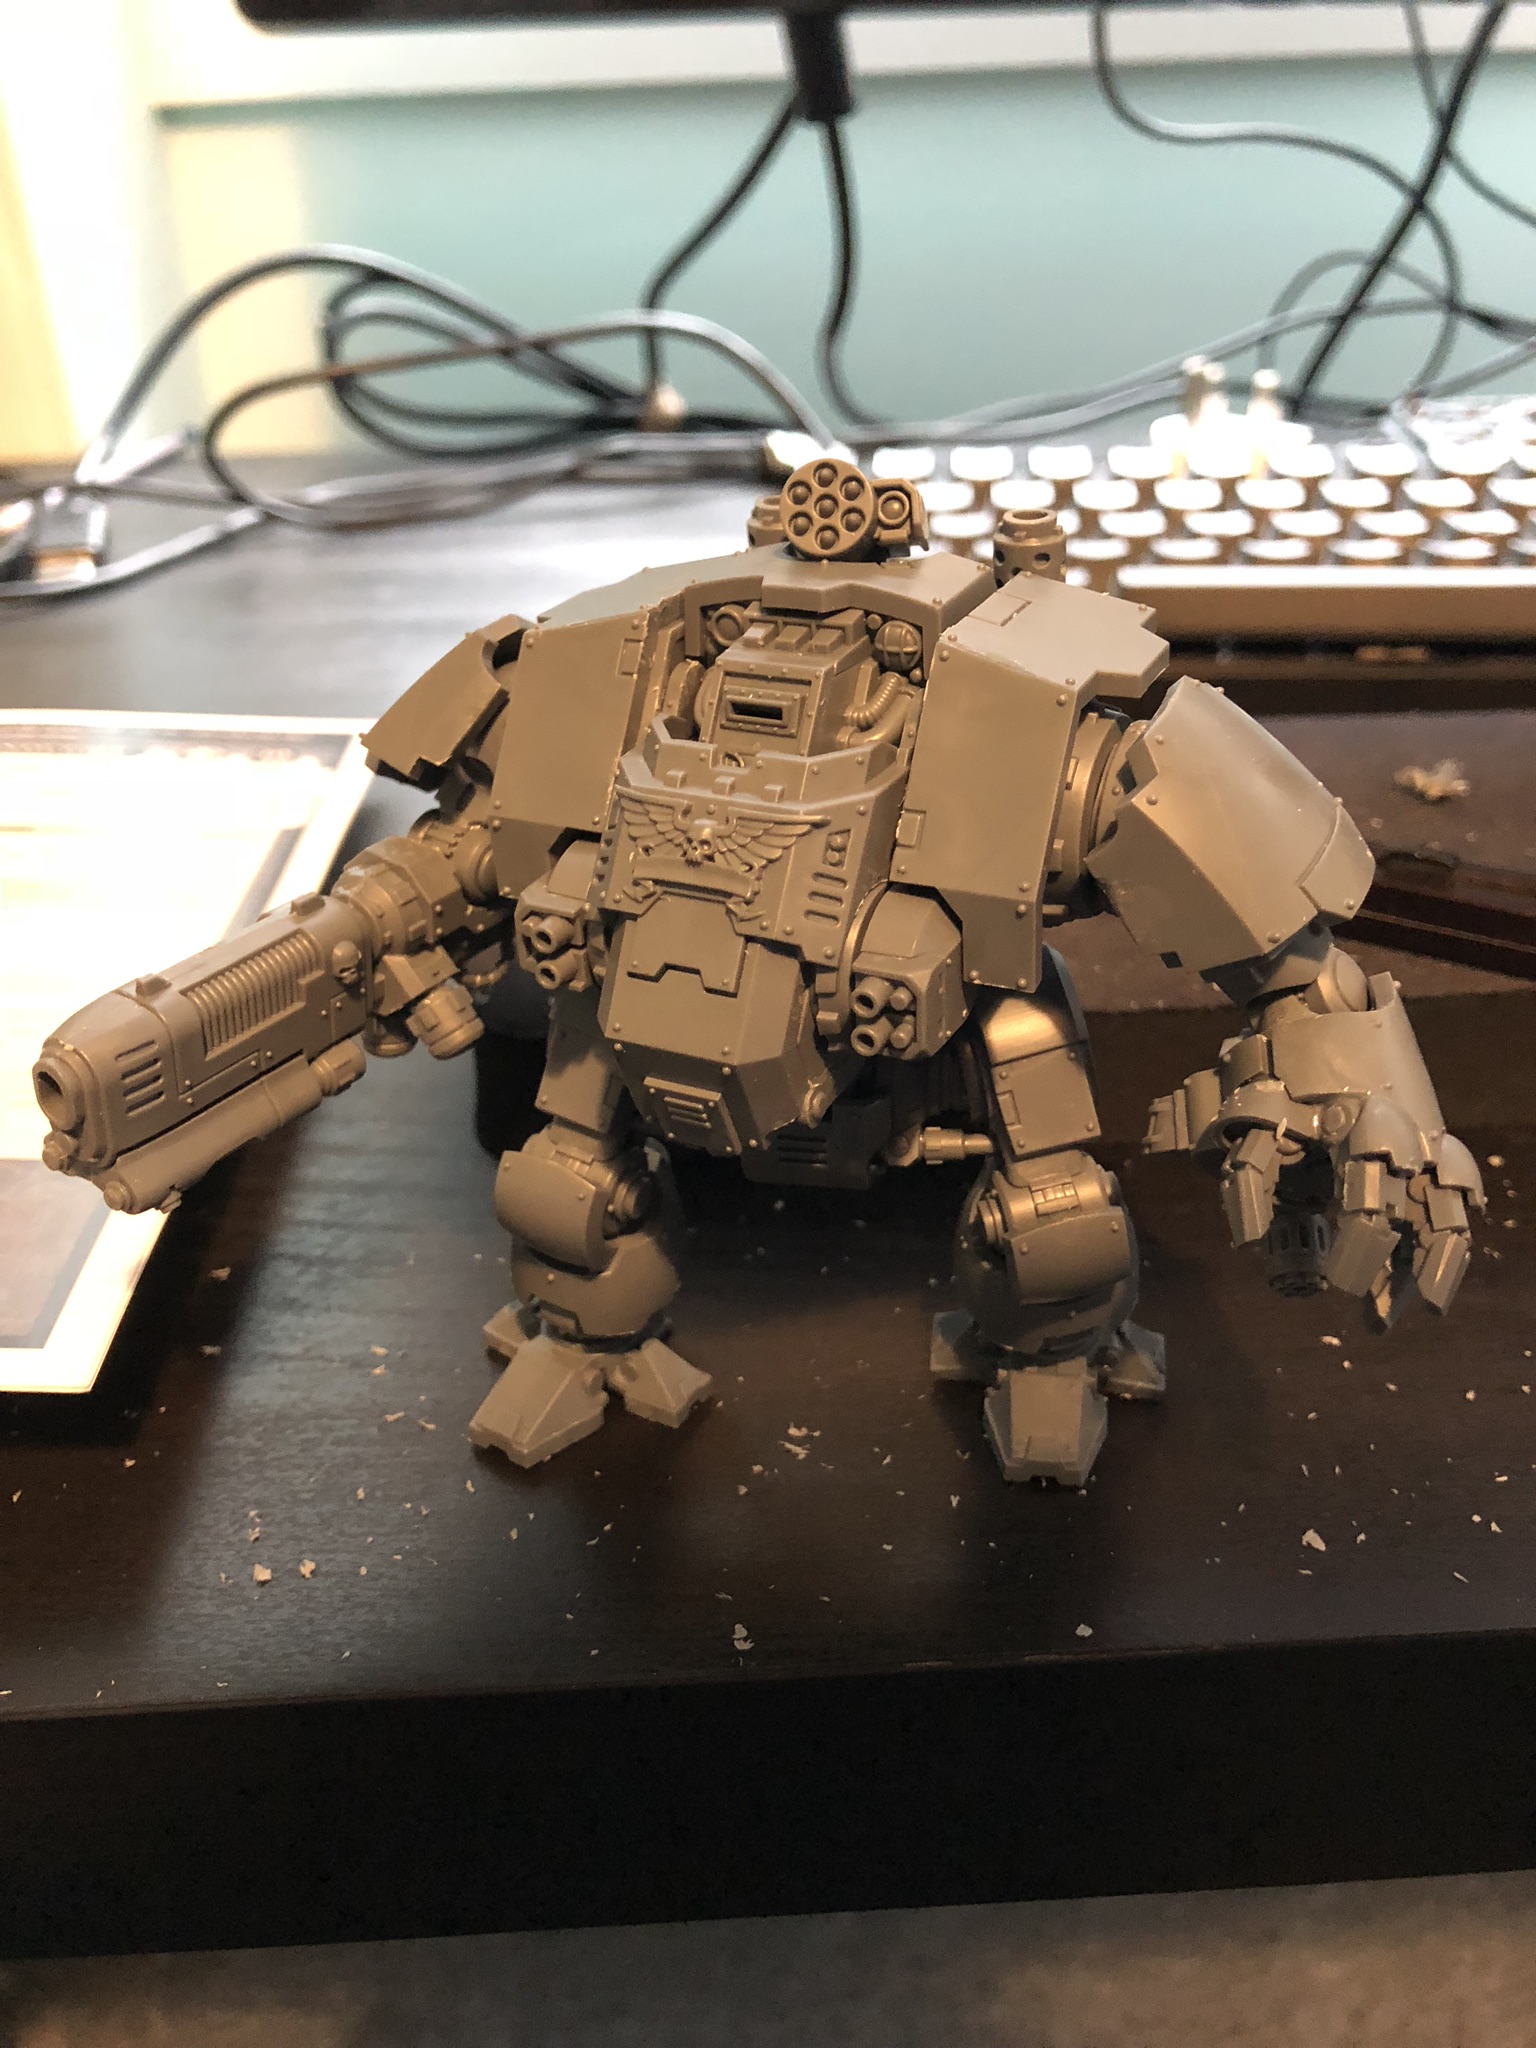
With the first batch nearing completion, I needed to start preparing the next wave! Needing a break from Intercessors, I decided to build something fun – a Redemptor Dreadnought. This kit was a joy to build, going together in just a few hours. Many of the parts are designed to remain unglued, so they can be reposed. I didn’t bother with this, as it would make things more difficult to paint. A couple of parts are unglued for now so I can paint them seperately.
With the Dreadnought assembled quicker than I thought it would be, I moved on to some Hellblasters. I have to admit I think I prefer this kit to the Intercessors. I might swap some of the bodies around between the two kits.
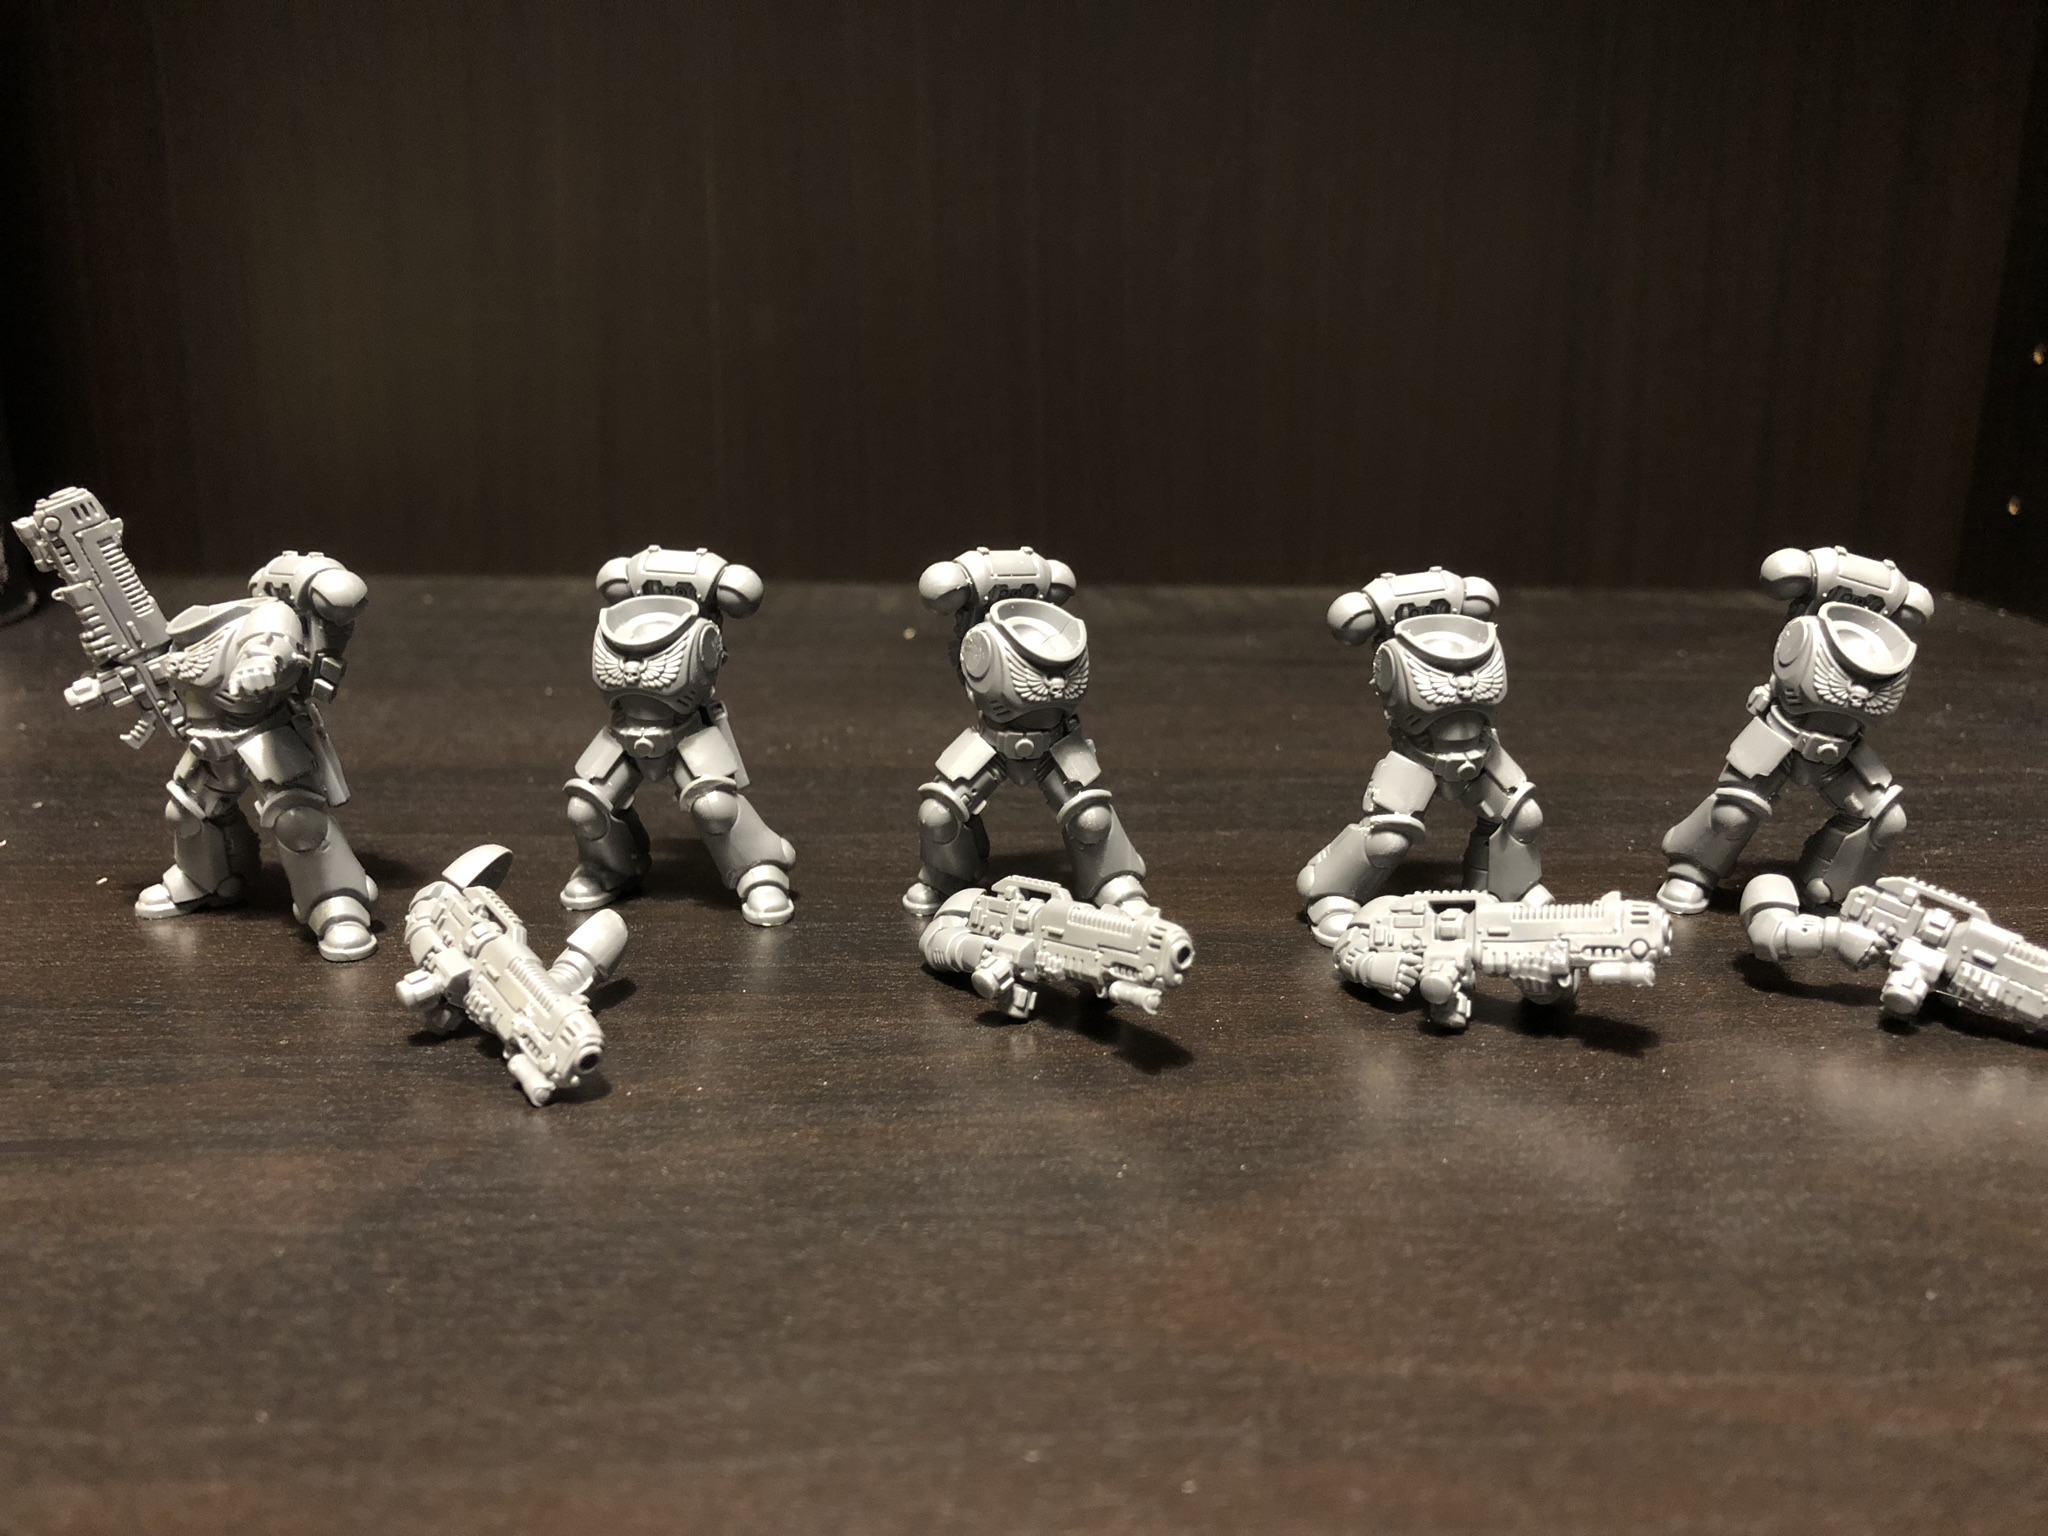
With these built, I just need to build five more Intercessors and I’ll have everything for Armies on Parade assembled. I might make these from the models found in the 40K starter sets, to add some variety. My plan for the wider army is for each ten-man Intercessor Squad to be half multi-part kit, half “easy to build,” so there is a better mix of poses throughout.
The first of many updates on the progress of painting everything for Armies on Parade.
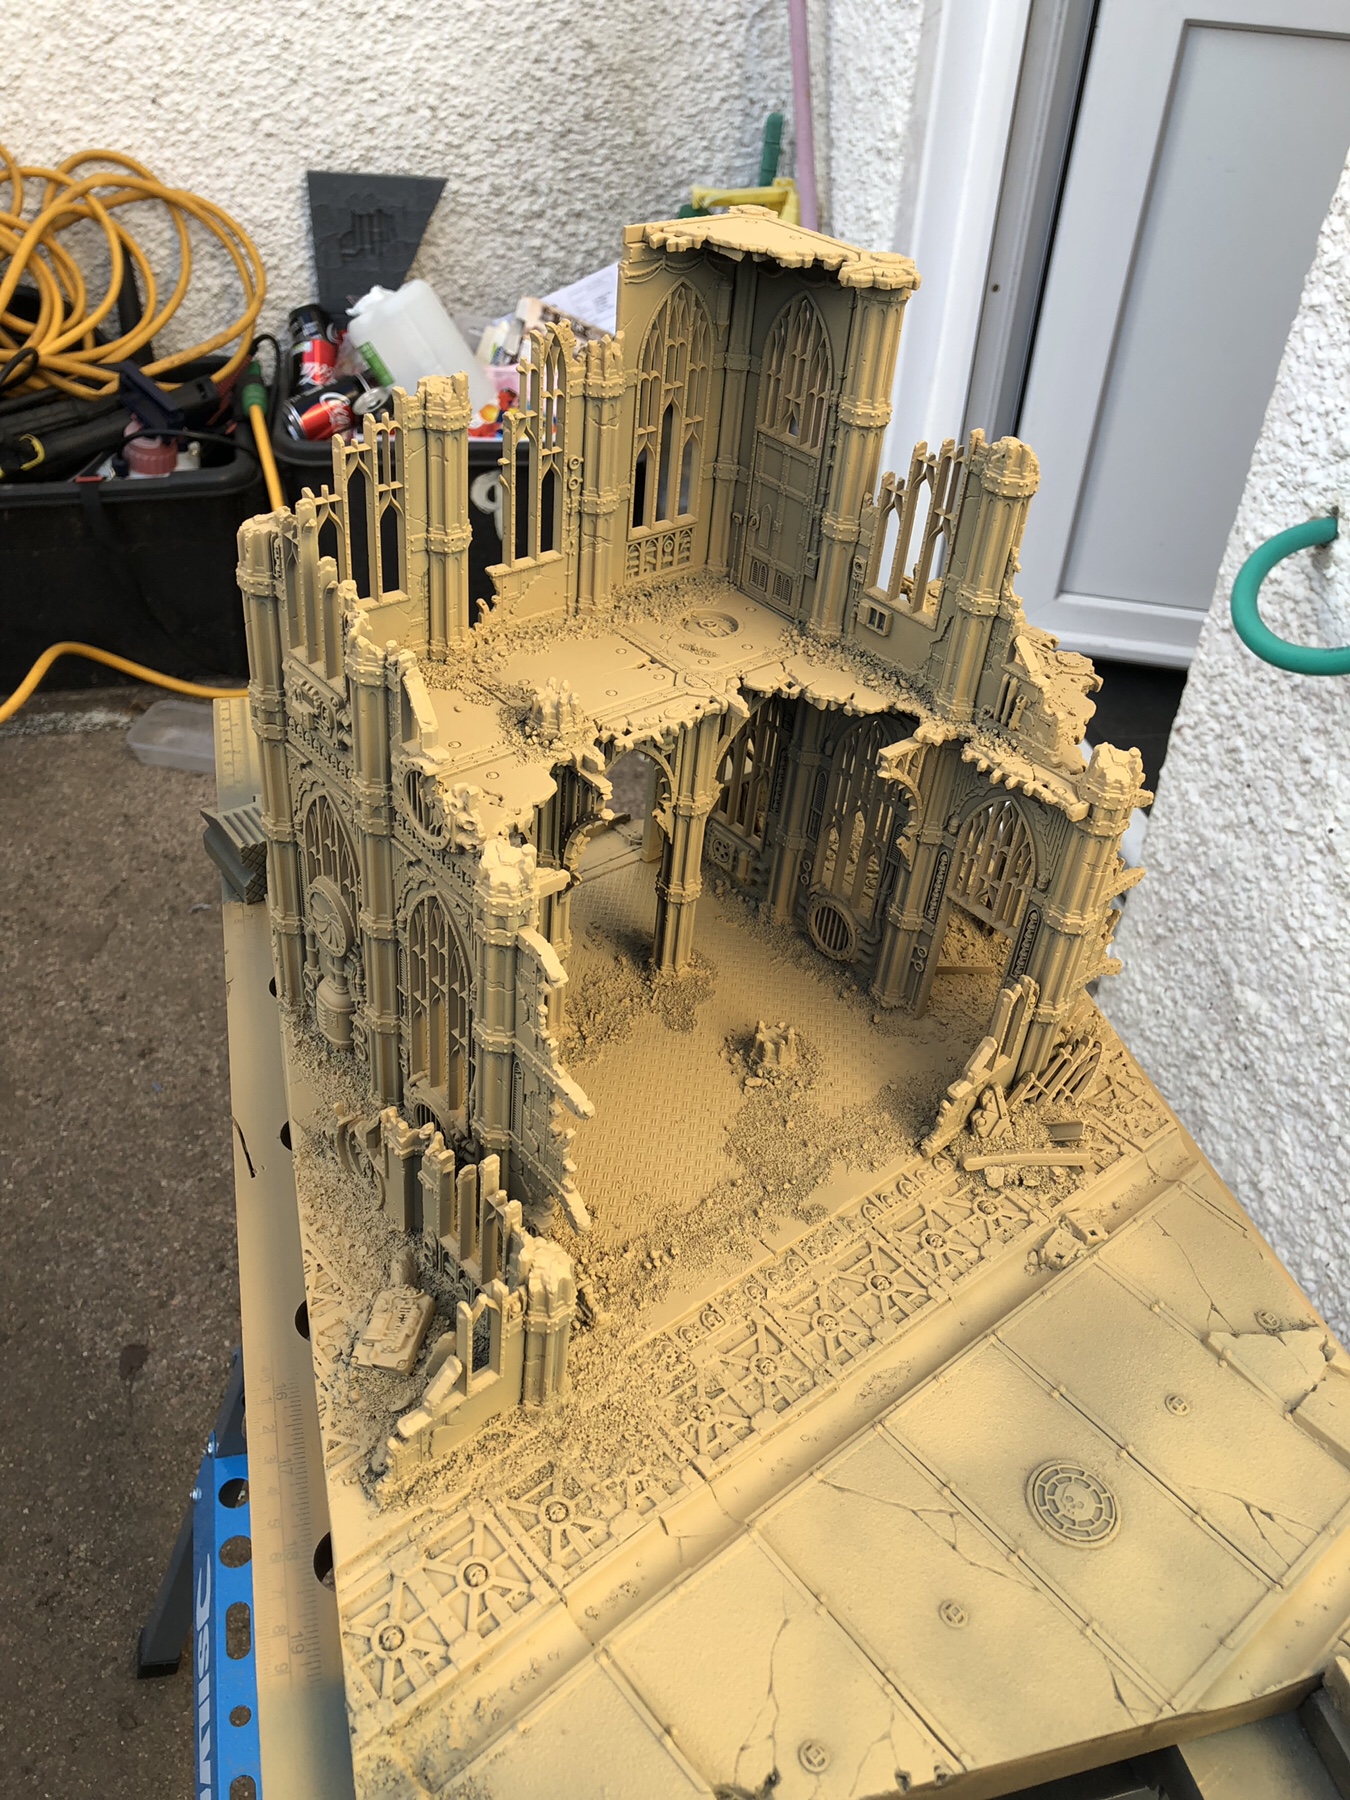
I finally managed to get hold of a can of Zandri Dust spray, so I was able to finish the base colour of the board. Everything was sprayed lightly from above, leaving the grey showing in recessed and in random areas of the walls and roads. The important thing was to make sure it wasn’t uniform, for a more natural appearance.
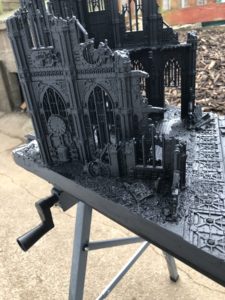
As luck would have it, the sun was setting as I took a picture of my progress, giving me this shot of the building glowing in the sunlight:
From the other side, things looked a lot more washed out:
The marines started to get their base coats and initial airbrush highlights.
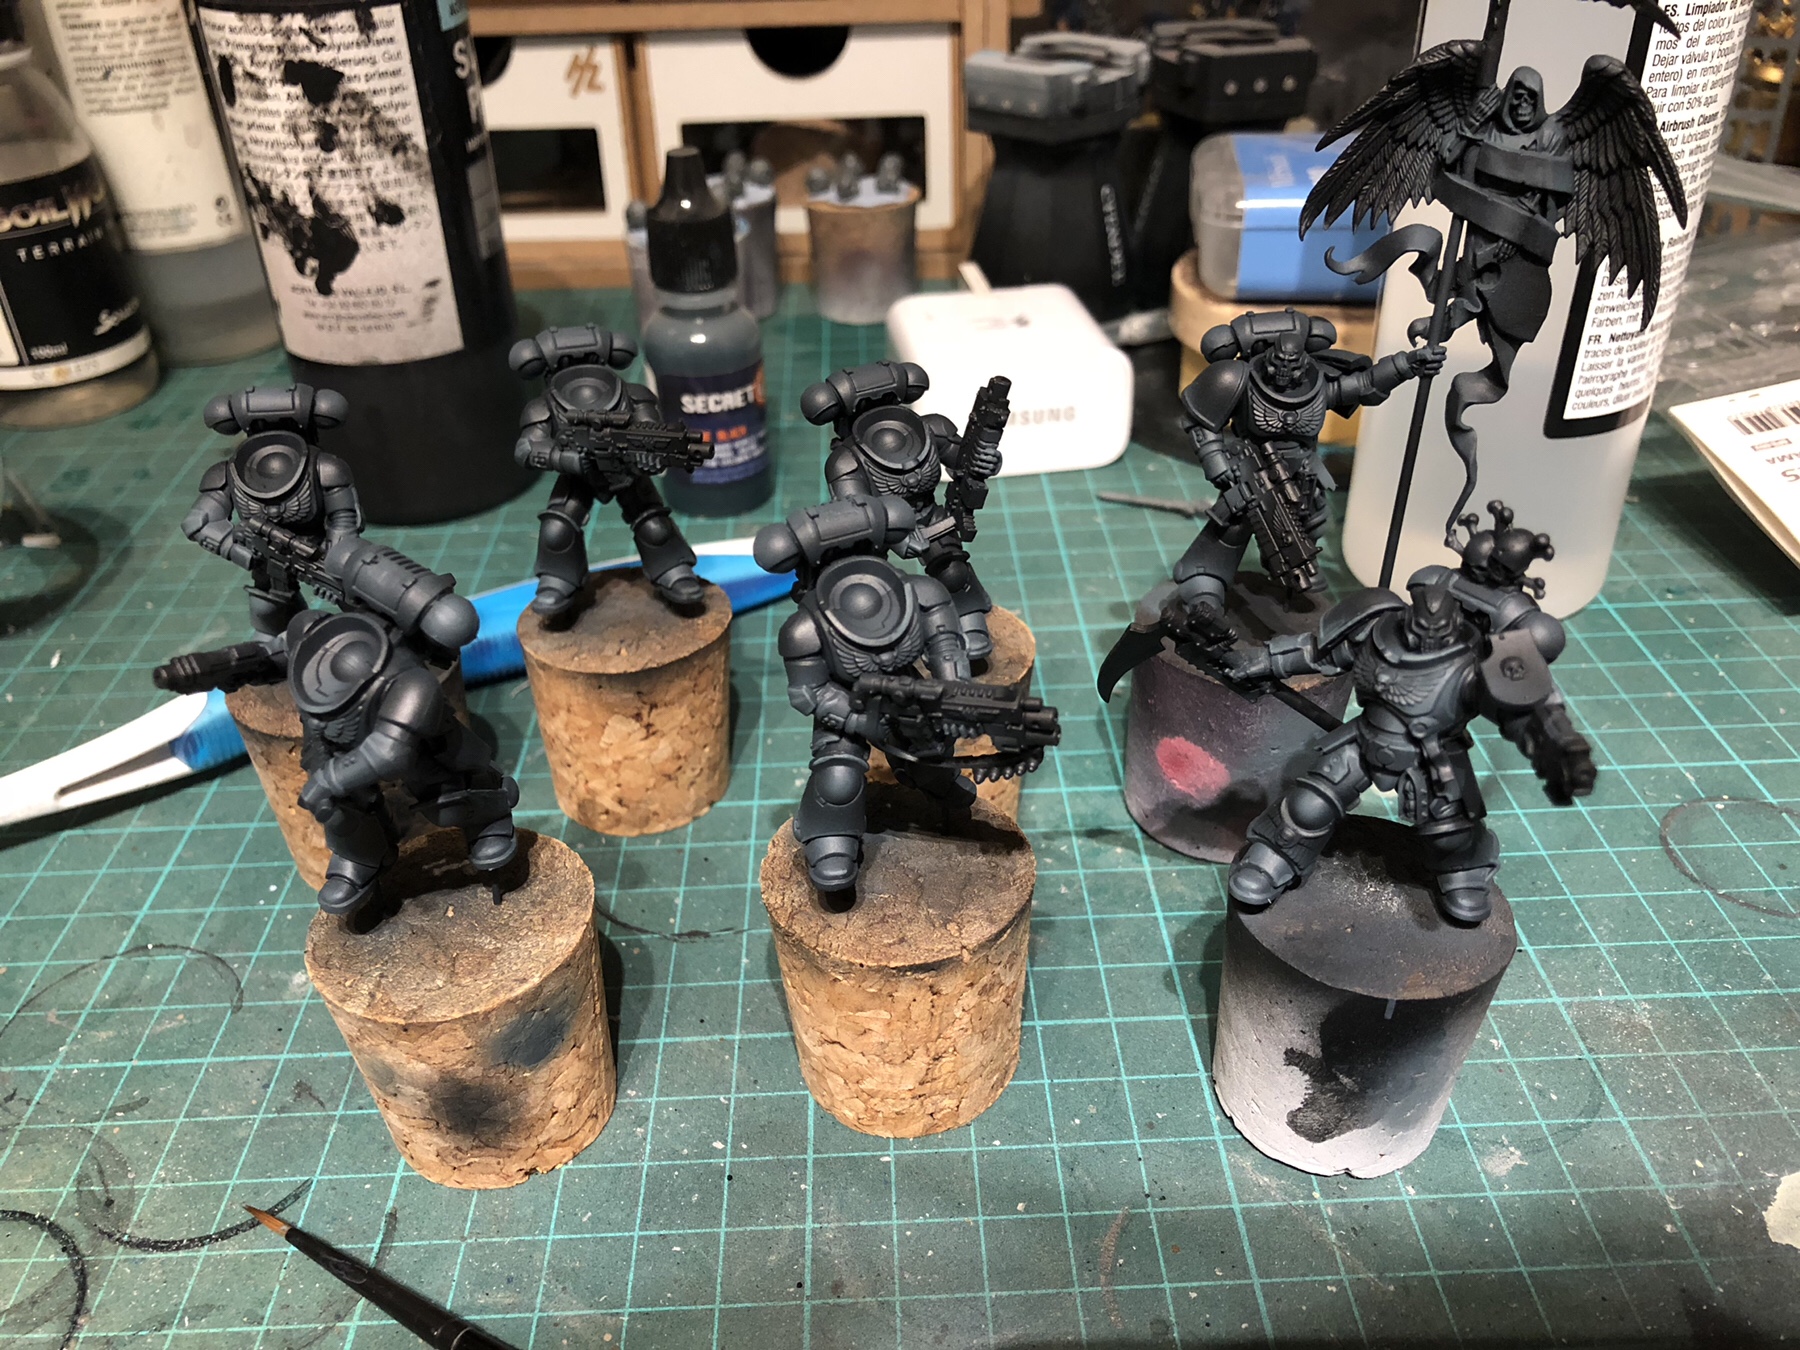
At first I wasn’t too happy with how things were looking, but after sleeping on things, and adding in a few more highlights to the characters, and spots of other colours, I’ve come around to how they look.
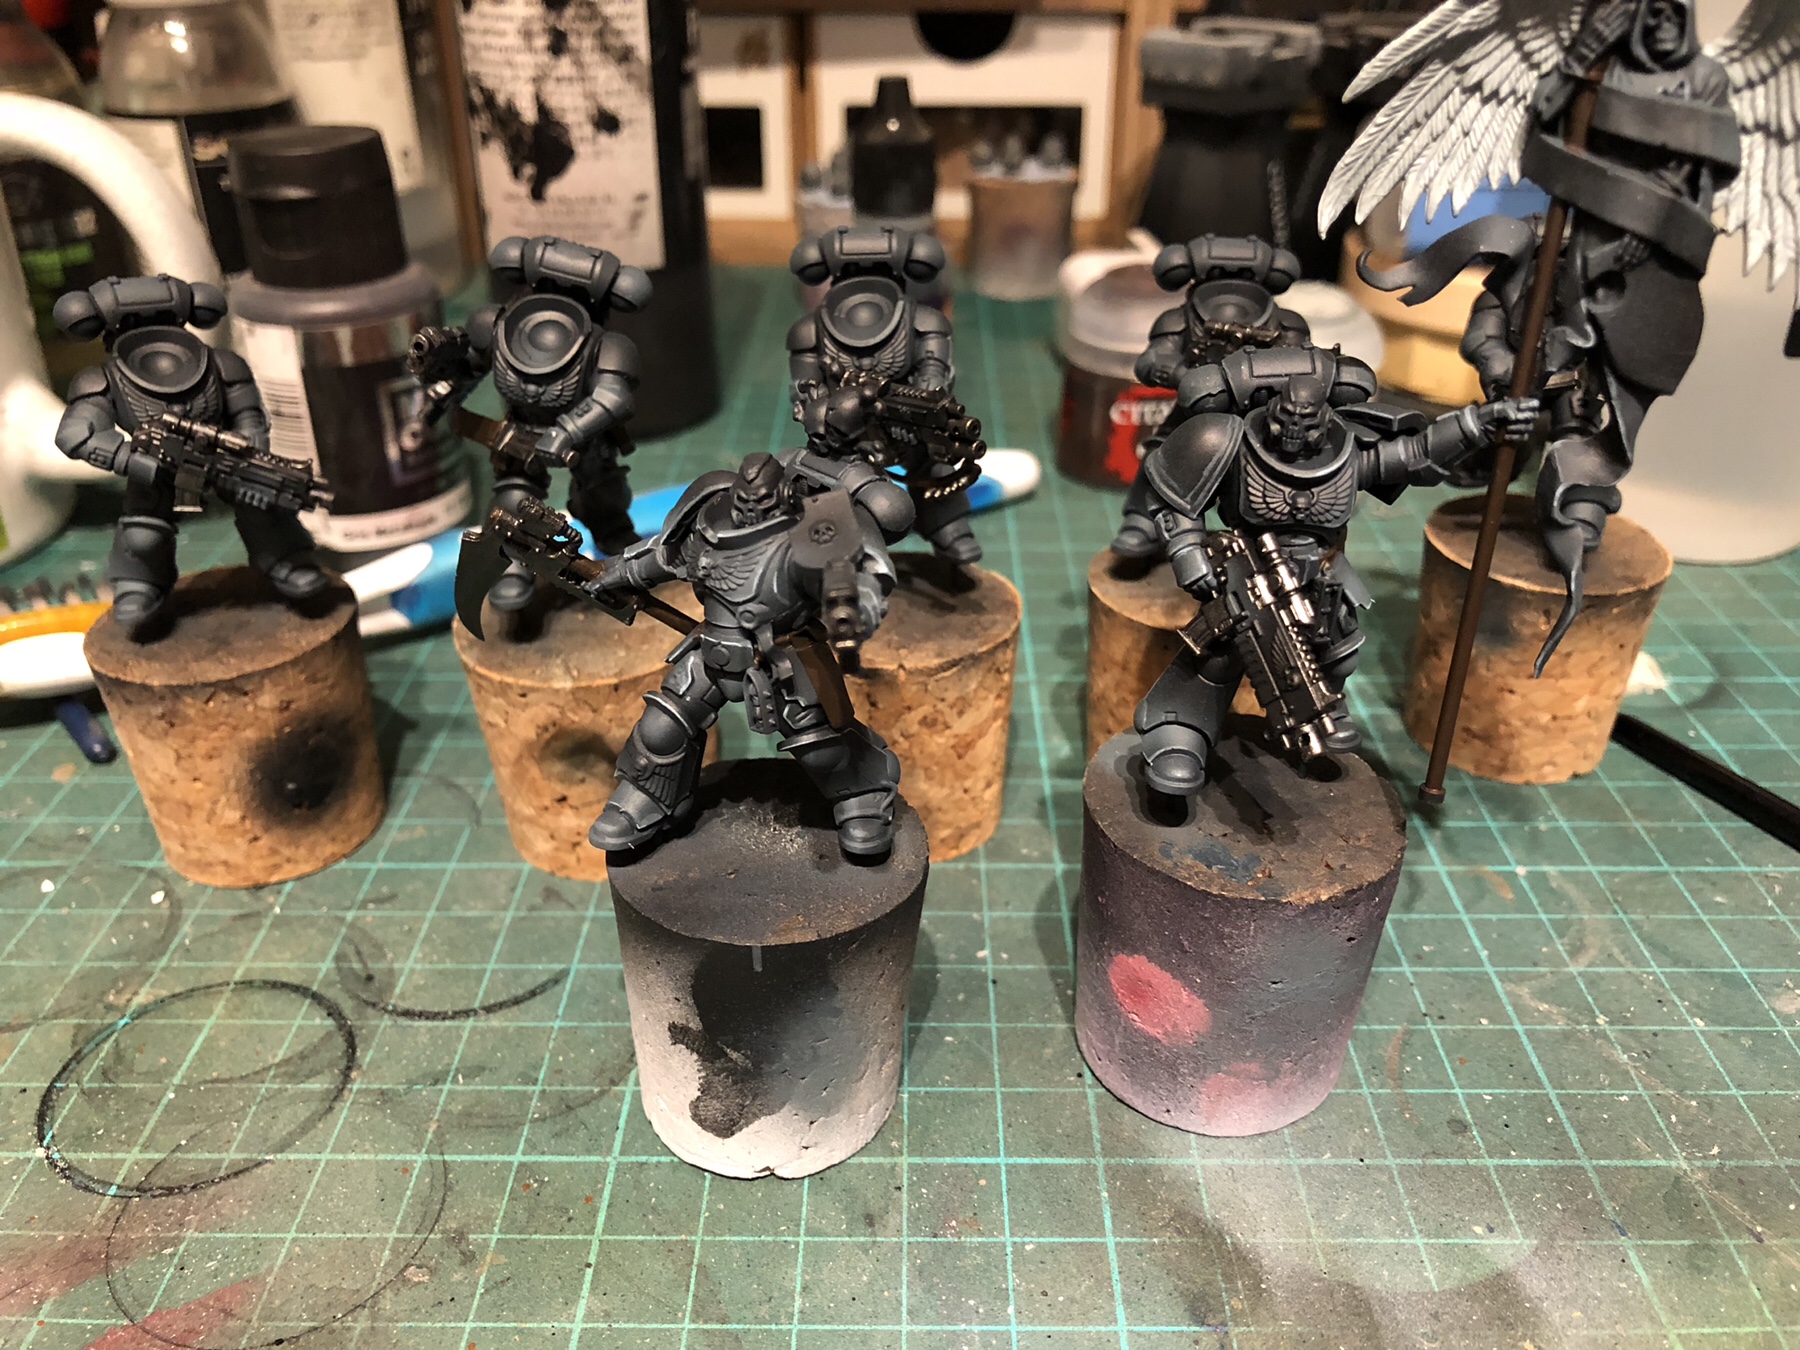
I’ll be giving them an all over wash of black ink, to give more shading, contrast, and richness to the colour. That should help a lot, even before I add the remaining “main” colours.
Over the weekend I plan to build the remaining marines (5 Intercessors, plus 5 Hellblasters), and the Dreadnought. If I can get the black armour finished on everything in the next few days, it frees me up to concentrate on other details and finishing the board.
Only 36 days to go!
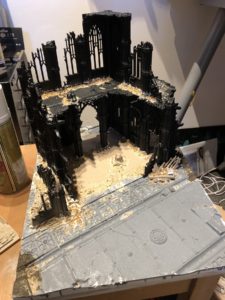
An important milestone has been reached in my Armies on Parade entry – the majority of board construction is finished, and painting has begun! It’s still only a few layers of paint, but every bit counts when there’s only 39 days to go!
I primed the main building separate from the rest of the board, so I could reach tricky areas easier. I then glued it to the board.

As the Sector Imperialis boards have a tonne of moulded detail, I had to find a way of hiding gaps between the walls and the ground. This was done using a combination of Polyfilla, textured paste, and various grits of sand and gravel. I managed to enlist a couple of small helpers with this, asking them to take some of the grit and (literally) throw it around the building — something which they quite enjoyed!


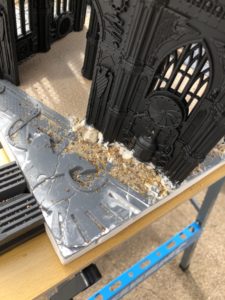


Once this initial layer was dry, I added some larger dollops of filler, and pressed a variety of objects into them: leftover floor sections, pieces clipped from spare wall sections, plastic H-beams, and a number of skulls. These then received the same shower of grits. These represent piles of larger rubble which have been pushed out of the way to make the building somewhat usable as shelter or storage.
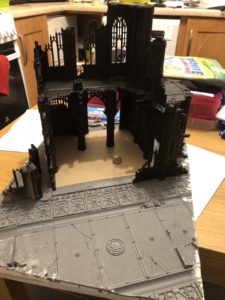
The next morning, once the filler had dried overnight, all of the grit was covered in Terrain Fixer and left to dry for a couple of hours. Then, it was on to priming! The pictures below show the board from all sides, so you can see the details.

Yes, I intend to fix that gap…
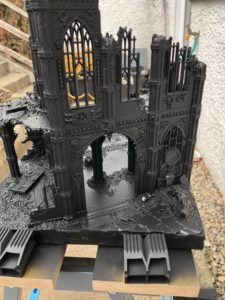


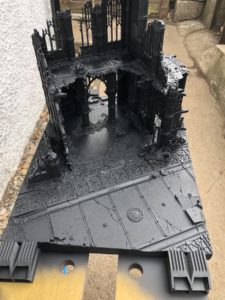

Priming the rest of the board finished off the can of Chaos Black I’d started with the main building. With the undercoat dry, I started the first layer, based on Peachy’s Kill Team board recipe, by spraying everything Mechanicus Standard Grey. Oddly, this only took about a third of a can.

With the main board making progress, it was time to move on to the other elements. the barrels, crates, and barricades all received a coat of Mechanicus Standard Grey, apart from two of the barrels which were sprayed Corax White.

But an Armies on Parade board needs an army, doesn’t it? I finished assembling the first Inceptor squad, before priming them along with the Lieutenant and Ancient I’d previously made. The shoulder pads and helmets are separate for now, as they’ll be primed a lighter colour.

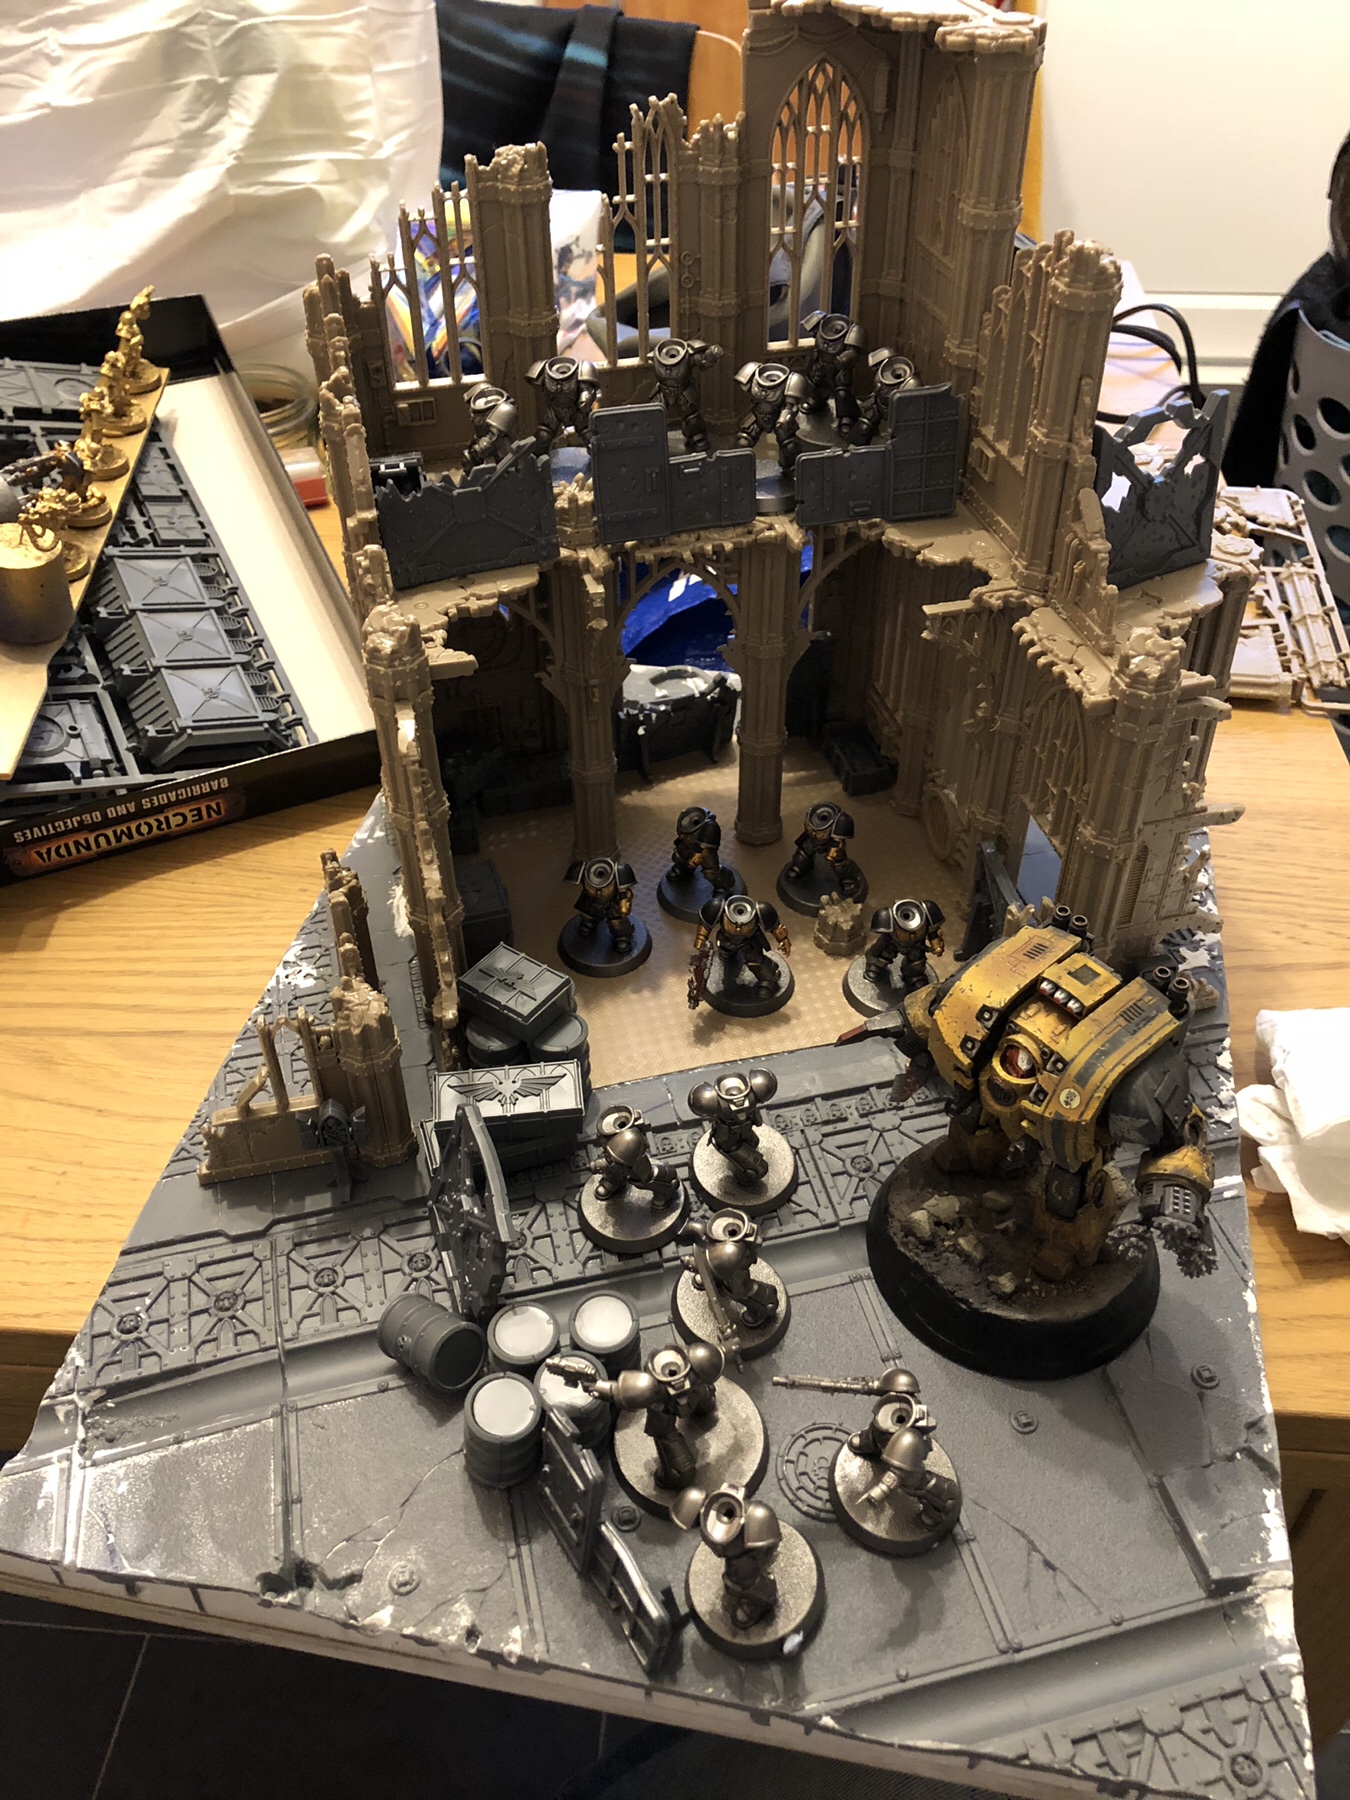
I laid out the rest of the scatter terrain I envisioned, and used some stand-in miniatures to approximate how I wanted the army itself to be displayed. All in all, I’m pretty pleased with how things are looking. Now I’ve just got to finish everything! But at least I have a plan to work to…

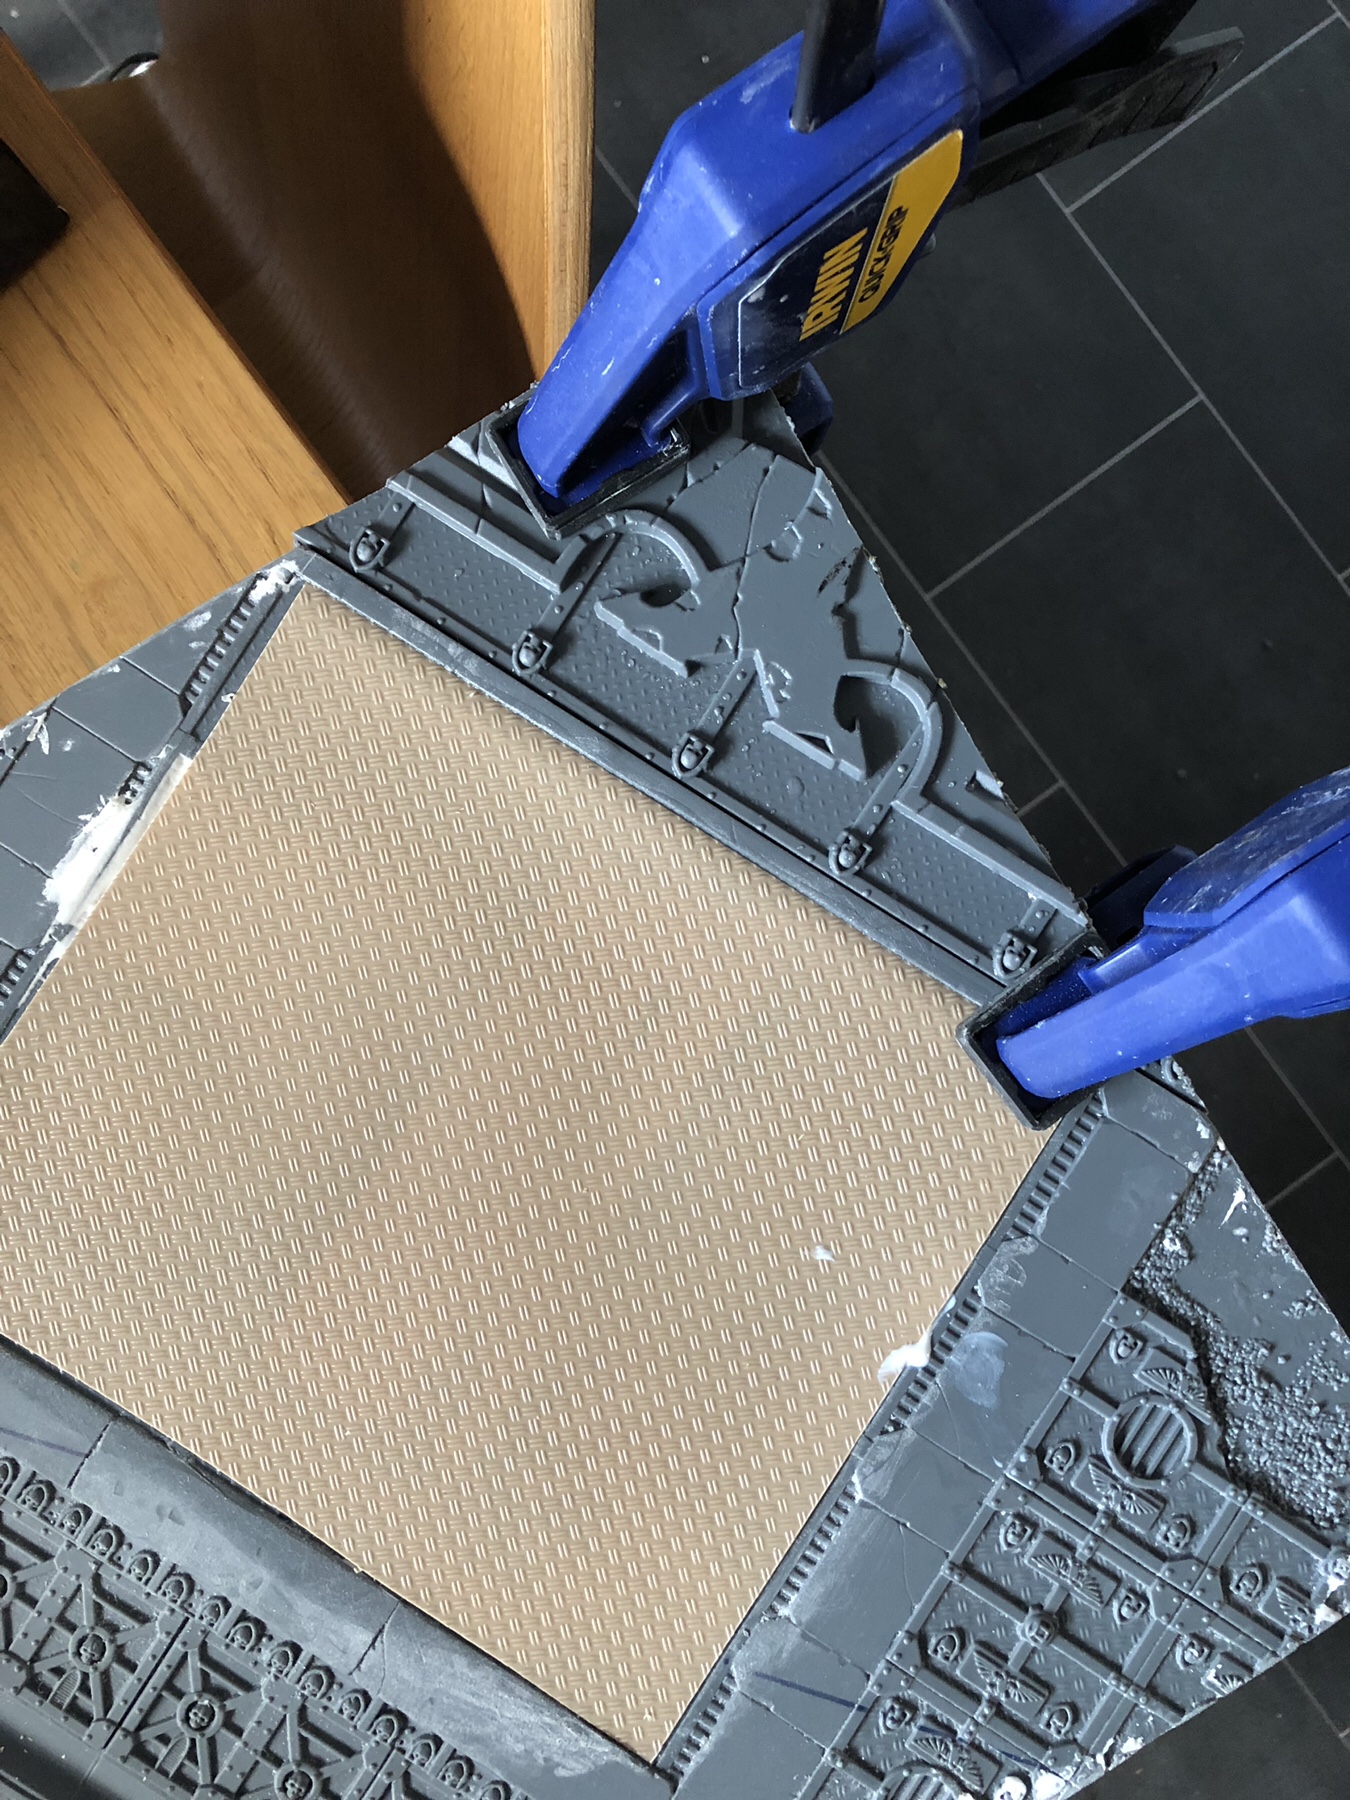
I’ve finally filled in the missing corner. Everything has been cut, glued, clamped, and filled… I’ve just got to sand everything down to size.

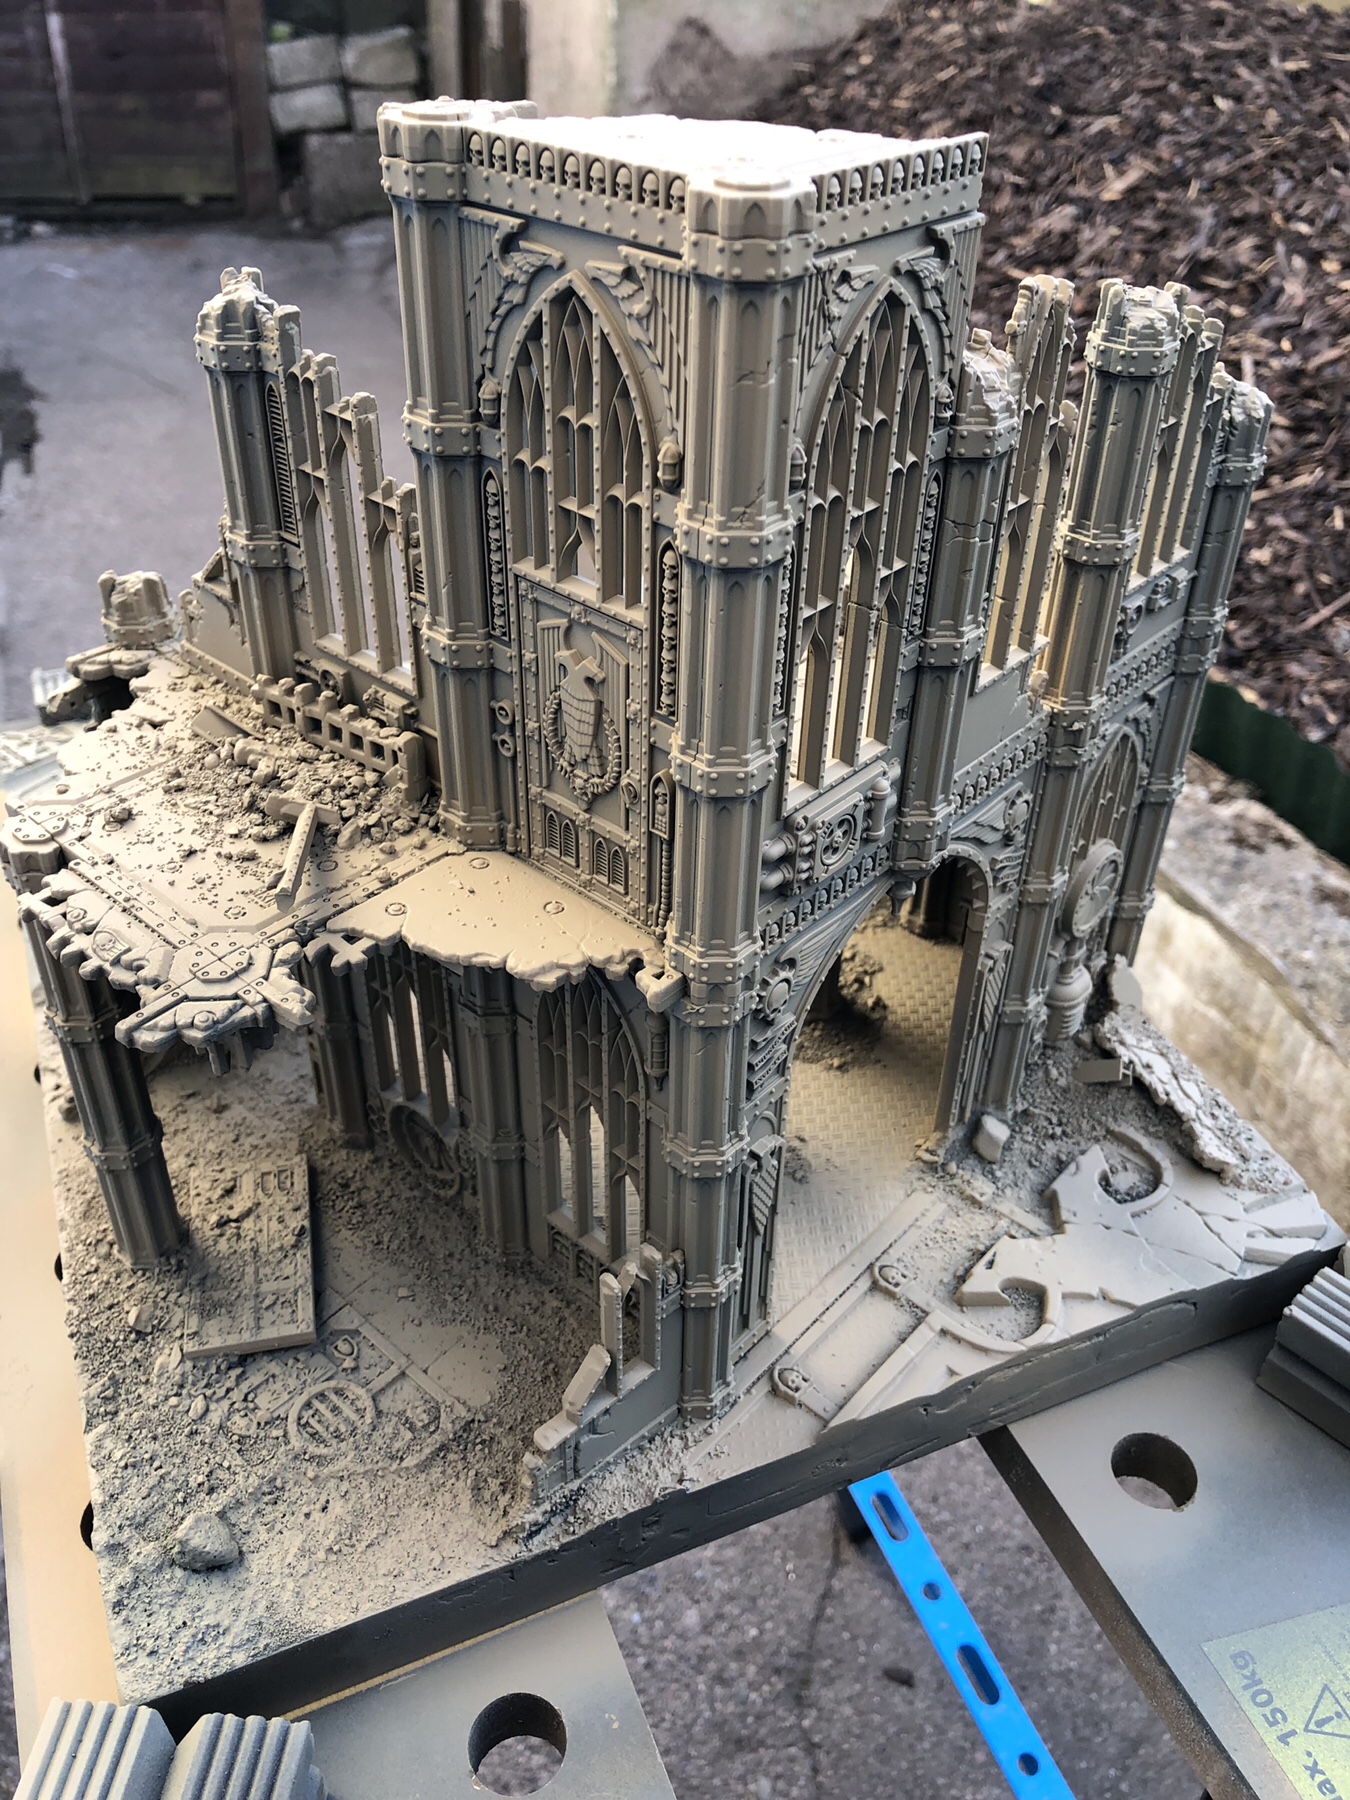
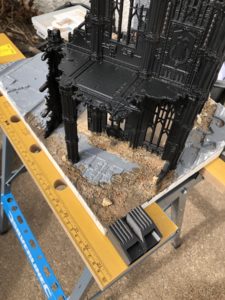
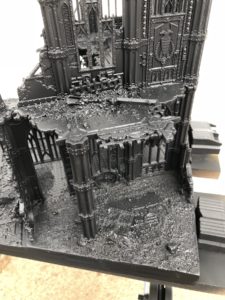
Last, but not least, the main building feature is 99% complete. I might add a couple more bits of broken columns, and there’ll be some rubble added to the floor on the board, but otherwise its ready for the next stage.
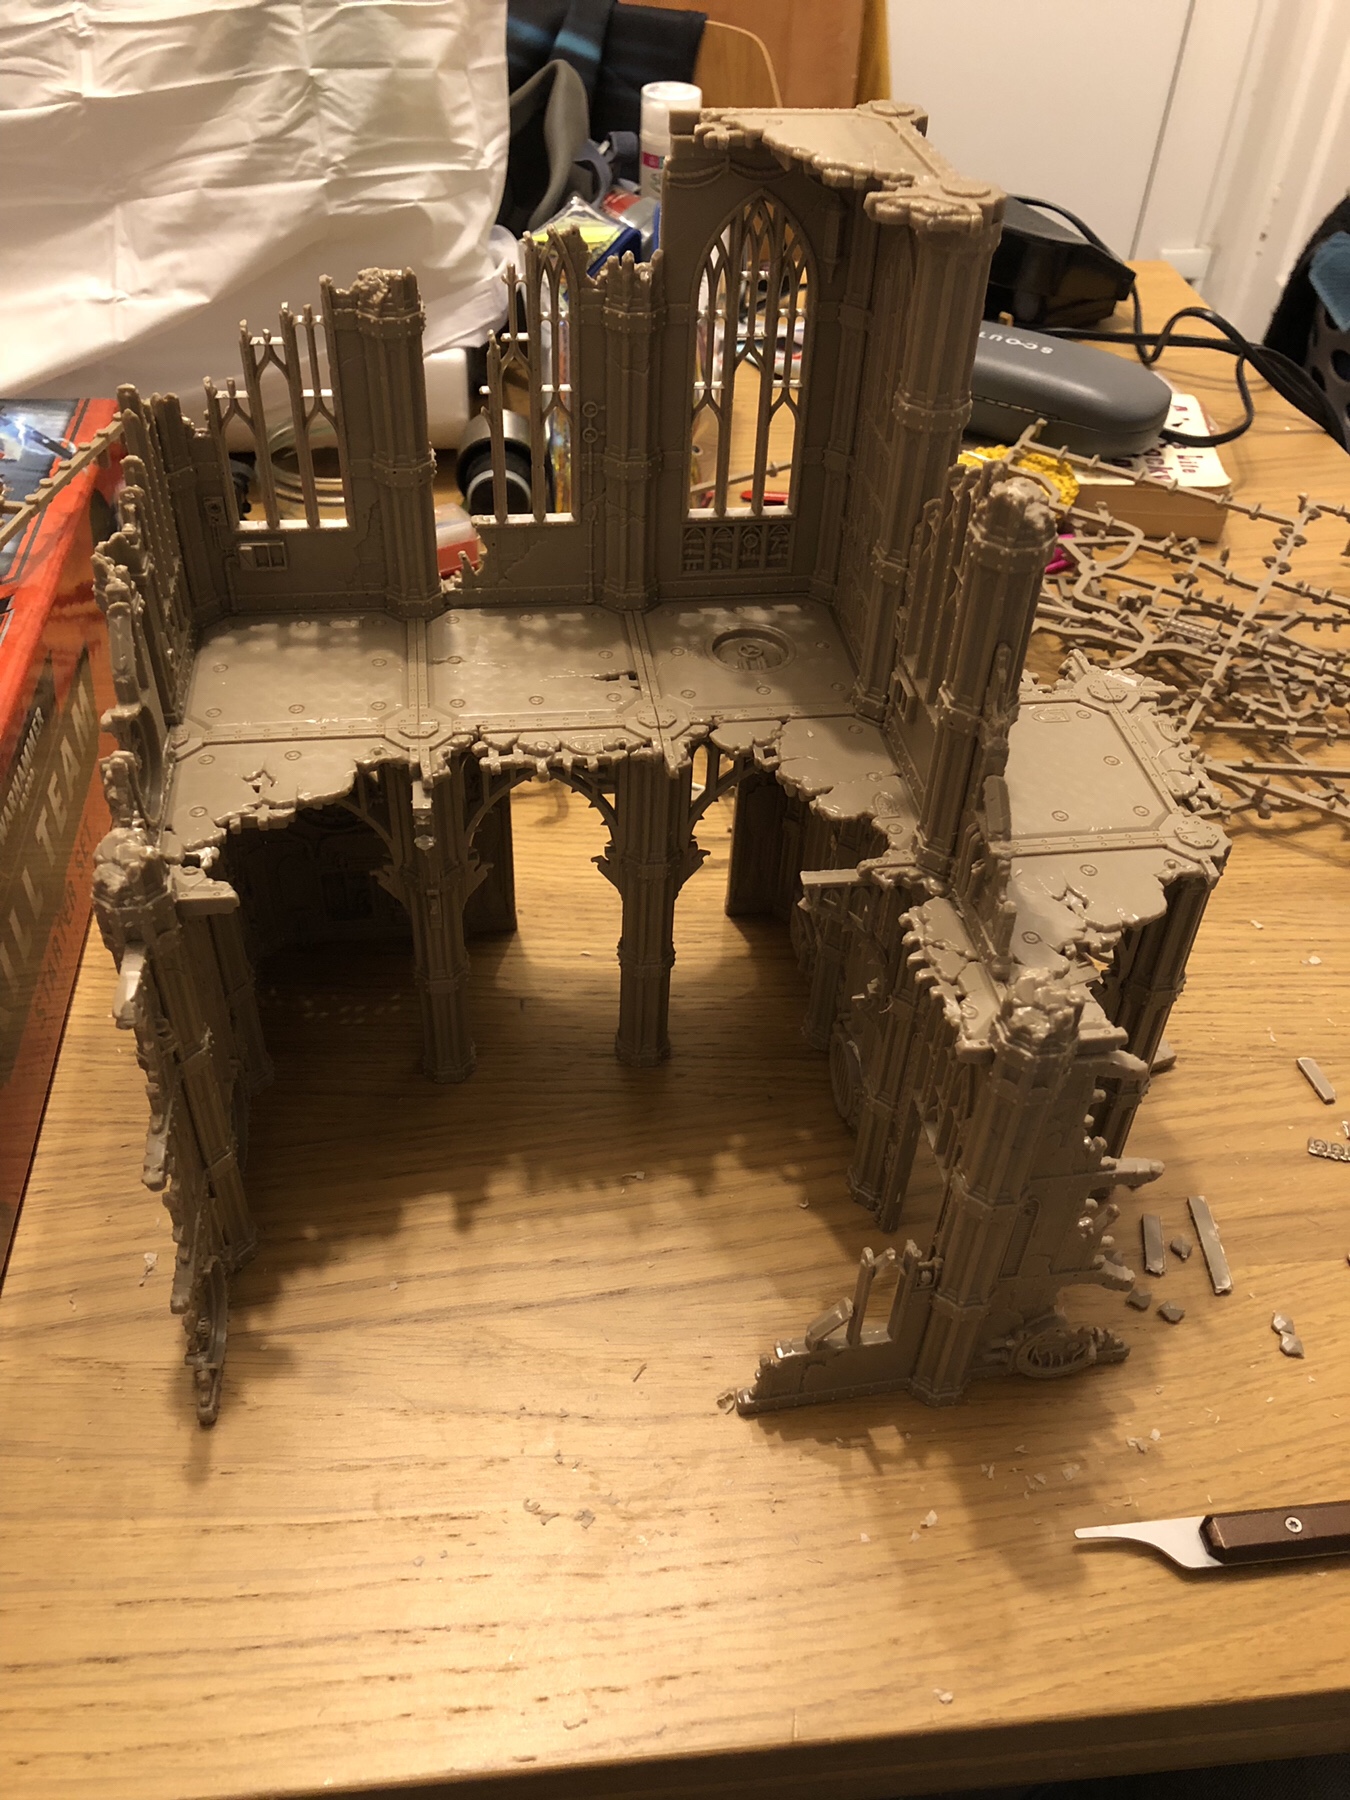

It’s bigger than I realised during assembly, running nearly the full width of the board, even when set at a diagonal. It’s almost amazing how the scale seems to change as soon as it’s placed on the board. Suddenly it becomes this huge, looming, monster towering over the battlefield.
I’ll be adding rubble and scatter terrain to break up the rest of the board, and make it look more “lived in”. Everything will be integrated using texture paint and extra grit and sand for variation. That’s the next task.
44 days to go.
I’ve been slowly chipping away at my Armies on Parade board over the last few days (when I’ve resisted the siren song of Warcraft…). The army itself is another matter, but that’s for another day.
Basic construction of the base has been finished, apart from that one empty corner. I’ve got a couple of ideas of how to fill it, I just haven’t settled on an option yet.
I started off by gluing the section cut from the Realm of Battle board to the plywood, and clamping everything together. Once the glue dried, I covered the sides and holes in the board with a hefty amount of Polyfilla.
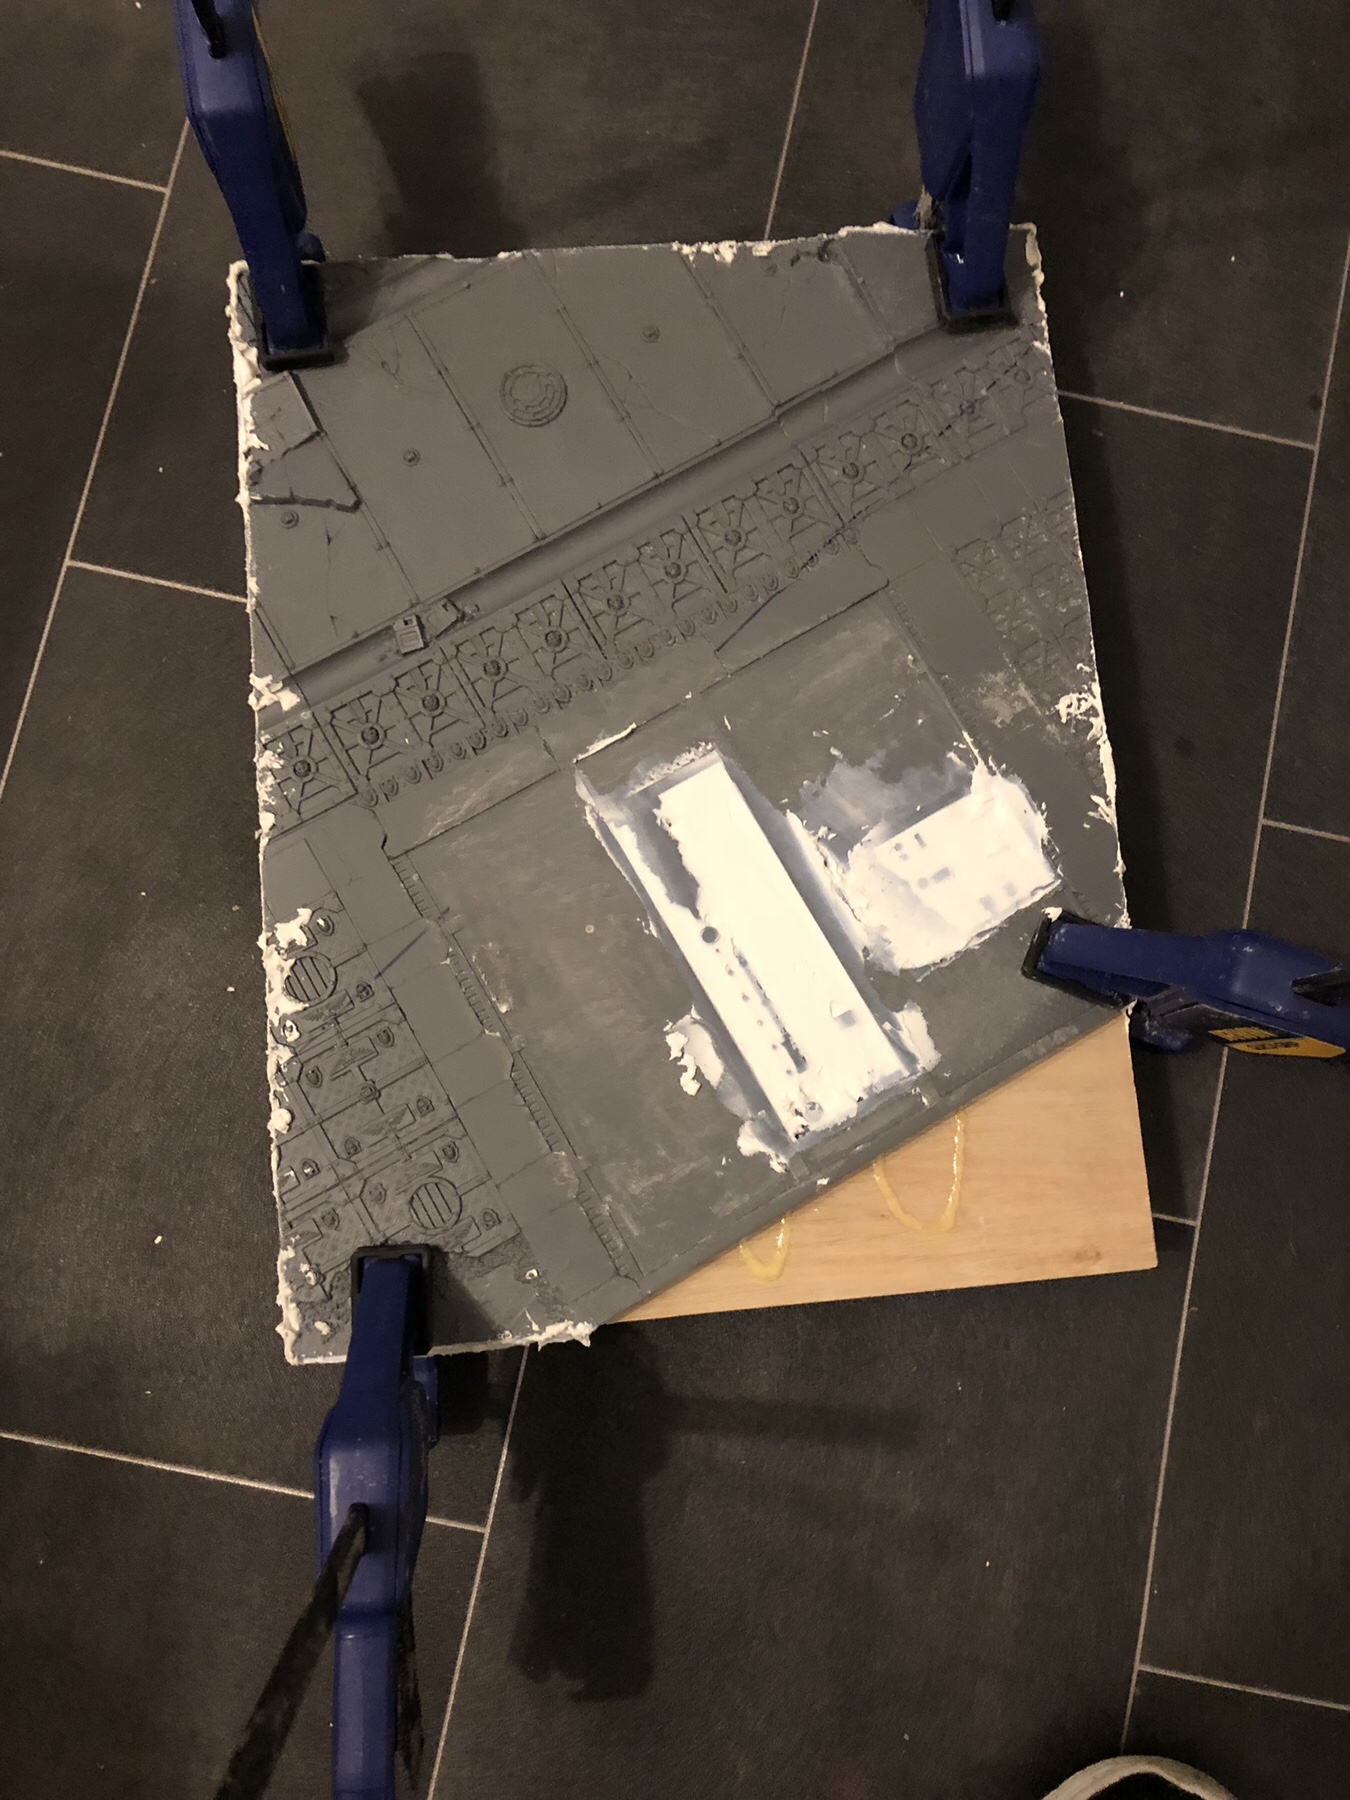

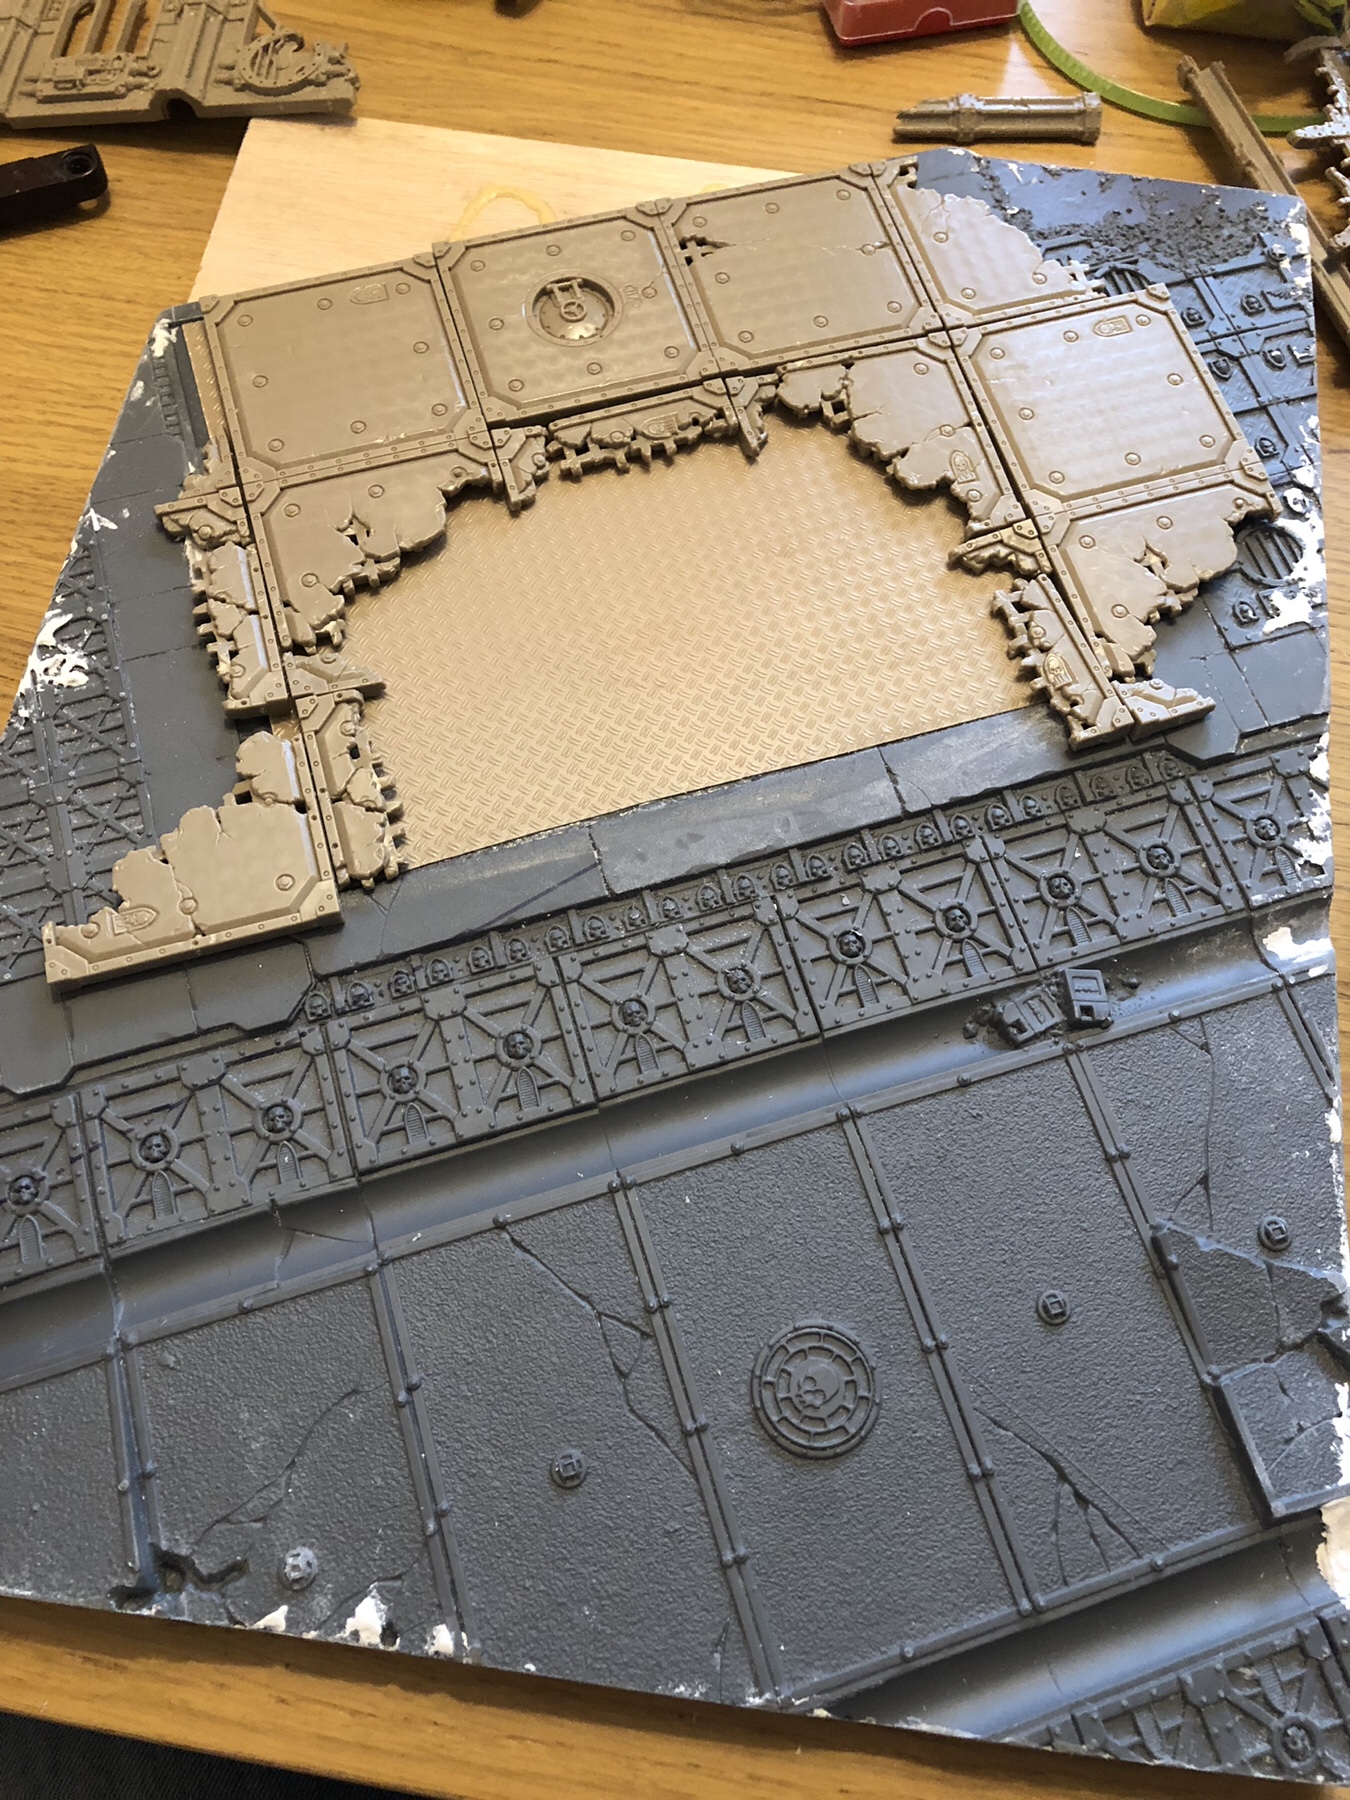
After leaving everything overnight to cure, I used an electric sander to smooth everything off and trim off the excess plastic. A new floor for the main building area was created out of textured plasticard.
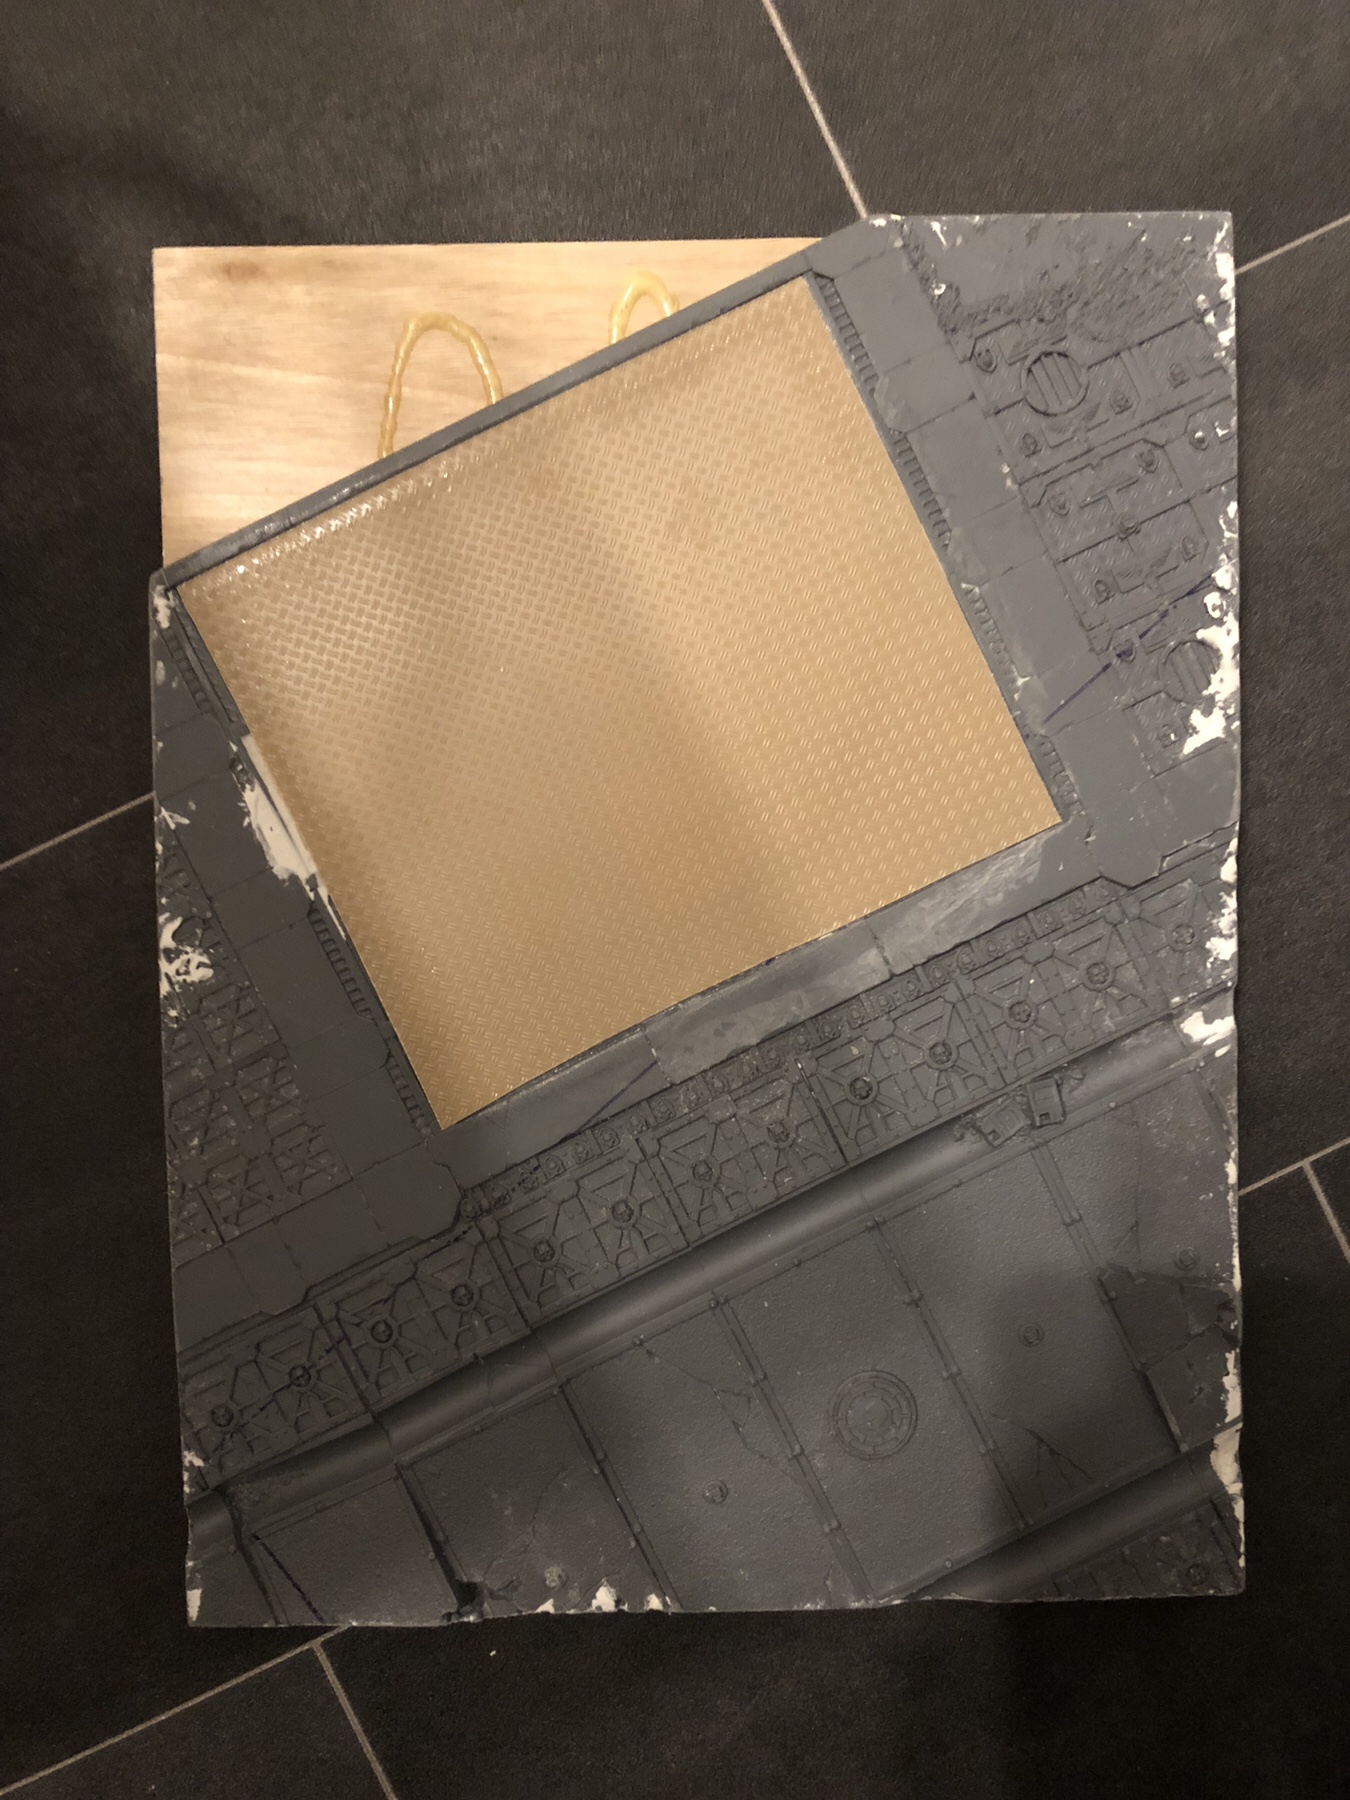

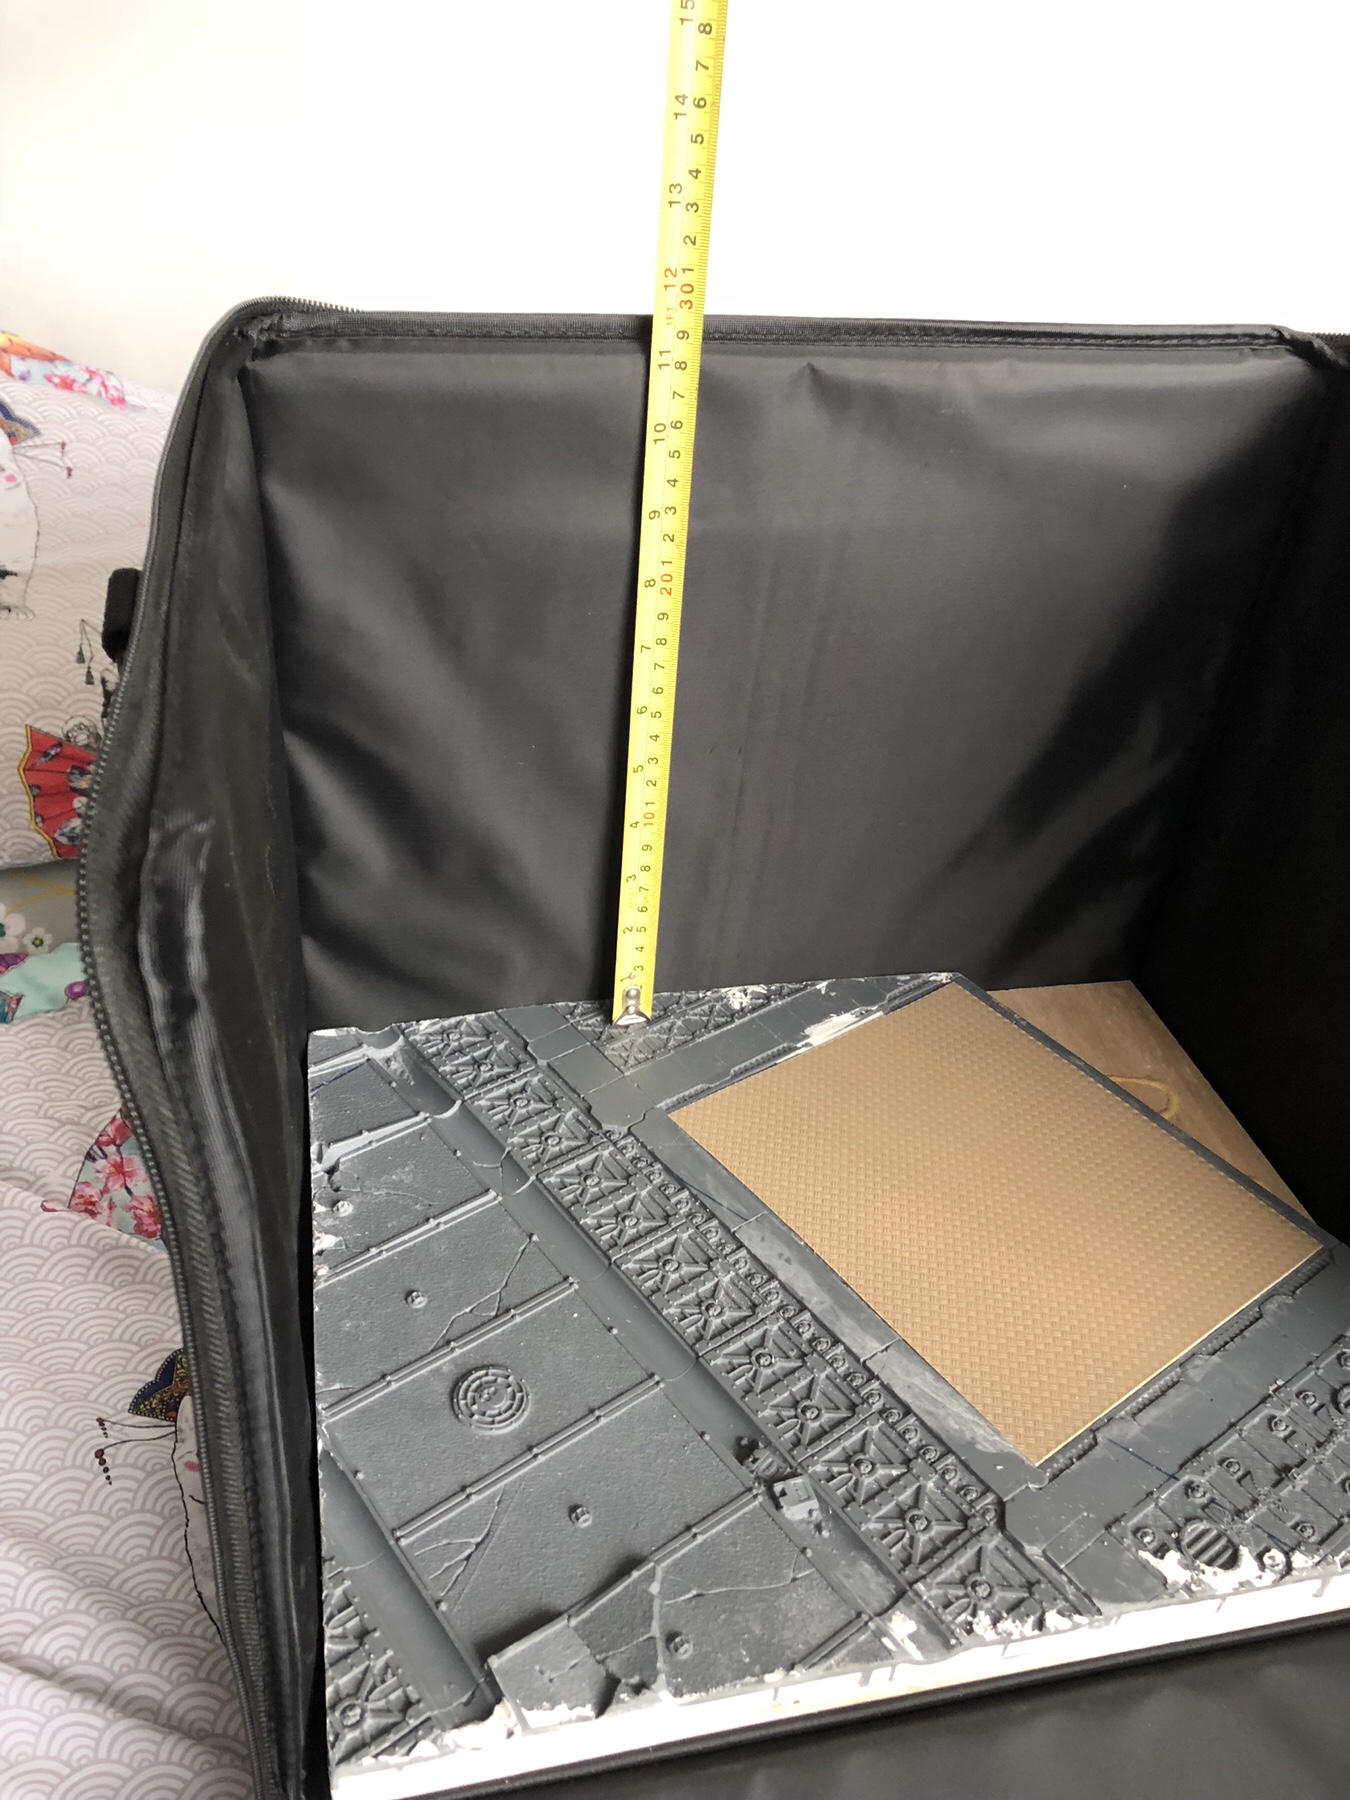
Time to check everything would fit into the case, and to see how tall I could make the buildings. It turned out I had 11.5 inches in height I could use, which was plenty. The new Sector Imperialis buildings are ~5 inches per level, so I could comfortably fit a two-story building into the case.

Now it’s on to the fun stuff – the buildings! I started by laying out a rough floor-plan, to see how many sections I needed per side. I ended up not using all of the sections on the left side.

With two sides built, things are starting to take shape. I removed the door built into one of the wall sections, to give another “access point” to the building.
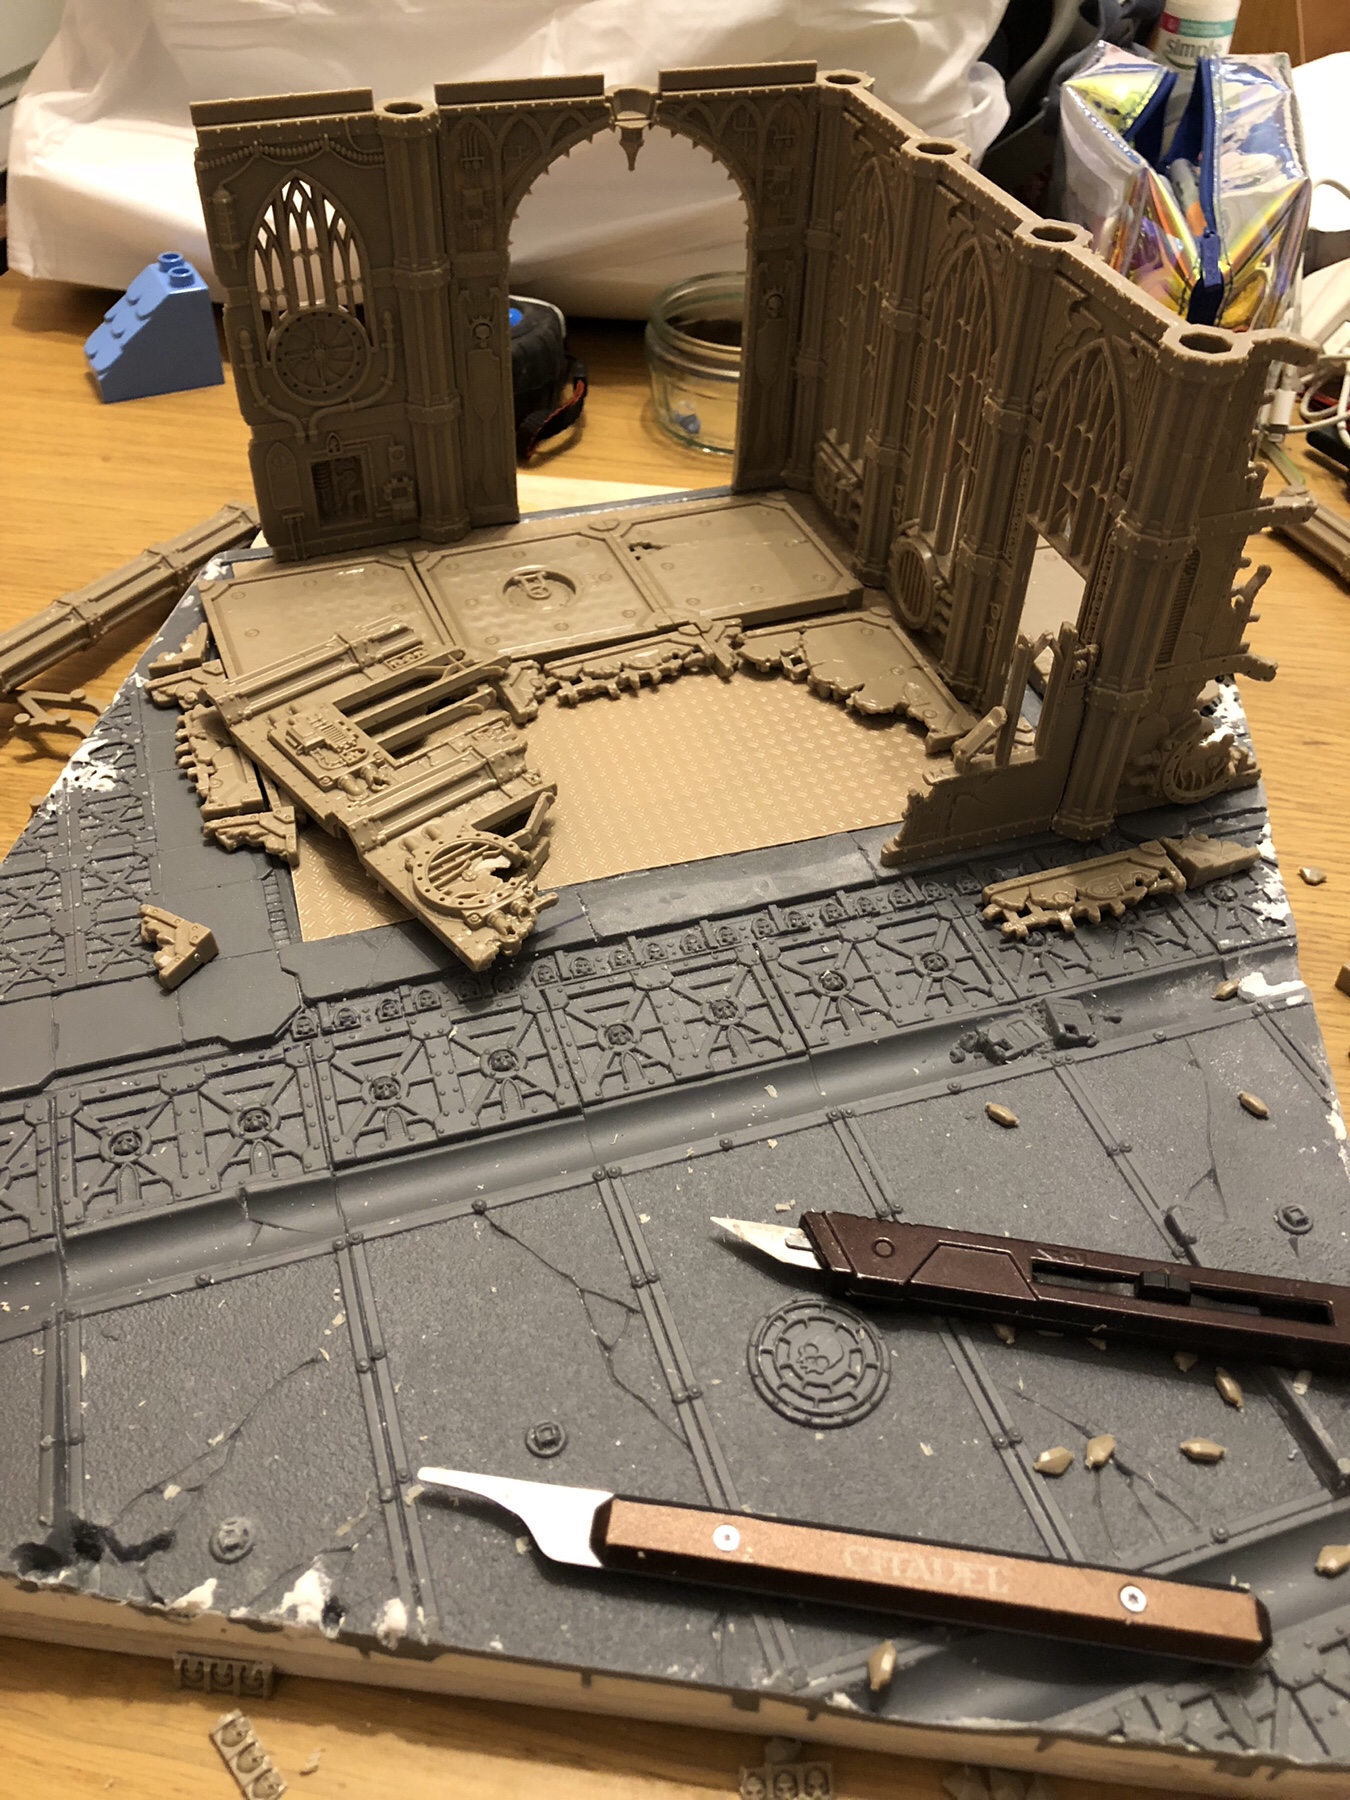

Here I’m test fitting the upper floor, to make sure everything is square. As I’d been using a spare floor section to try line-up the wall sections throughout, things were pretty good.
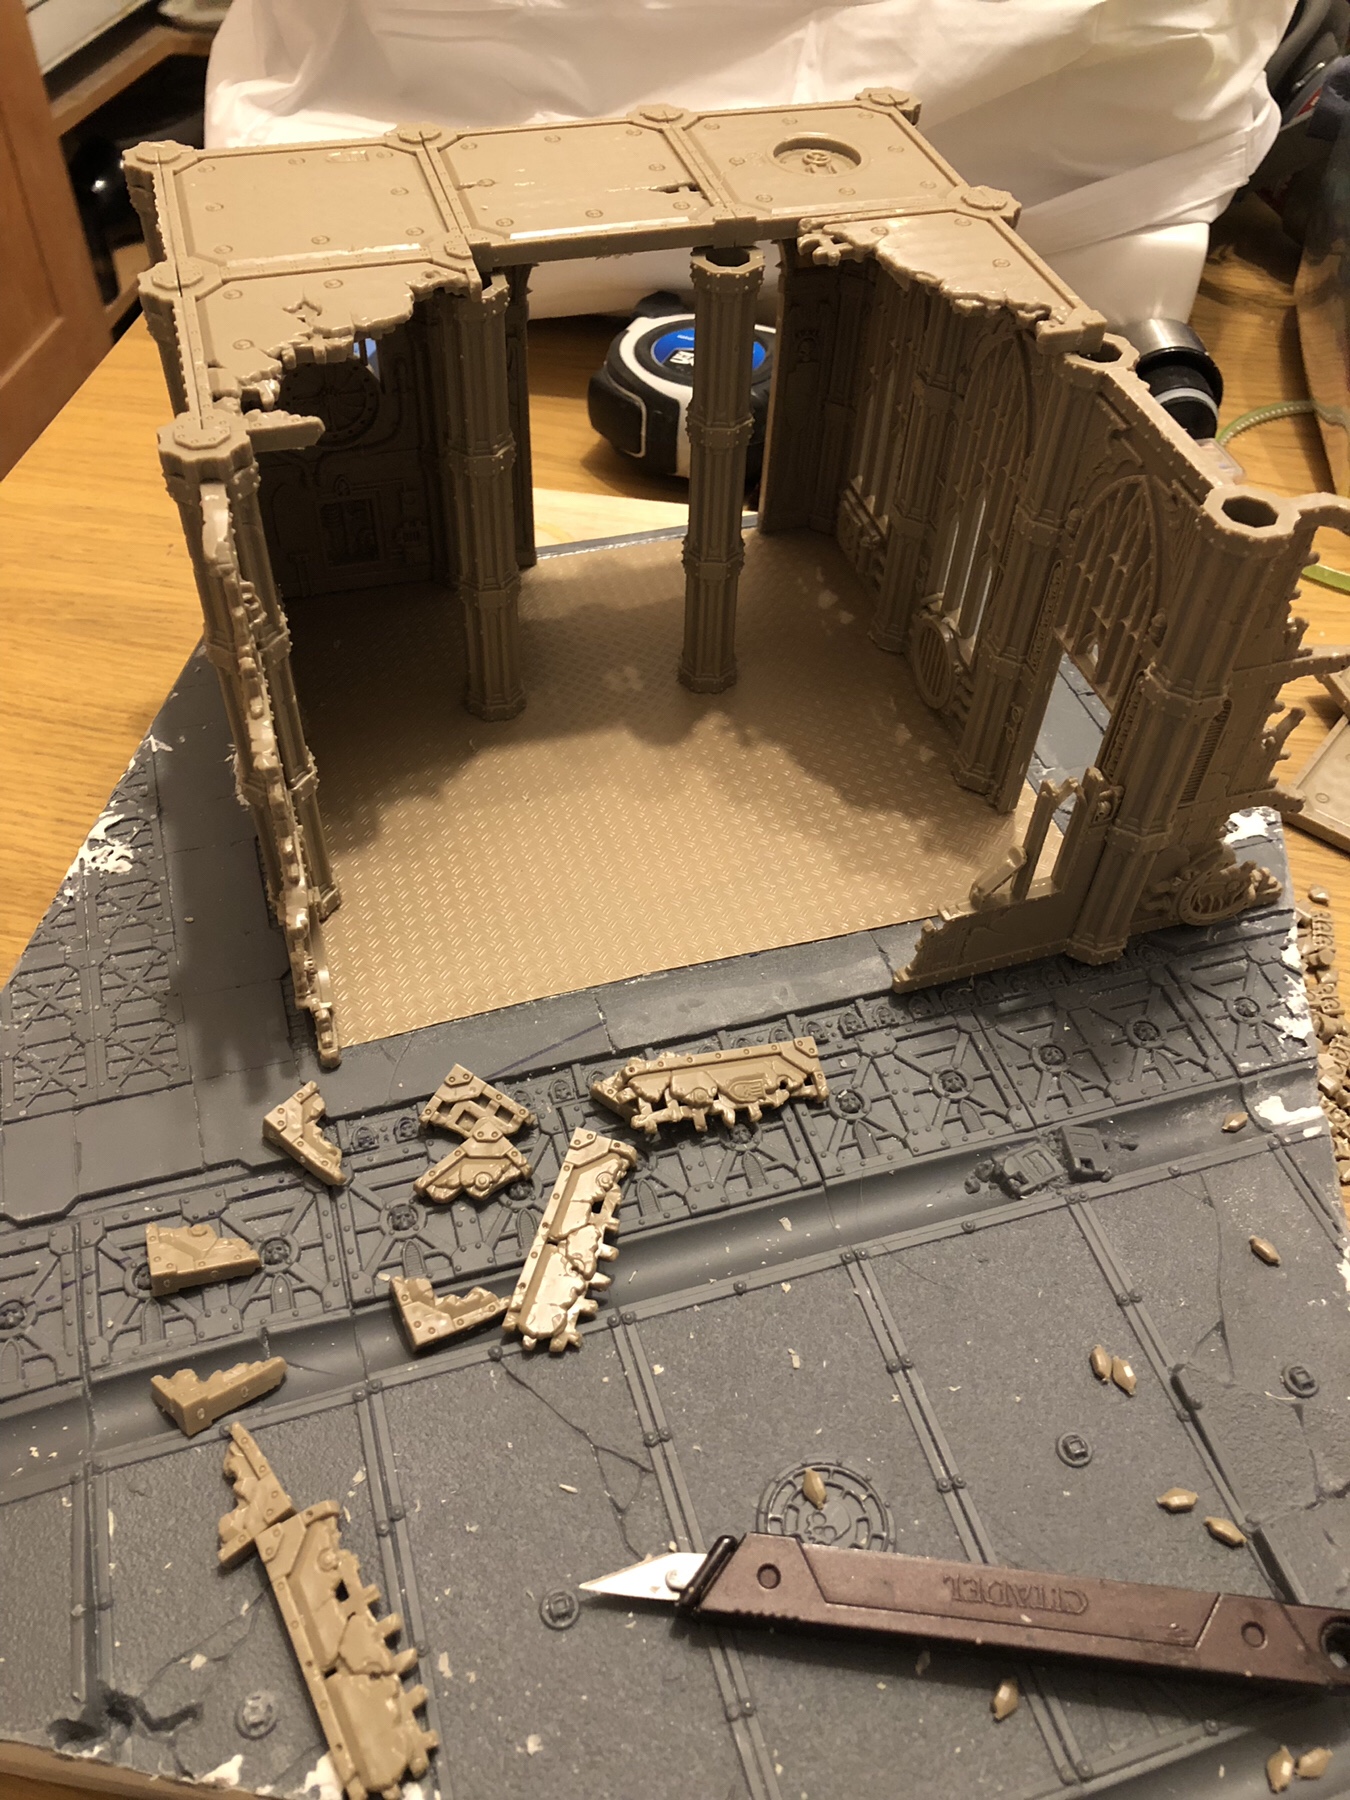

By this point I was starting to think about the walls on the upper floor, but it was time to pack everything away for the night. Shortly after taking this picture, I realised I had to rip the column tops from the right-side wall as I remembered I was going to extend the floor out that way.
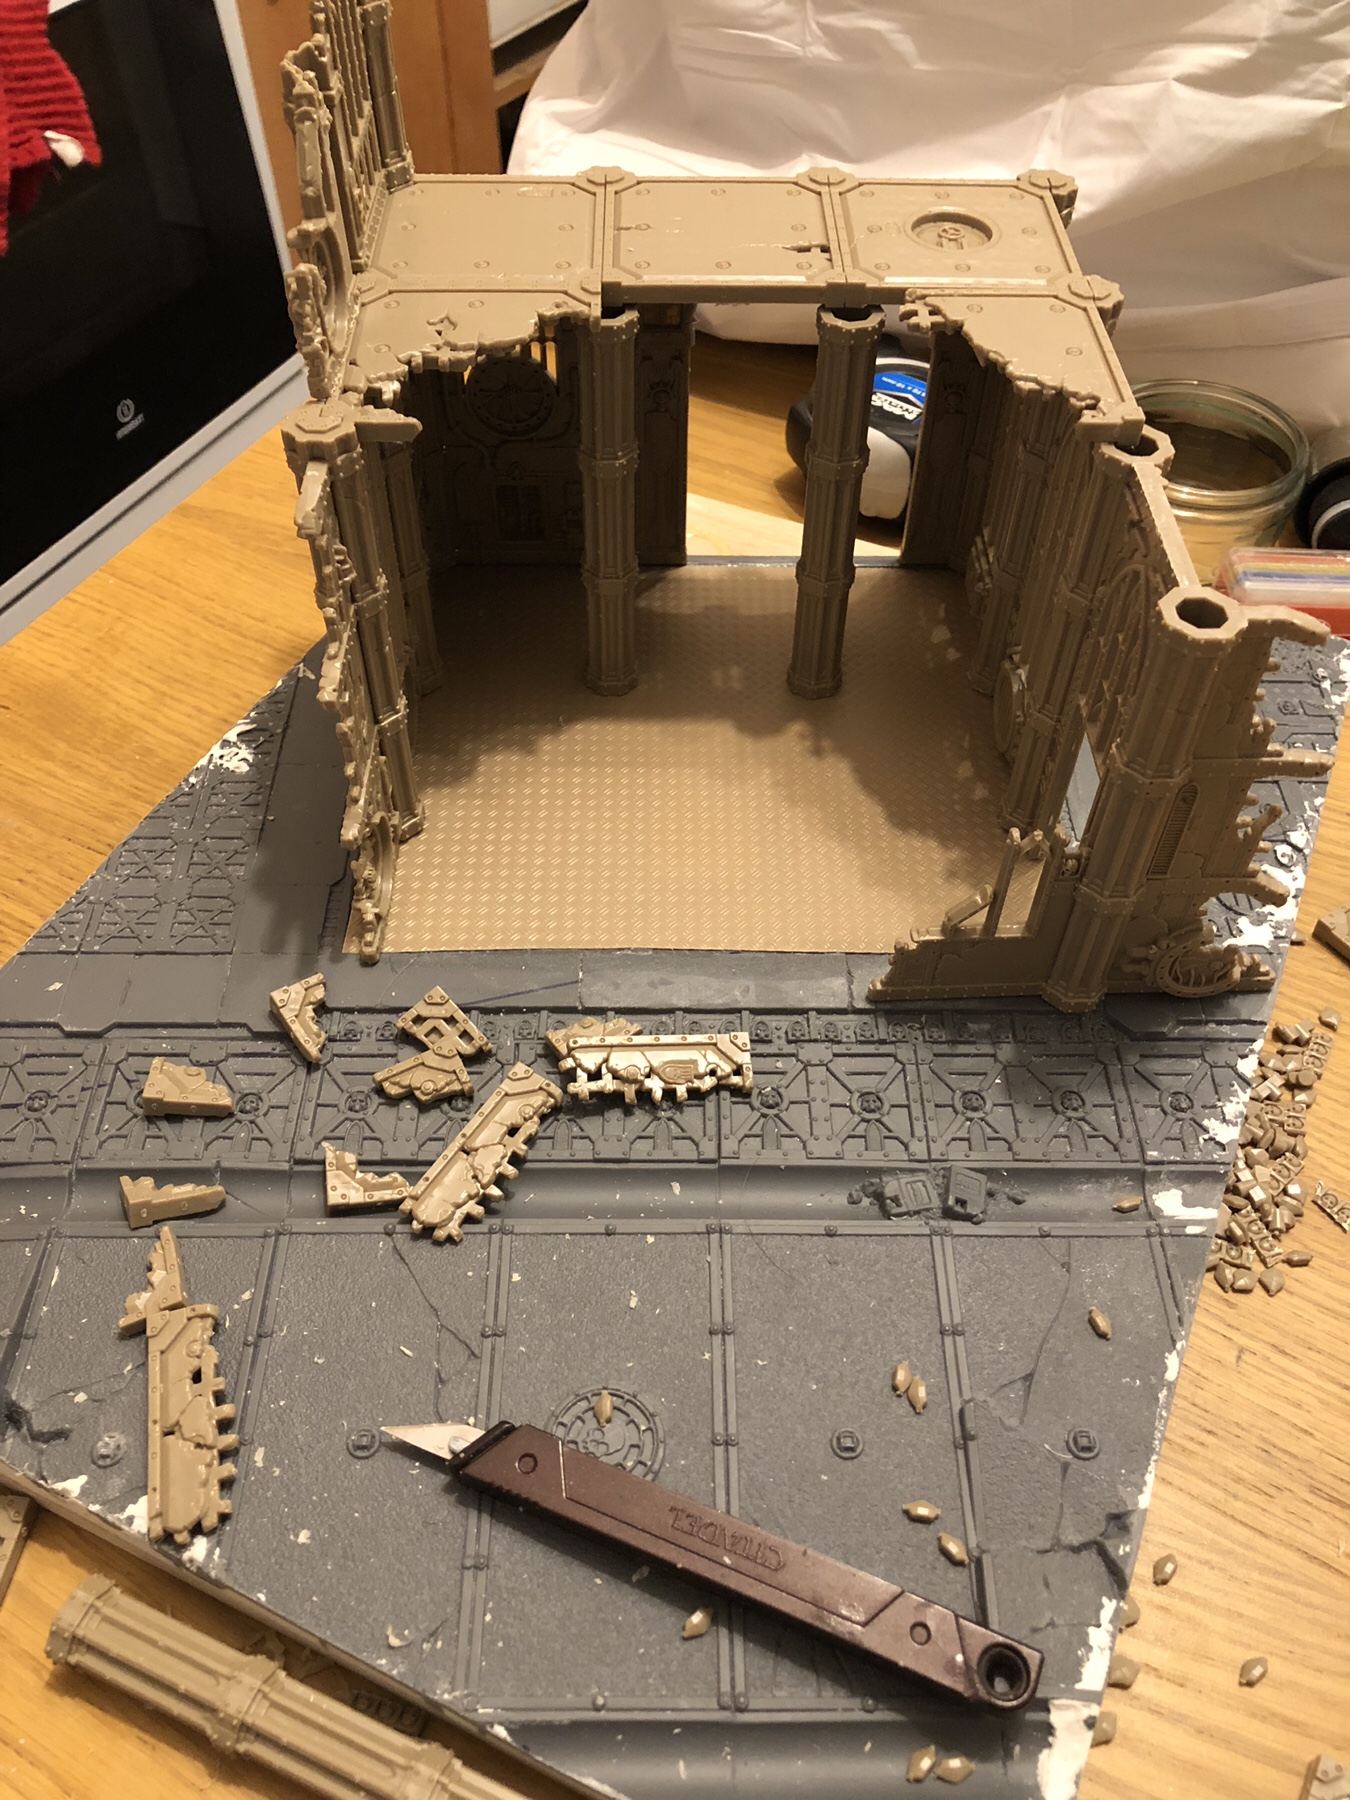

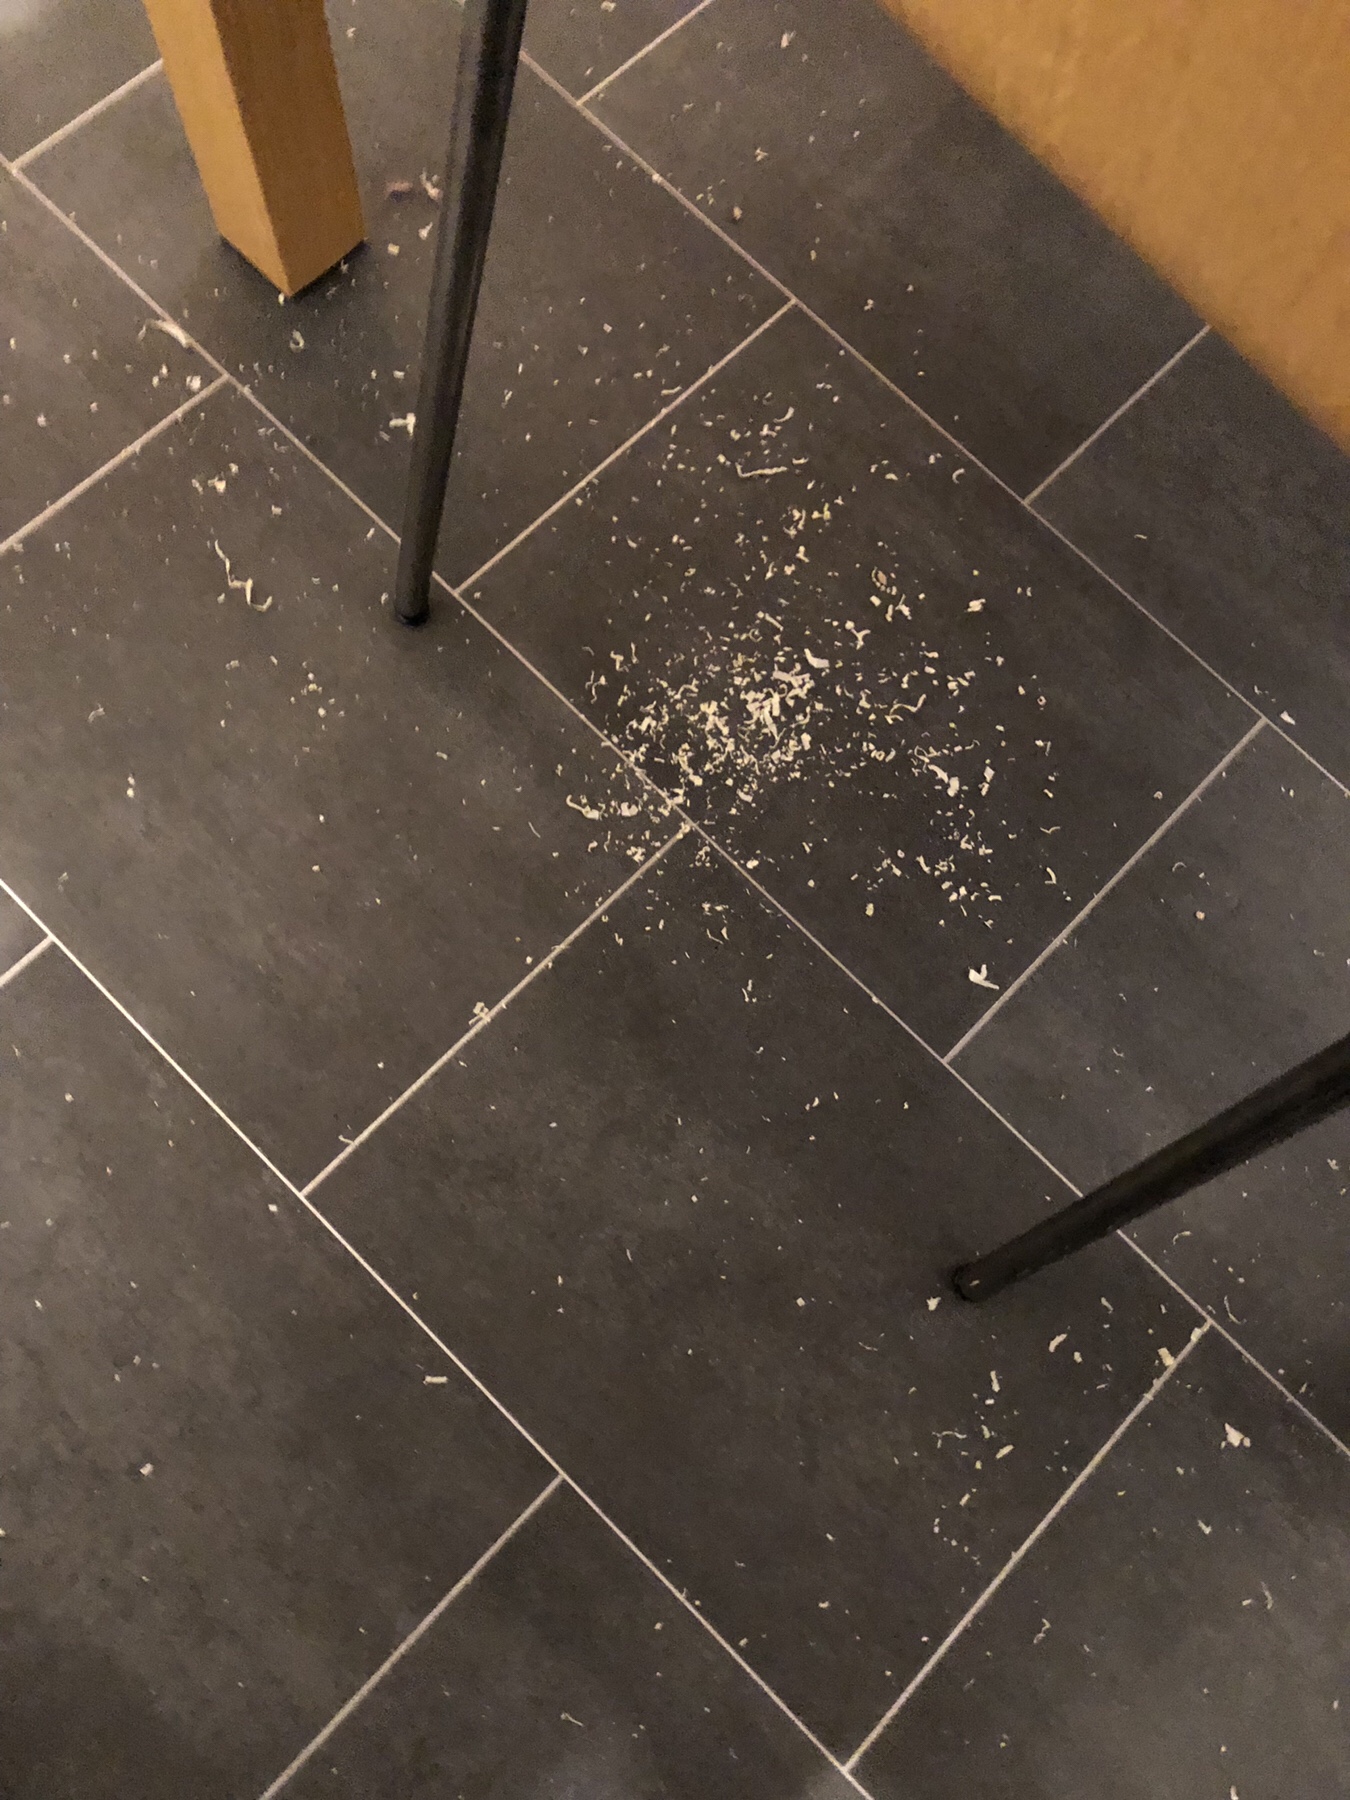
This is the mess from just from scraping off mould-lines in one sitting. Time to get the vacuum out…

My plan is to finish construction of the buildings and ruins this evening. Providing I get the missing corner filled with something, I might manage to get the first layers of paint on the board by the start of next week. I really need to get the board finished soon, so I can move on to painting the army. There are only 45 days to go until Parade Day!
If – like me – you were eying up the Volkite Weapon Kits from Forge World as a means of expanding the Betrayal At Calth box set, but we’re dismayed to find them sold out and “no longer available” (as opposed to “Temporarily out of stock”), then fear not!
Forge World have your back, according to a reply I got when I asked about the missing kits:

Not only will the weapons coming back in an improved form, but other kits will be getting a refresh, along with new accessory packs.